#1 HOW TO: Set up your Ghost.org account and billing.

Recently, I took the notion of setting up my own travel and lifestyle blog and I was very naïve to think that it would be easy. I like to think I’m pretty savvy with a computer. Well, that was until I started trying to create my own blog/website and then, I realised this is a completely different ball game. I have no background in computing and especially, not coding which to me seems like a different language.
Over the last couple of weeks, I’ve watched so many YouTube videos and blogs trying to get my head around how to use Ghost.org and I’ve found they’ve all been far too complicated for me. So, to hopefully save you the frustration of also trying to understand Ghost.org, I am going to write a 'how-to' series of blog posts to explain the process. I will start with the very basics being how to set up your Ghost.org account and billing.
There is A LOT of different hosting websites. However, in this blog I will only be covering Ghost.org as I only have experience with this hosting site.
This blog post will cover:
- STEP ONE: Creating an account on Ghost.org
- STEP TWO: Setting up Ghost.org billing
- Links to the other 'how-to' blog posts
If you need help with other aspects of Ghost.org/Google Domains, follow my 'how-to' blog post series linked at the bottom of this blog. A new 'how-to' blog post will be released every Thursday.
STEP ONE: Creating an account on Ghost.org
1. Access ghost.org
2. Click 'Get started - free'.

3. Input your email address and choose a password, at least 10 characters long, to sign up.
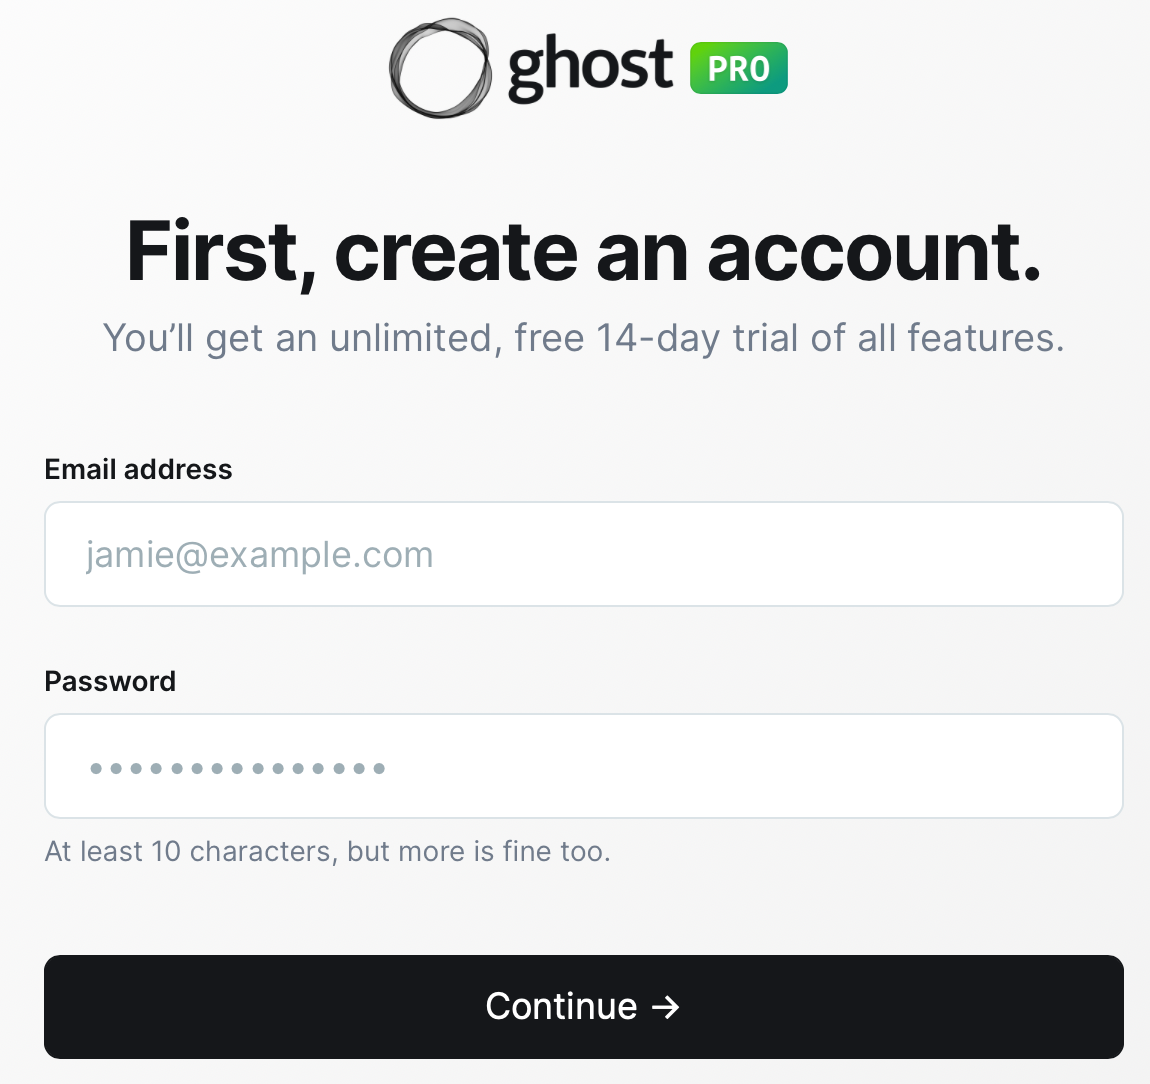
> Please note: Ghost org are currently offering a 14-day free trial.
4. Choose from what describes you best:
· Creator (I’m growing my audience around my content)
· Marketer (I work for a company publishing content)
· Developer (I mainly write code and configure websites).
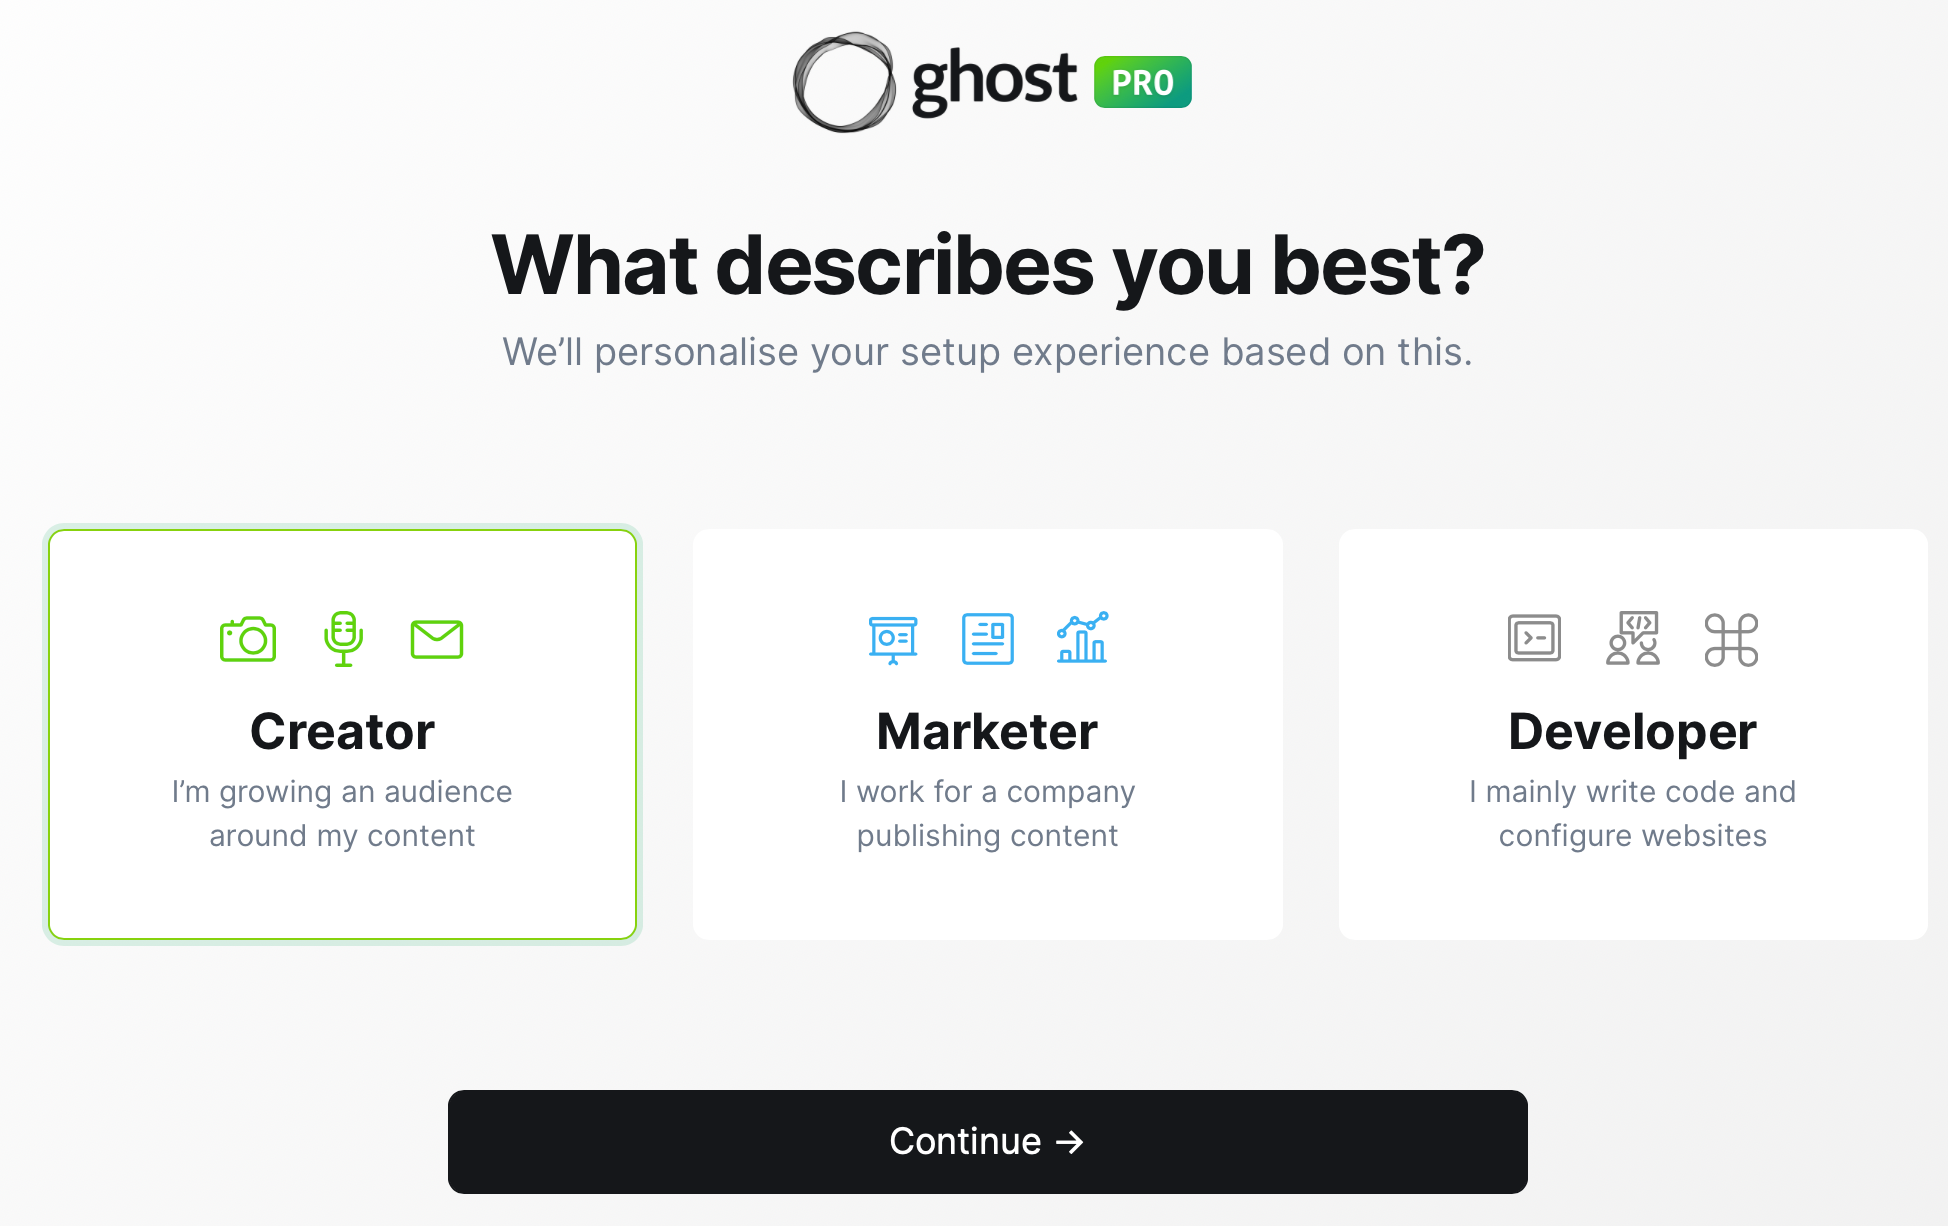
> I choose 'creator' as I will be using Ghost.org to host my blog.
5. Choose you publication name. This publication name will be used in your theme, meta data and search results. This can be changed at a later time, if required.
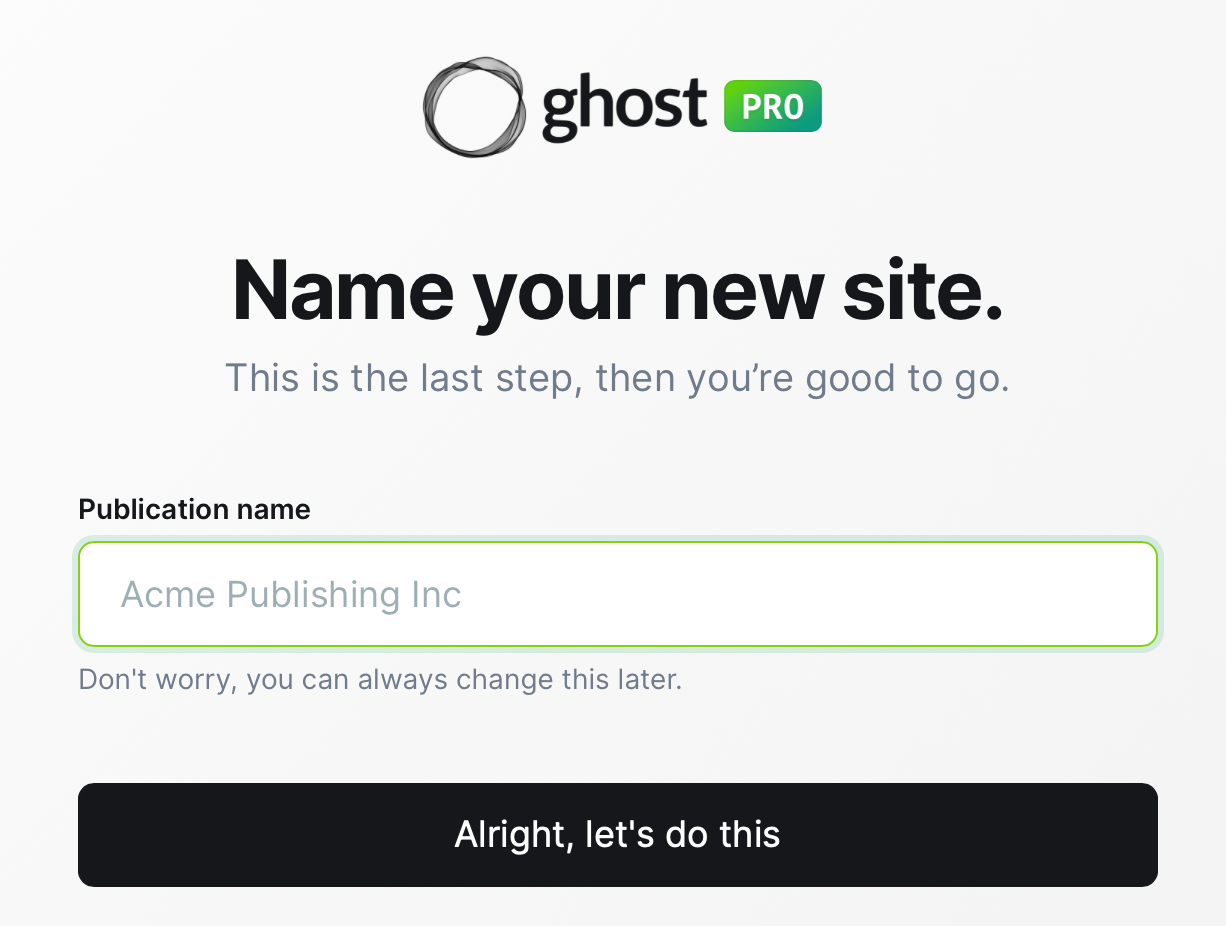
> You should now see the following: NEW SITE BEING CREATED.
STEP TWO: Setting up Ghost.org billing
If you are wanting to have your Ghost.org account/blog for longer than the 14-day free trial period, then you will have to set-up Ghost Pro billing.
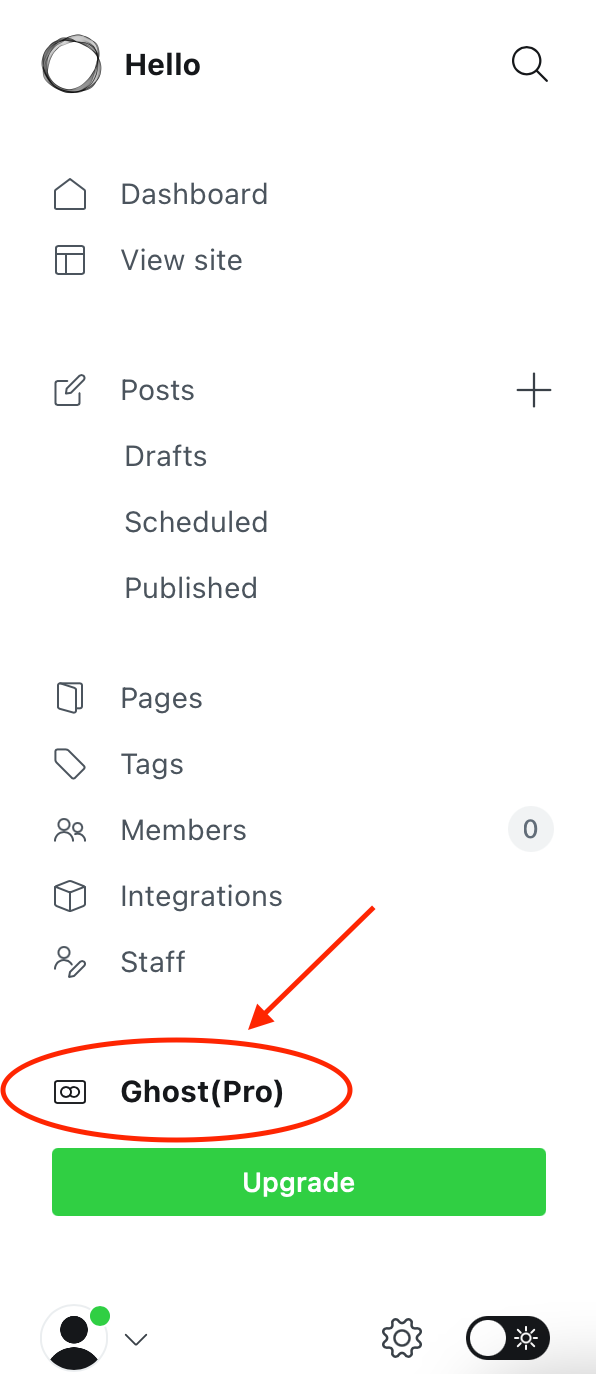
1. Choose Ghost Pro down the left-hand menu.
2. Click the ‘billing’ tab.

3. Use the slider to choose your audience; the higher you put your audience number, the higher the monthly cost will be for having a Ghost.org account. Your audience is the number of members you will have. Members are people who have signed up to your site.

4. Choose from starter, creator, team, or business plans depending on which one is best suited to you.
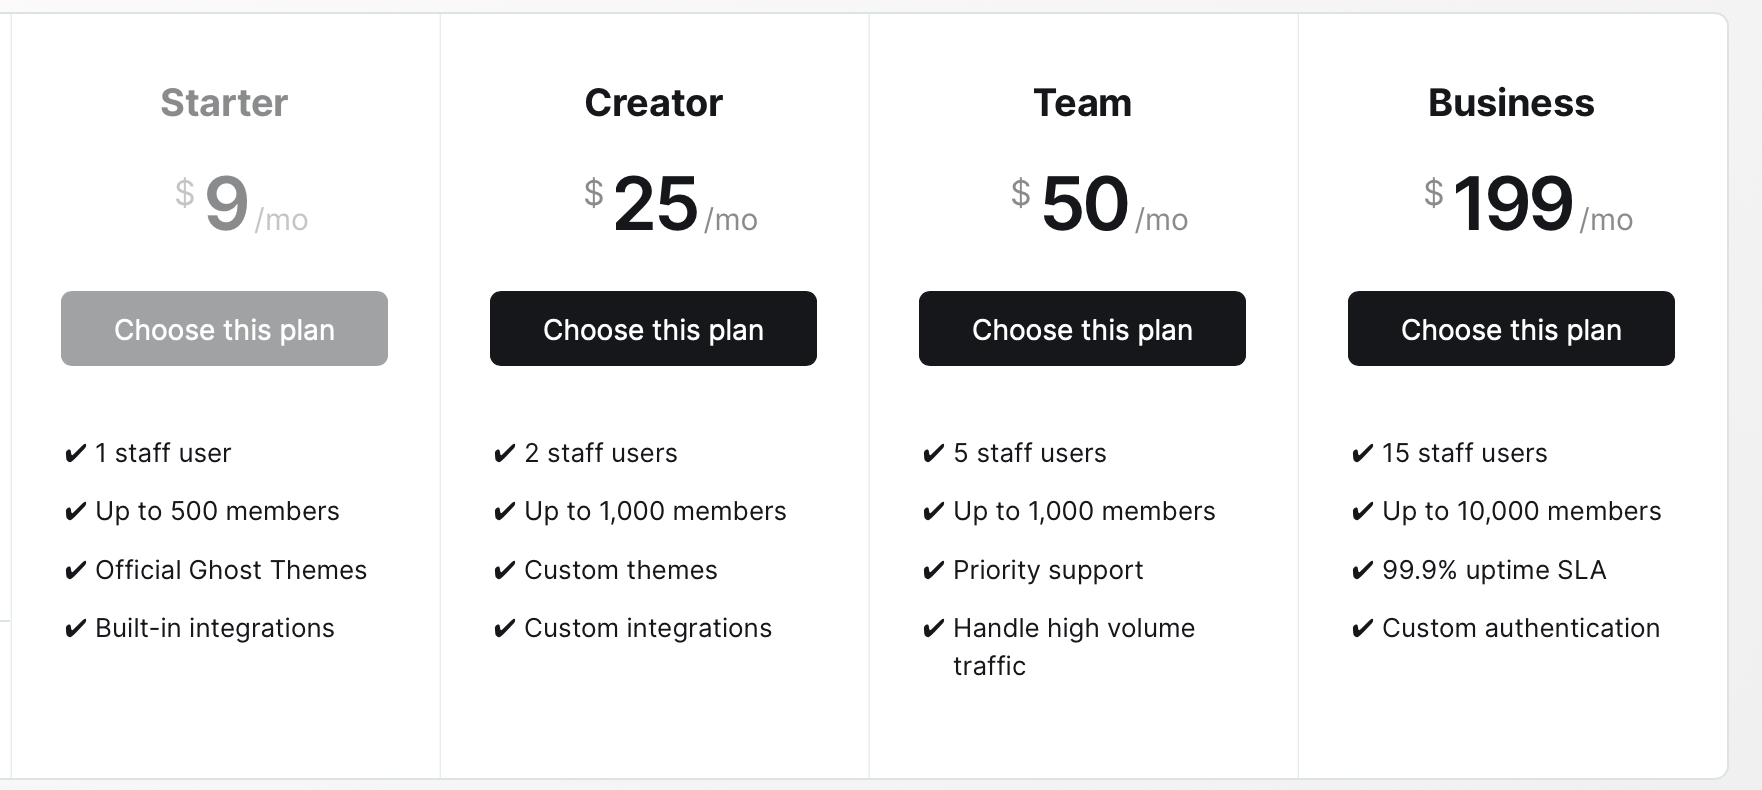
> As, I’m just starting out, I chose 'starter' which is £7/$9 a month or £78/$108 for the year. I paid for a year subscription as it includes a £17/$24 discount.
You can update your plan at any time to suit your Ghost.org account needs.
Links to the other 'how-to' blog posts:
 Kirsty
 Kirsty
 Kirsty
 Kirsty
I'm really hoping this helped and saved you a lot of hassle! Please get in touch via the contact form if you have any more questions.