#3 HOW TO: Pick and install your Ghost.org blog theme

Being a complete novice when it comes to setting up a website, I am finding it’s taking a lot of time to navigate Ghost.org. Slowly but surely, I am getting there. I’m going to take you along on my journey to setting up my Ghost.org blog, all the trials and tribulations. Hopefully, helping other complete beginners to also set their website/blog up in the process.
This blog post will cover:
- STEP ONE: Picking and installing a theme on Ghost.org.
- STEP TWO: Activate your Ghost.org theme, switch between Ghost.org themes or upload your own custom theme.
- Links to the other 'how-to' blog posts:
If you need help with other aspects of Ghost.org/Google Domains, follow my 'how-to' blog post series linked at the bottom of this blog. A new 'how-to' blog post will be released every Thursday.
STEP ONE: Picking and installing a theme on Ghost.org.
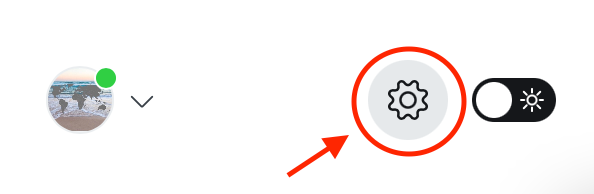
1. You will need to be logged into your Ghost.org account.
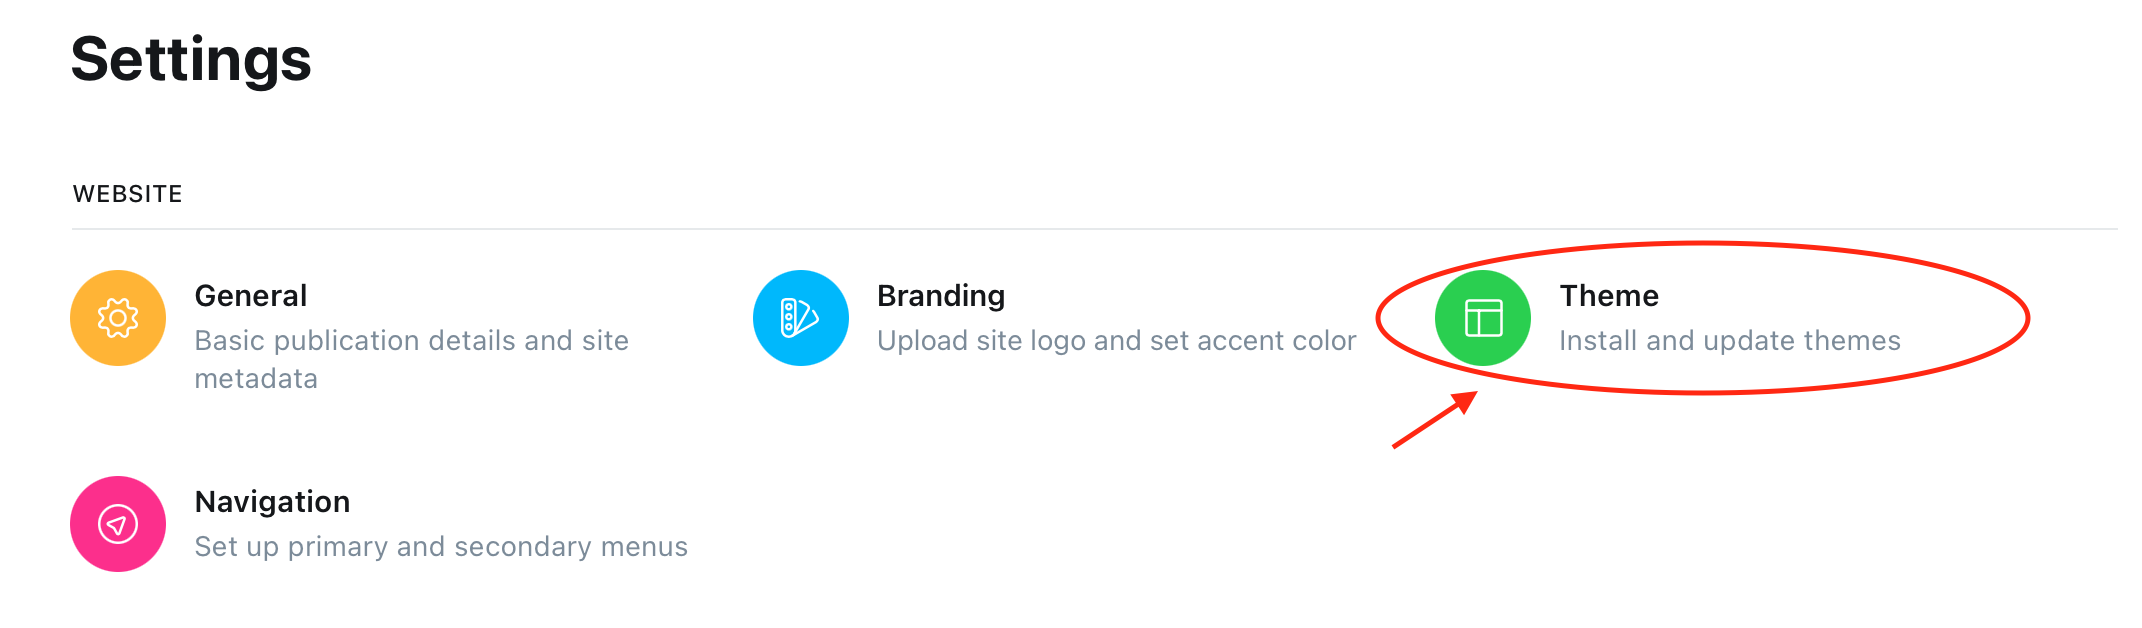
2. Next, click on 'settings' (the cog at the bottom of the page next to the brightness setting).
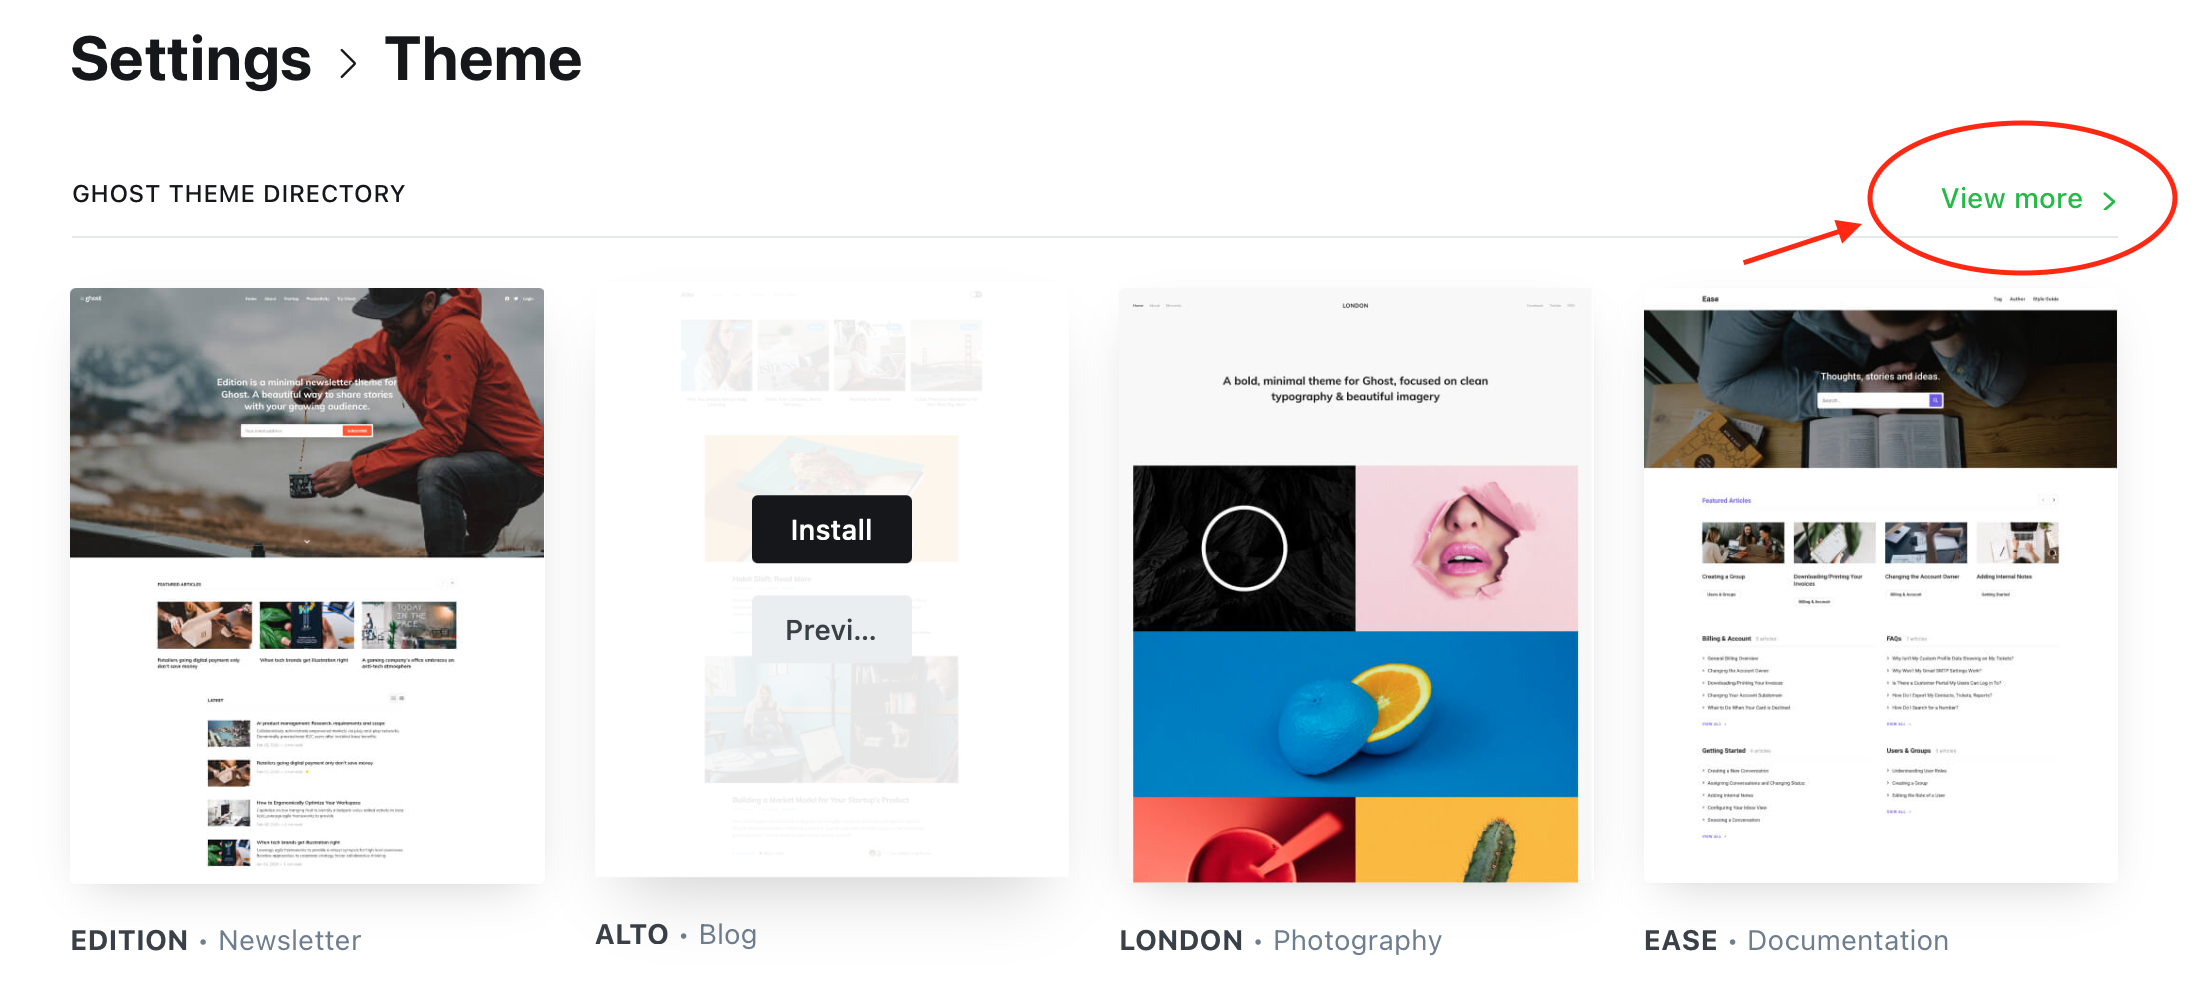
3. In the ‘website’ section, you will see a tab for ‘theme’. Click on this.

4. You will be taken to a ‘ghost theme directory’, click on ‘view more’ on the right-hand side of the page above the selection of themes.
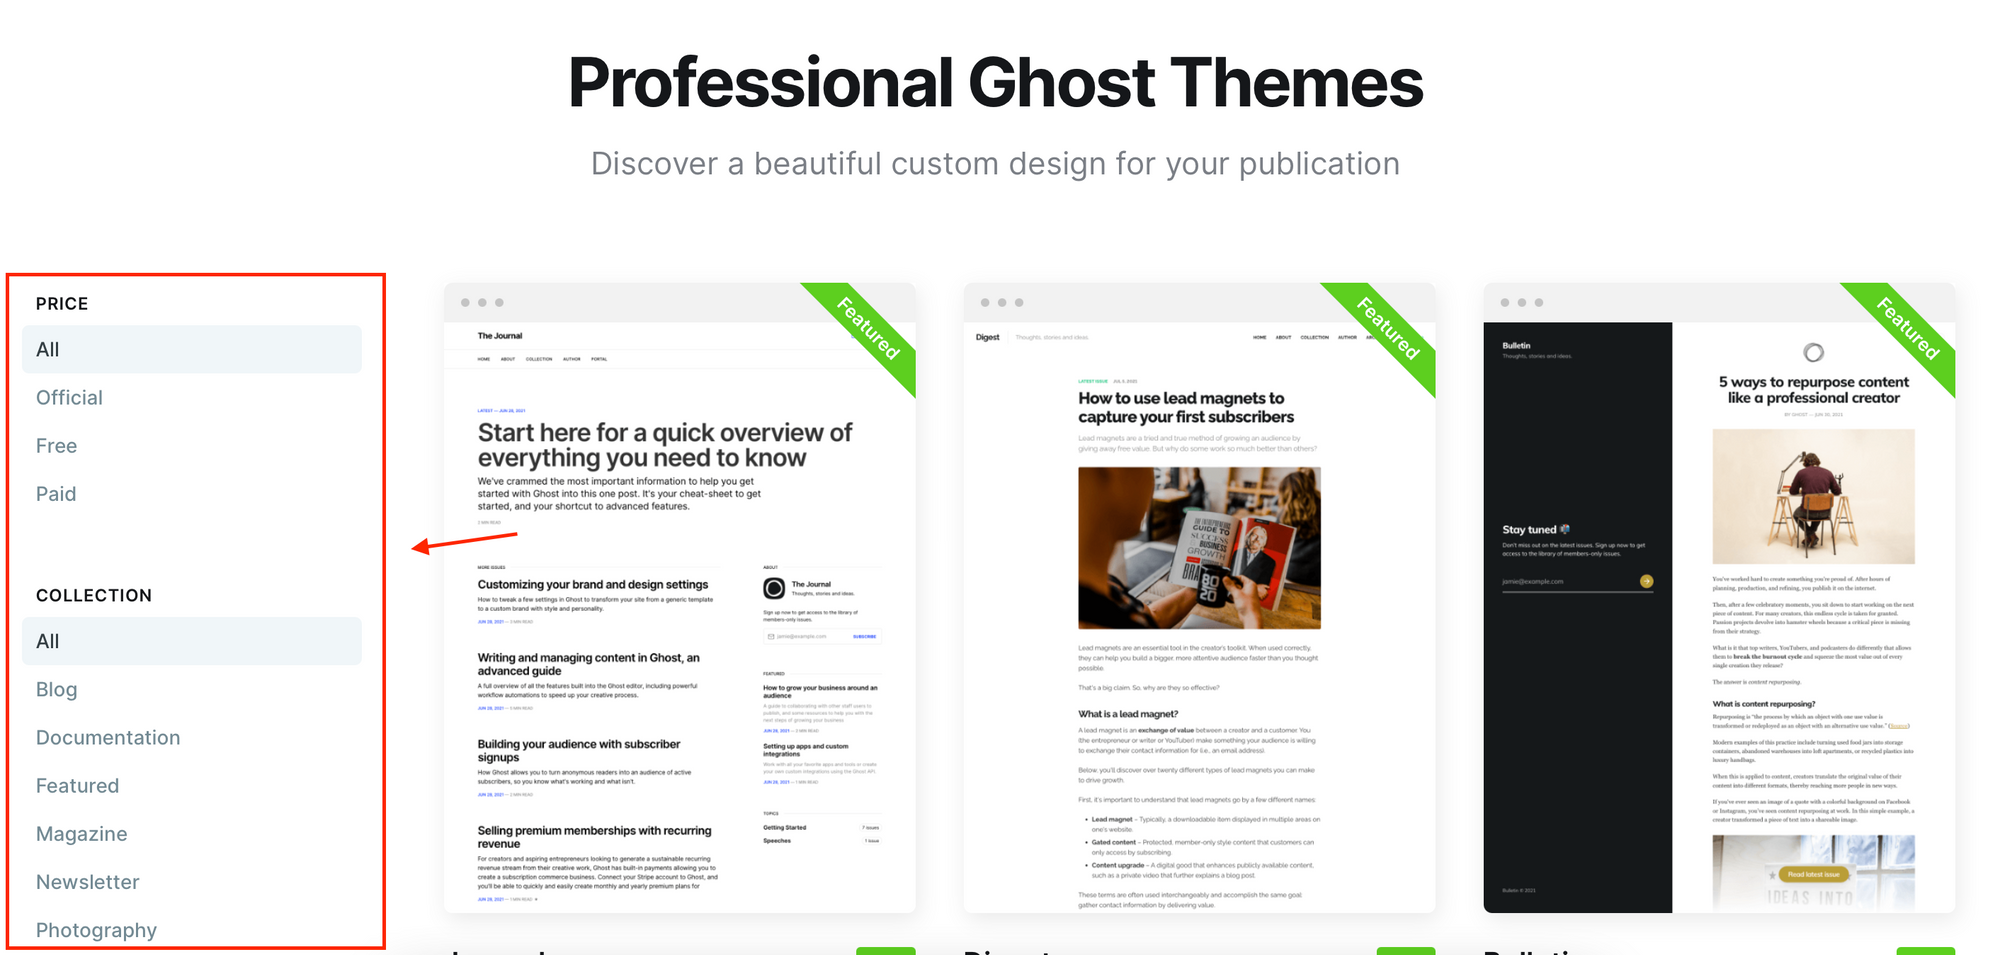
5. This will take you to a page where there are lots of themes to choose from depending on your price range ($0-$149).
> I went for a free theme as I think they are just as nice as the ones you have to pay for.
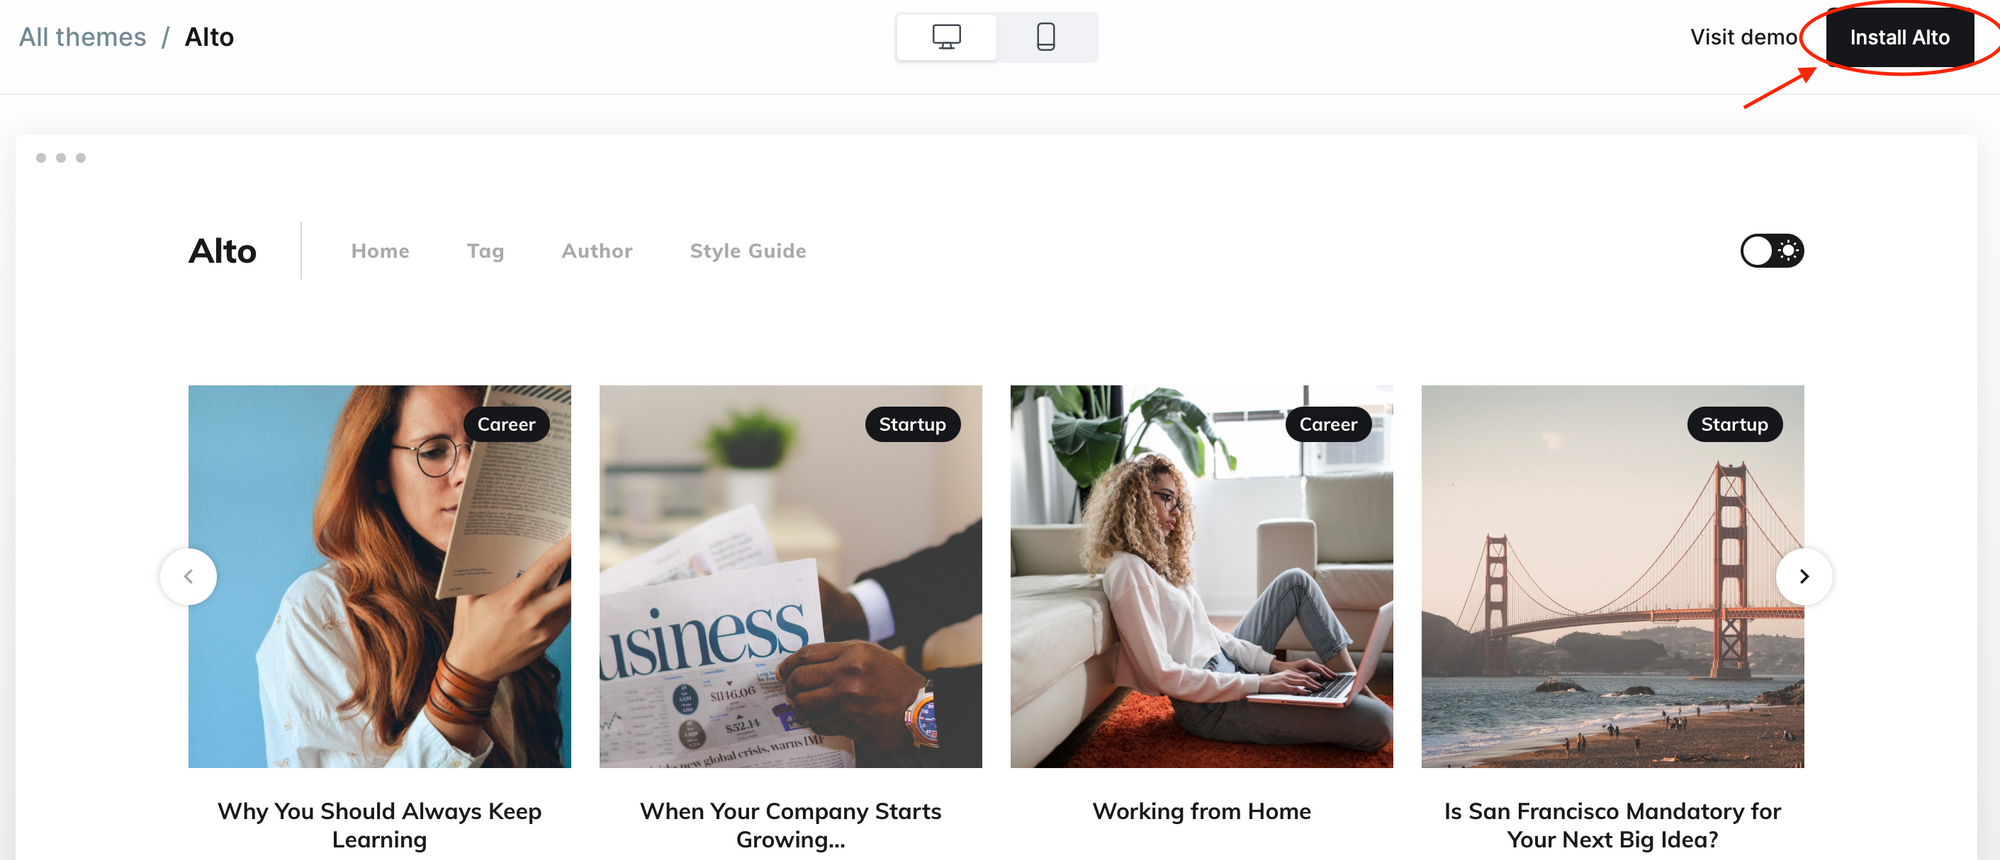
6. Click on the theme you like the look of. You will be able to see in more detail what it will look like and the desktop/mobile versions of the page.
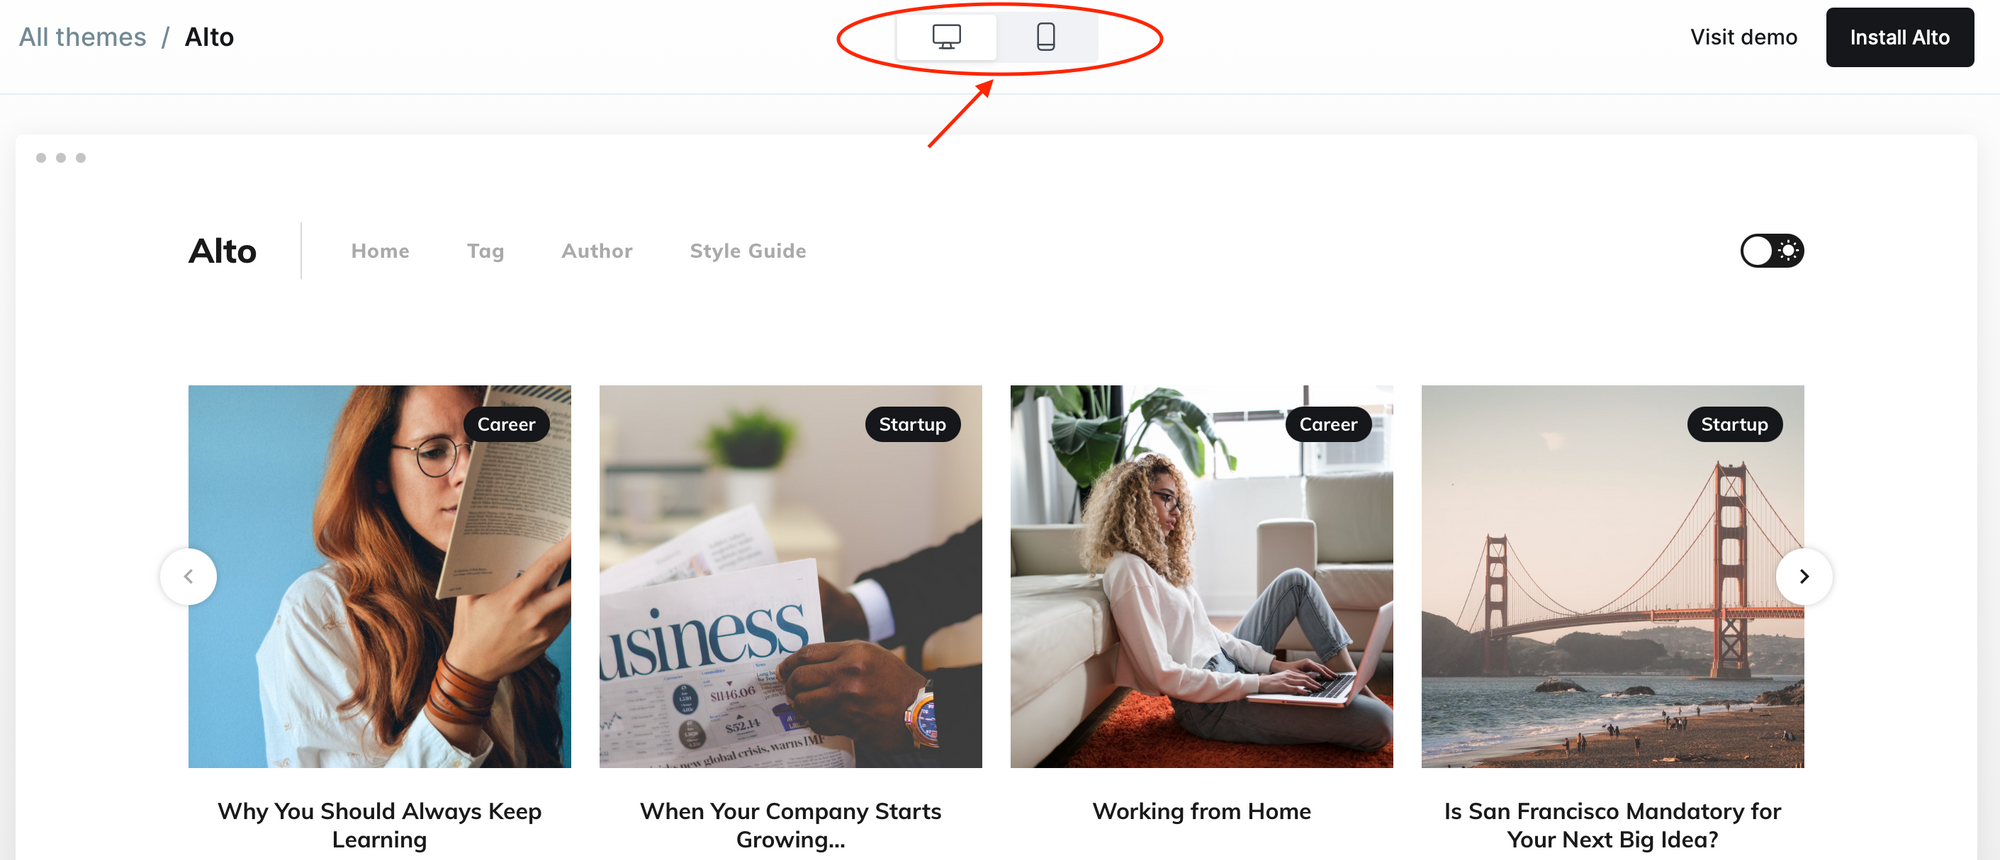
7. If you are happy with it, click 'Install (theme name)' up the top right-hand corner of the page. Enter your site address and click 'install now'.
STEP TWO: Activate your Ghost.org theme, switch between Ghost.org themes or upload your own custom theme.
Are you wanting to activate the Ghost.org theme you just installed or have you installed a theme that you aren’t too keen on? Don’t worry you can switch to another theme.
1. Make sure you have downloaded the new theme you want using the above steps.
2. Go back to the settings, under website click on ‘theme’
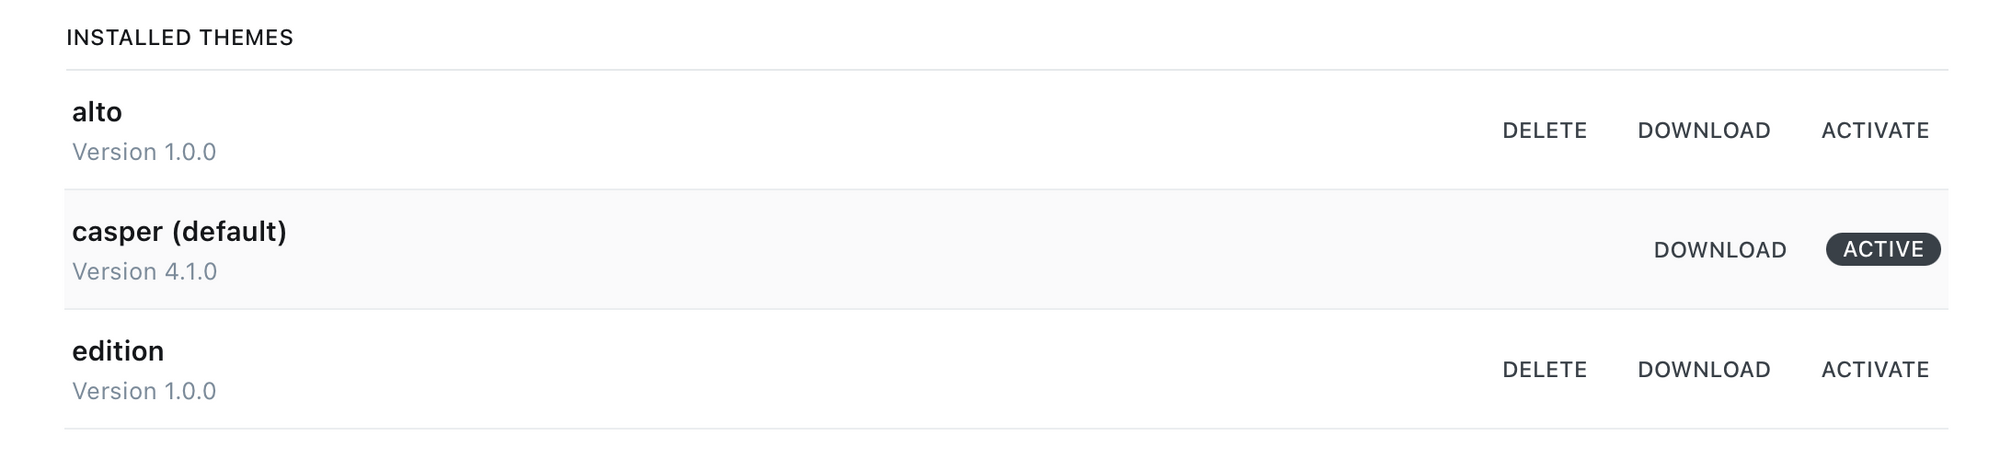
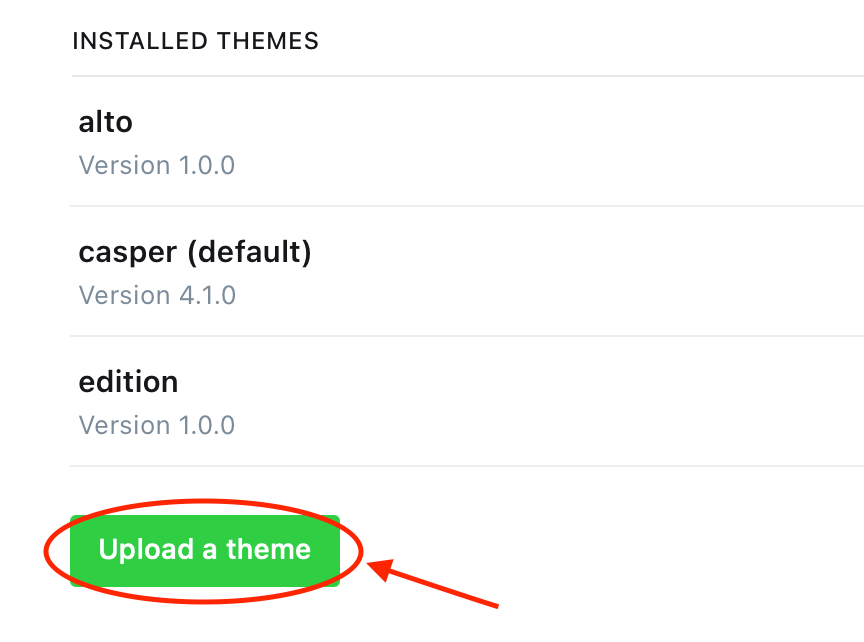
3. At the bottom half of this page, you will see a section called ‘installed themes’
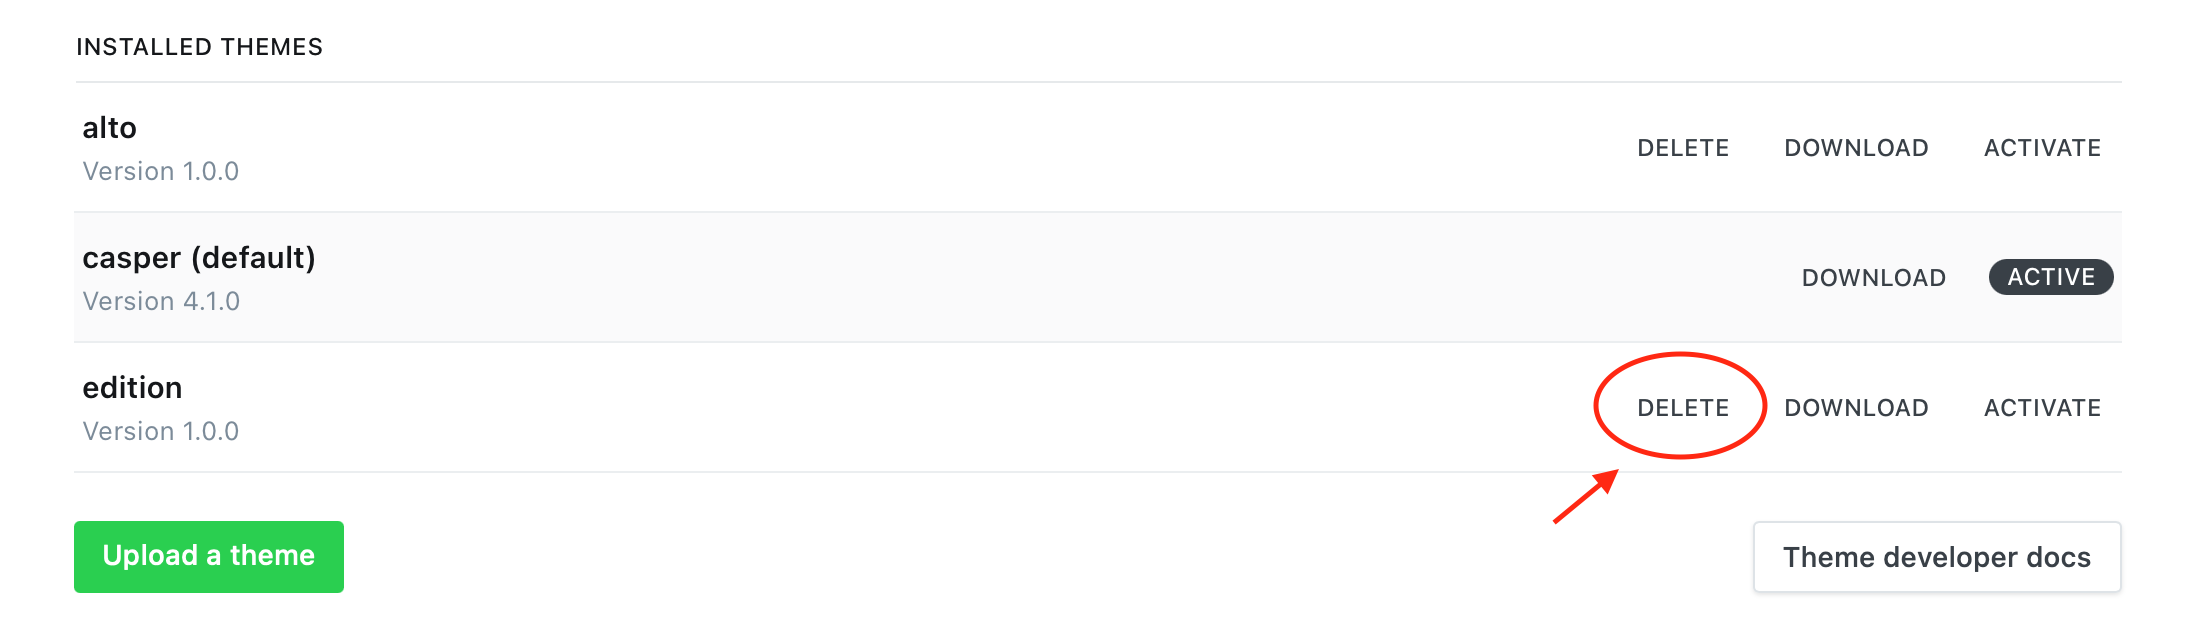
4. To activate the theme, you’ve just installed or switch between installed themes, simply click ‘activate’ on the theme you want. Go back to the ‘view site’ tab on the left-hand menu and refresh the page. It might take some time.
> As you see from this picture, I have three Ghost.org themes installed. Firstly, I started using Alto then, Edition and now I’m back to the default theme, Casper.

5. You can also delete themes if you no longer need them.
6. You also have the option of uploading your own theme. However, you can only do this if you upgrade to a higher billing plan such as creator.
> I can see the benefit of using your own theme as you can customise it to exactly the way you want it. Whereas with the Ghost.org theme you are limited with your design. However, I have now managed to get my free Ghost.org theme design close to what I wanted it to look like so it is possible.
Links to the other 'how-to' blog posts:
 Kirsty
 Kirsty
 Kirsty
 Kirsty
If you have any questions about setting up your Ghost.org blog/website, don't hesitate to contact me via the contact form.