#4 HOW TO: Edit your Ghost.org general publication details and link your social media

Hopefully, at this point you have set up your Ghost account, linked your Google domain and picked your Ghost theme. However, if not don't worry, just refer to my other 'how-to' blog posts linked at the bottom of this blog or under the 'lifestyle' menu at the top of my blog to help you!
Now you have your theme, the next step is to customise your site. I'm going to be using the 'Casper (default)' ghost theme to show how I customised my blog. Customisation will be unique for everyone's blog, niche, and Ghost theme, and not to mention, it takes a while! I'm going to break it down step-by-step to help you make your blog exactly as you pictured it!
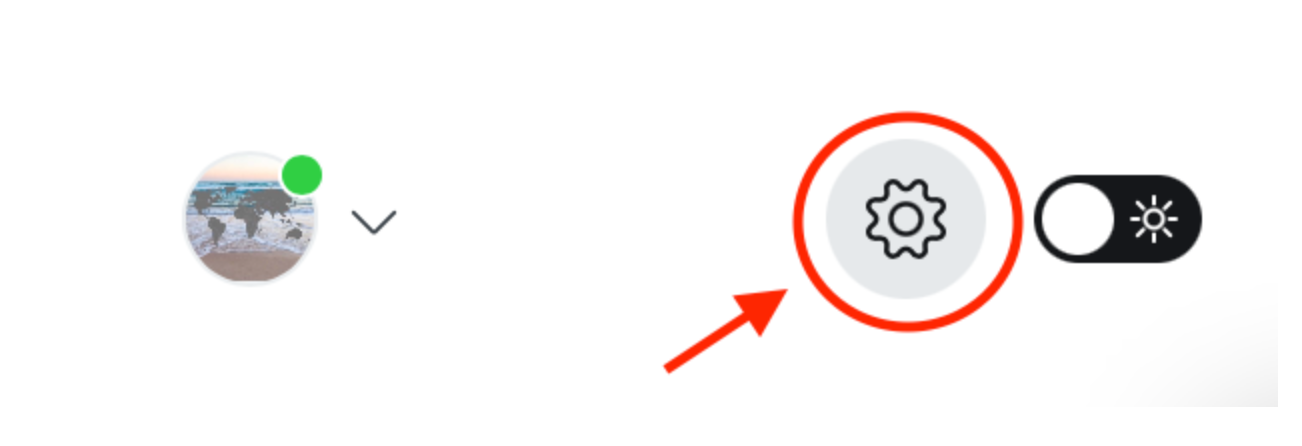
This blog post will focus on how to edit your general publication information, site metadata, and link your social media accounts. All these sections can be found under the 'general' tab in 'settings'. To access your Ghost settings, you will need to be logged into your Ghost.org account and then click on this button.
Within your Ghost settings and under the 'website' section, click on the 'general' tab (highlighted in the picture below).
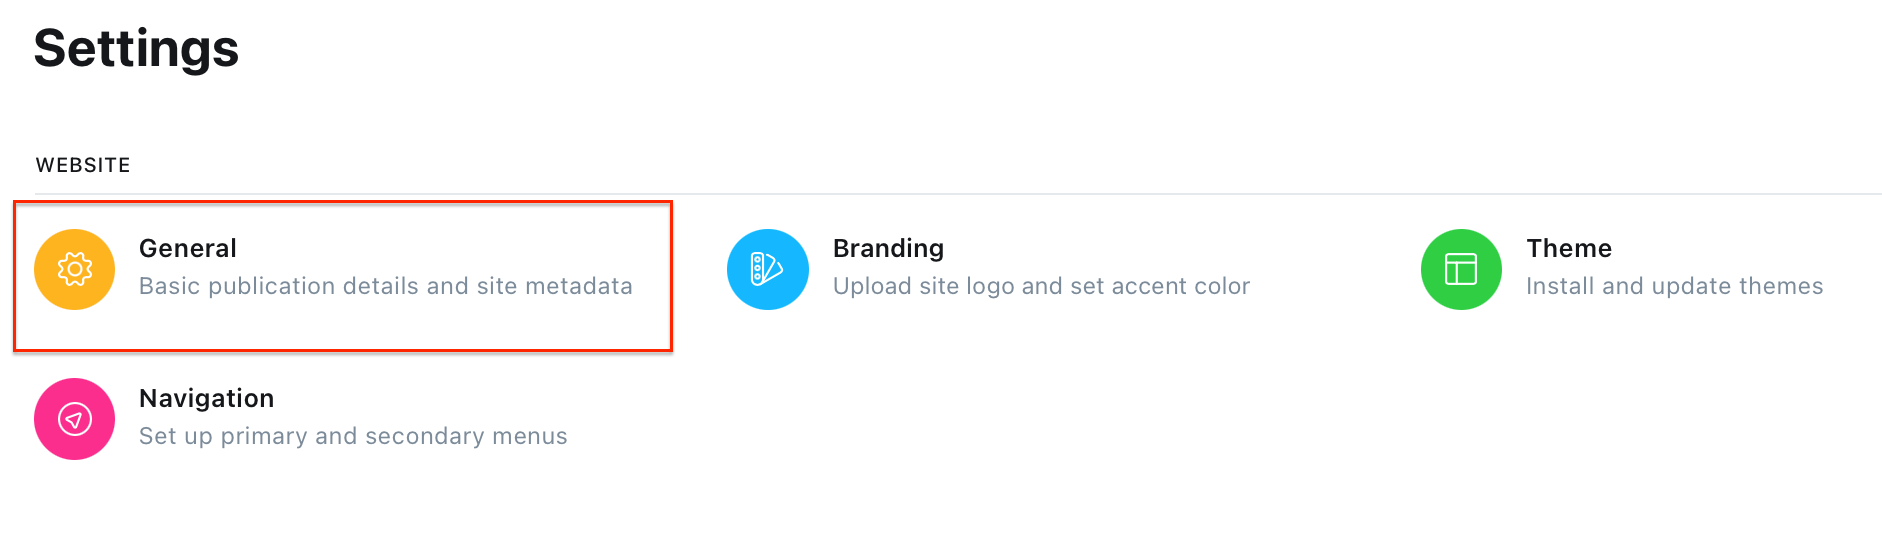
There is four parts within the 'general' tab including 'publication info' (covered in step one), 'site meta settings' (covered in step two), 'social accounts' (covered in step three) and 'advanced settings' (covered in step four).
This blog post will cover:
- STEP ONE: Editing publication information
- STEP TWO: Editing site metadata
- STEP THREE: Linking social media accounts
- STEP FOUR: Set your site as private
- Links to the other 'how-to' blog posts
If you need help with other aspects of Ghost.org/Google Domains, follow my 'how-to' blog post series linked at the bottom of this blog. A new 'how-to' blog post will be released every Thursday.
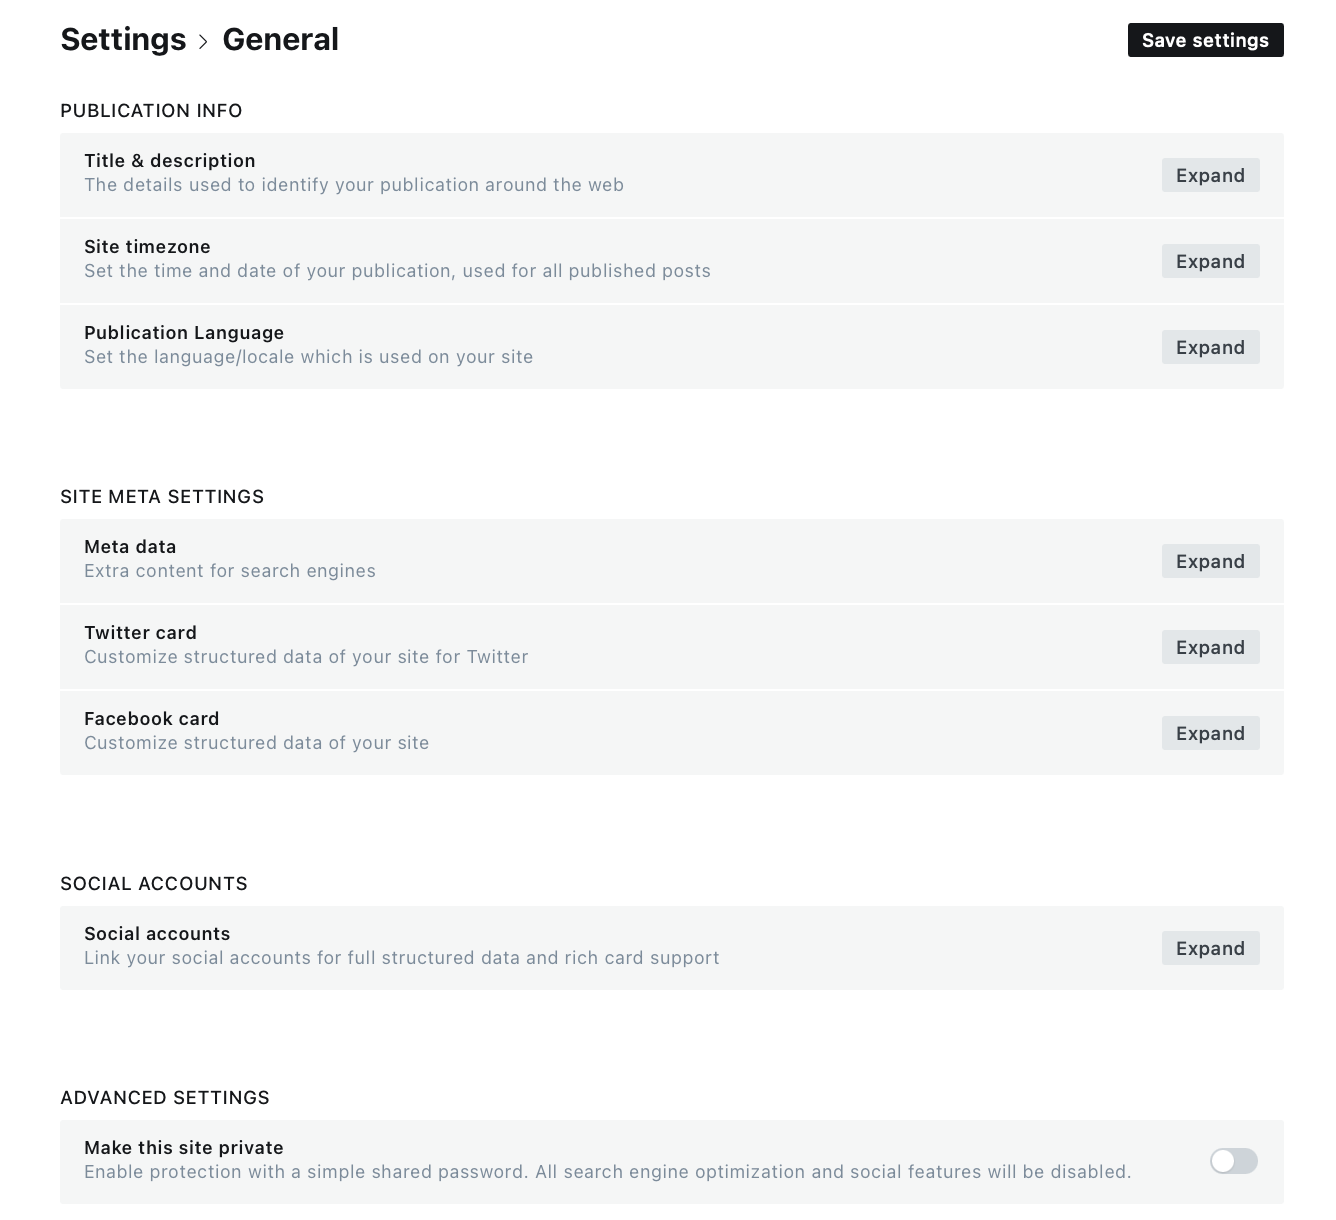
STEP ONE: Editing publication information
- Under the 'publication data' heading, you should see the following subheadings: 'title & description', 'site time zone' and 'publication language'. Hopefully, this should be quite straight forward to fill in these sections. The information you need to input will be unique to you.
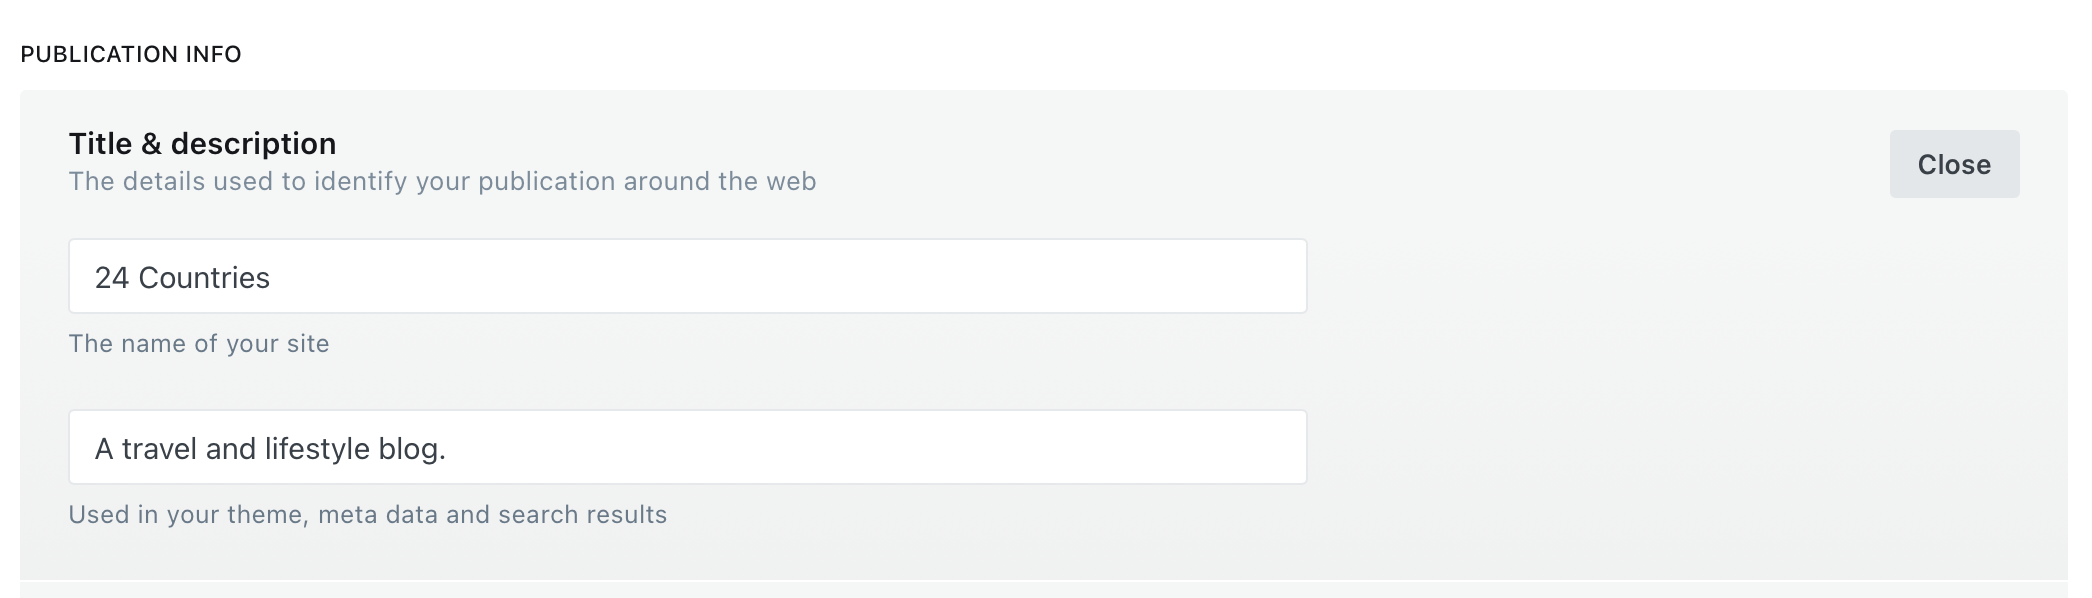
- Editing title and description:
· Your title is the name of your site.
· The description should include an understanding of what your blog is about and the niche it covers. This description is used in your theme, metadata, and search results.
How to remove title and description from the main banner on your homepage... Please note, that when you input your title and description into this section, it will be displayed on the centre of the main banner on your home page for the 'Casper (default)' Ghost theme. I'm not sure if this happens for other Ghost themes but I really didn't want this as I'd designed my own banner with my own writing and logo in the middle. If you also want to remove it from your banner, go to 'settings' and under the 'advanced' section, click on 'code injection'. Input this code into the header section and click 'save':
<style>
.site-header-content h1,
.site-header-content p {
    display: none;
}
</style>
Note: if you just decide not to input your title & description as you think you don't need it and you don't want it to go over your banner, then, it will flag up Google AMP (accelerated mobile pages) issues, which take it from me are more hassle than they are worth! I spent ages trying to figure out what an AMP was, first-of-all and then, ages trying to figure out how to fix it. All to find out that it was because I hadn't filled in the title and description information.
2. Editing your site time zone and publication language:
· Your site time zone is the time zone for the country you live in. This is important as when it comes to scheduling posts, the post will be released according to the time entered and time zone selected.
· The publication language is the language which is used on your site.
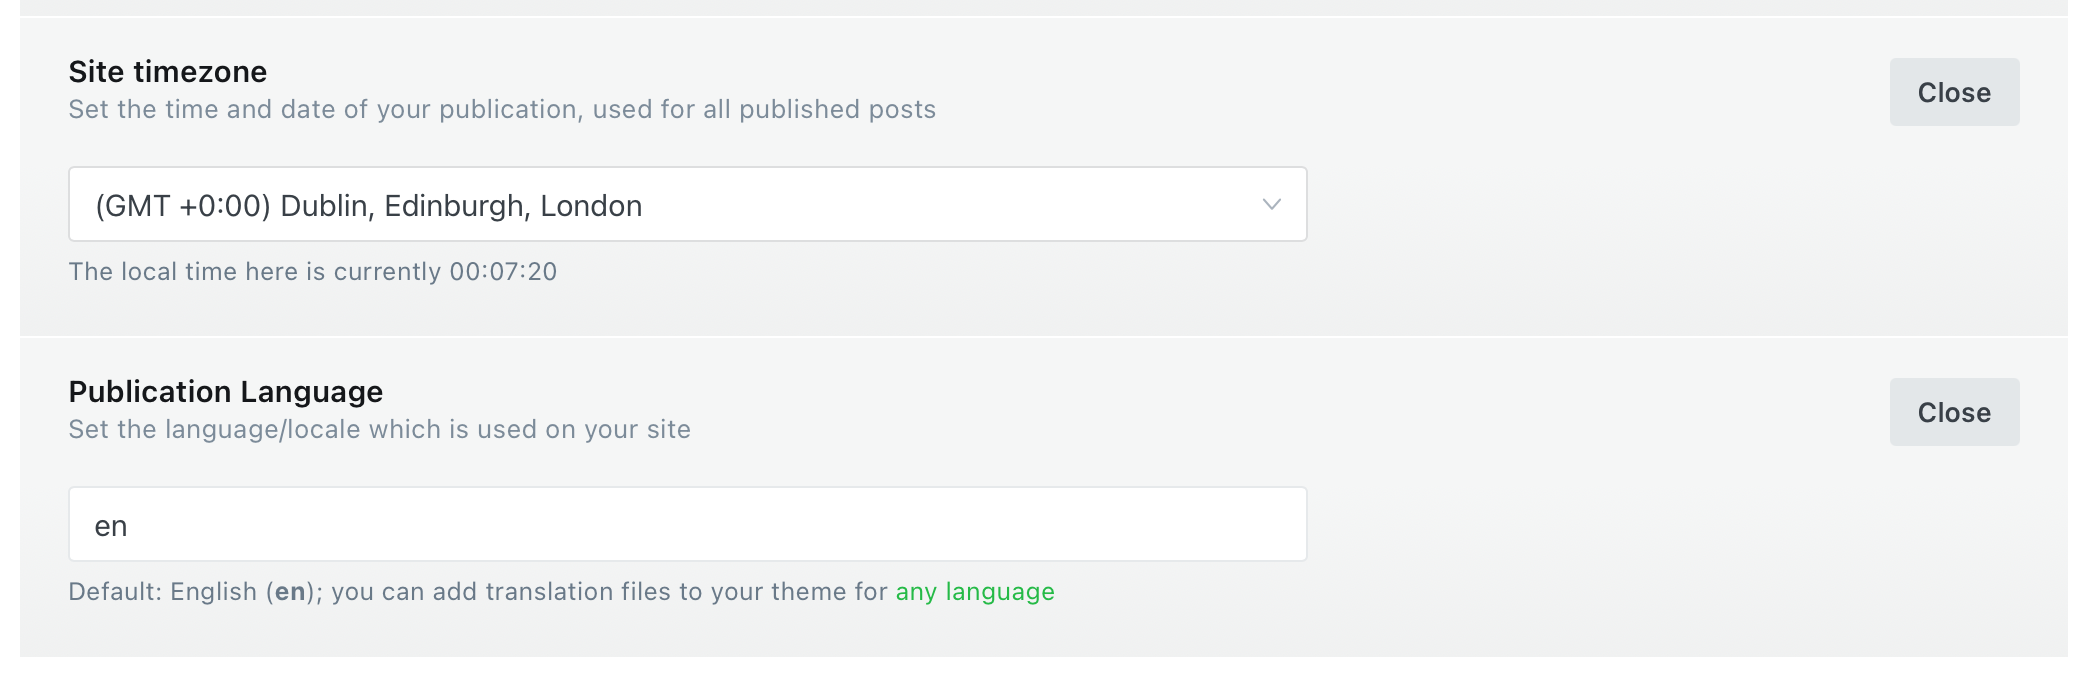
Once you've inputted your publication information, click the 'save settings' button up the top right-hand corner to save changes.
STEP TWO: Editing site metadata
What is metadata? If you asked me this a few weeks ago, I wouldn't know how to answer that question. However, I've now got a better understanding as to what metadata is, thanks to setting up my Ghost blog. Metadata is data that describes other data. Well, what does that mean?... Metadata is used to describe individual pages on a website (your blog), allowing search engines to understand what each page portrays.
So, by editing your metadata to perfectly describe what your site is all about, you are optimising it for search engines. It's really important you fill this information in. If you don't fill it in, Ghost will automatically generate the metadata for your site.
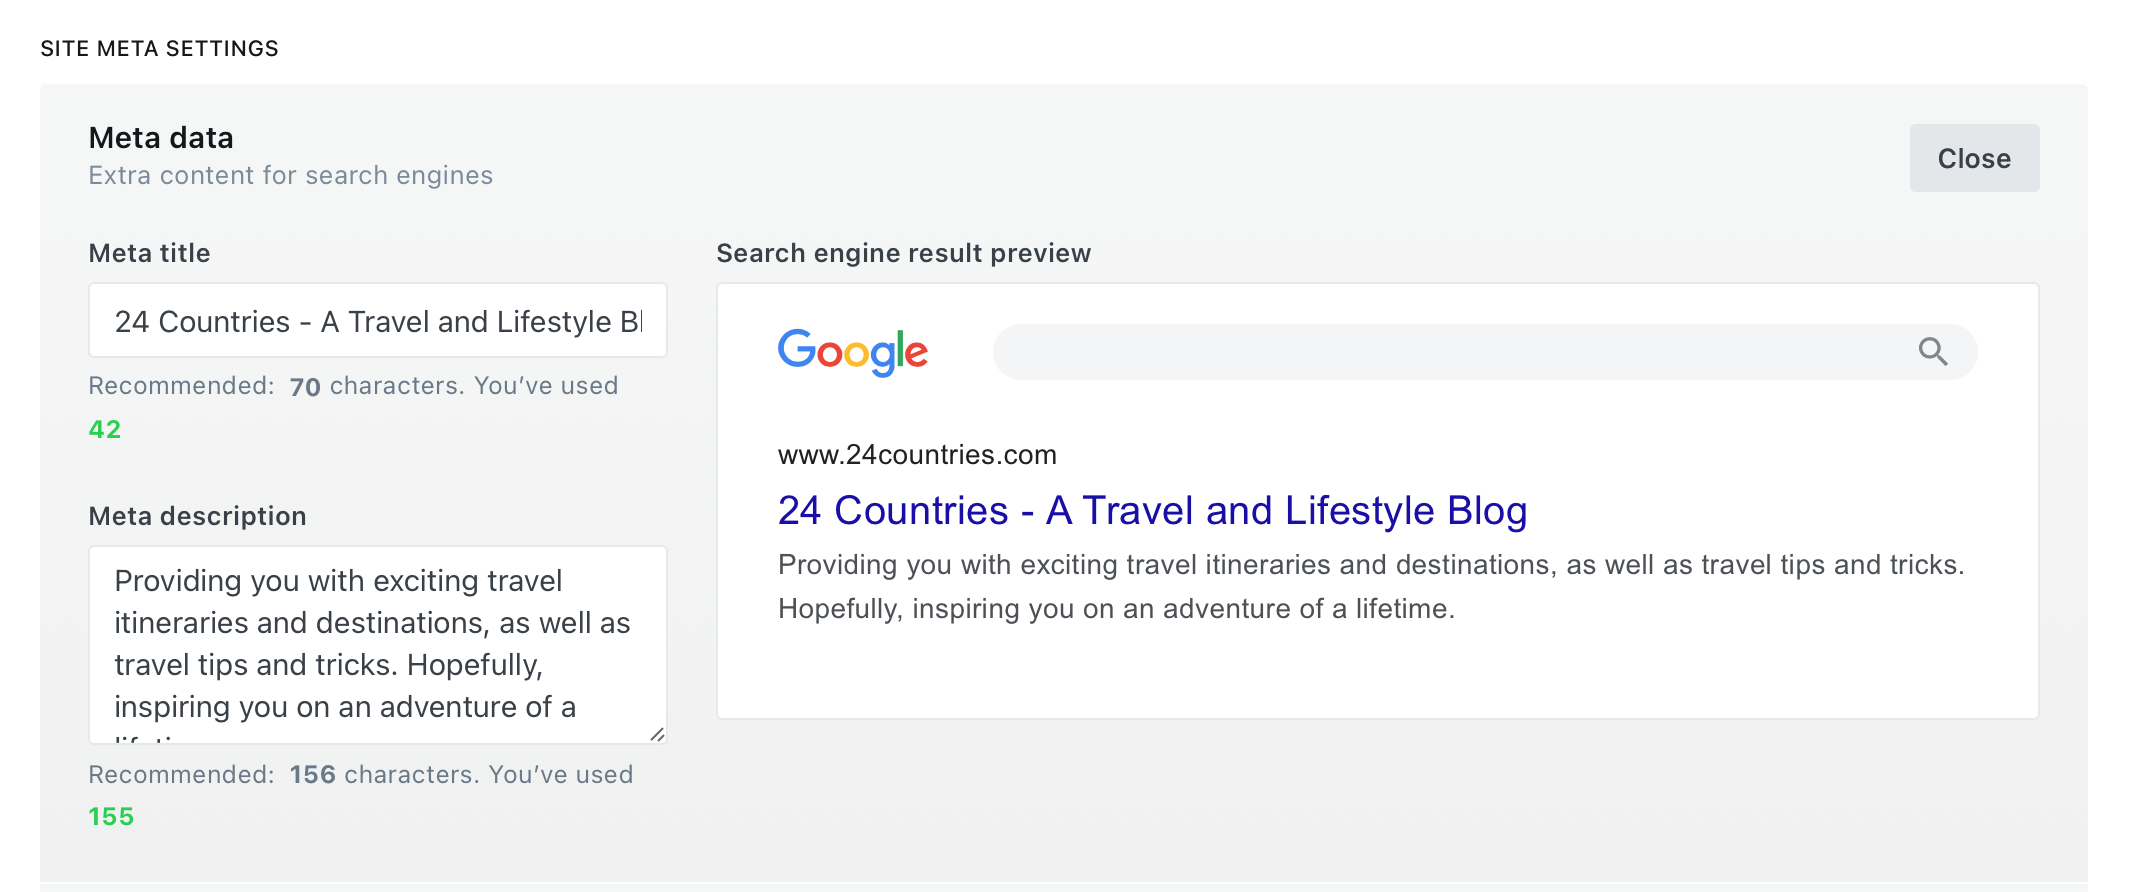
- Editing meta title
You have 70 characters to use to write your meta title. This is the title that search engines will display for your site. For this, I just included the name of my site and what kind of niche my blog is focused on.
2. Editing meta description
You have 156 characters to use to write your meta description. Use as many characters as possible to try and perfectly describe the purpose of your site (make sure you state your niche!). For example, being a travel blog, I'm trying to provide others with travel itineraries to inspire them to go on an adventure of a lifetime so I wanted to use this in my description. This tells others exactly what my site is all about.
3. Search engine result preview
This is what the meta title and description will look like in a search result.
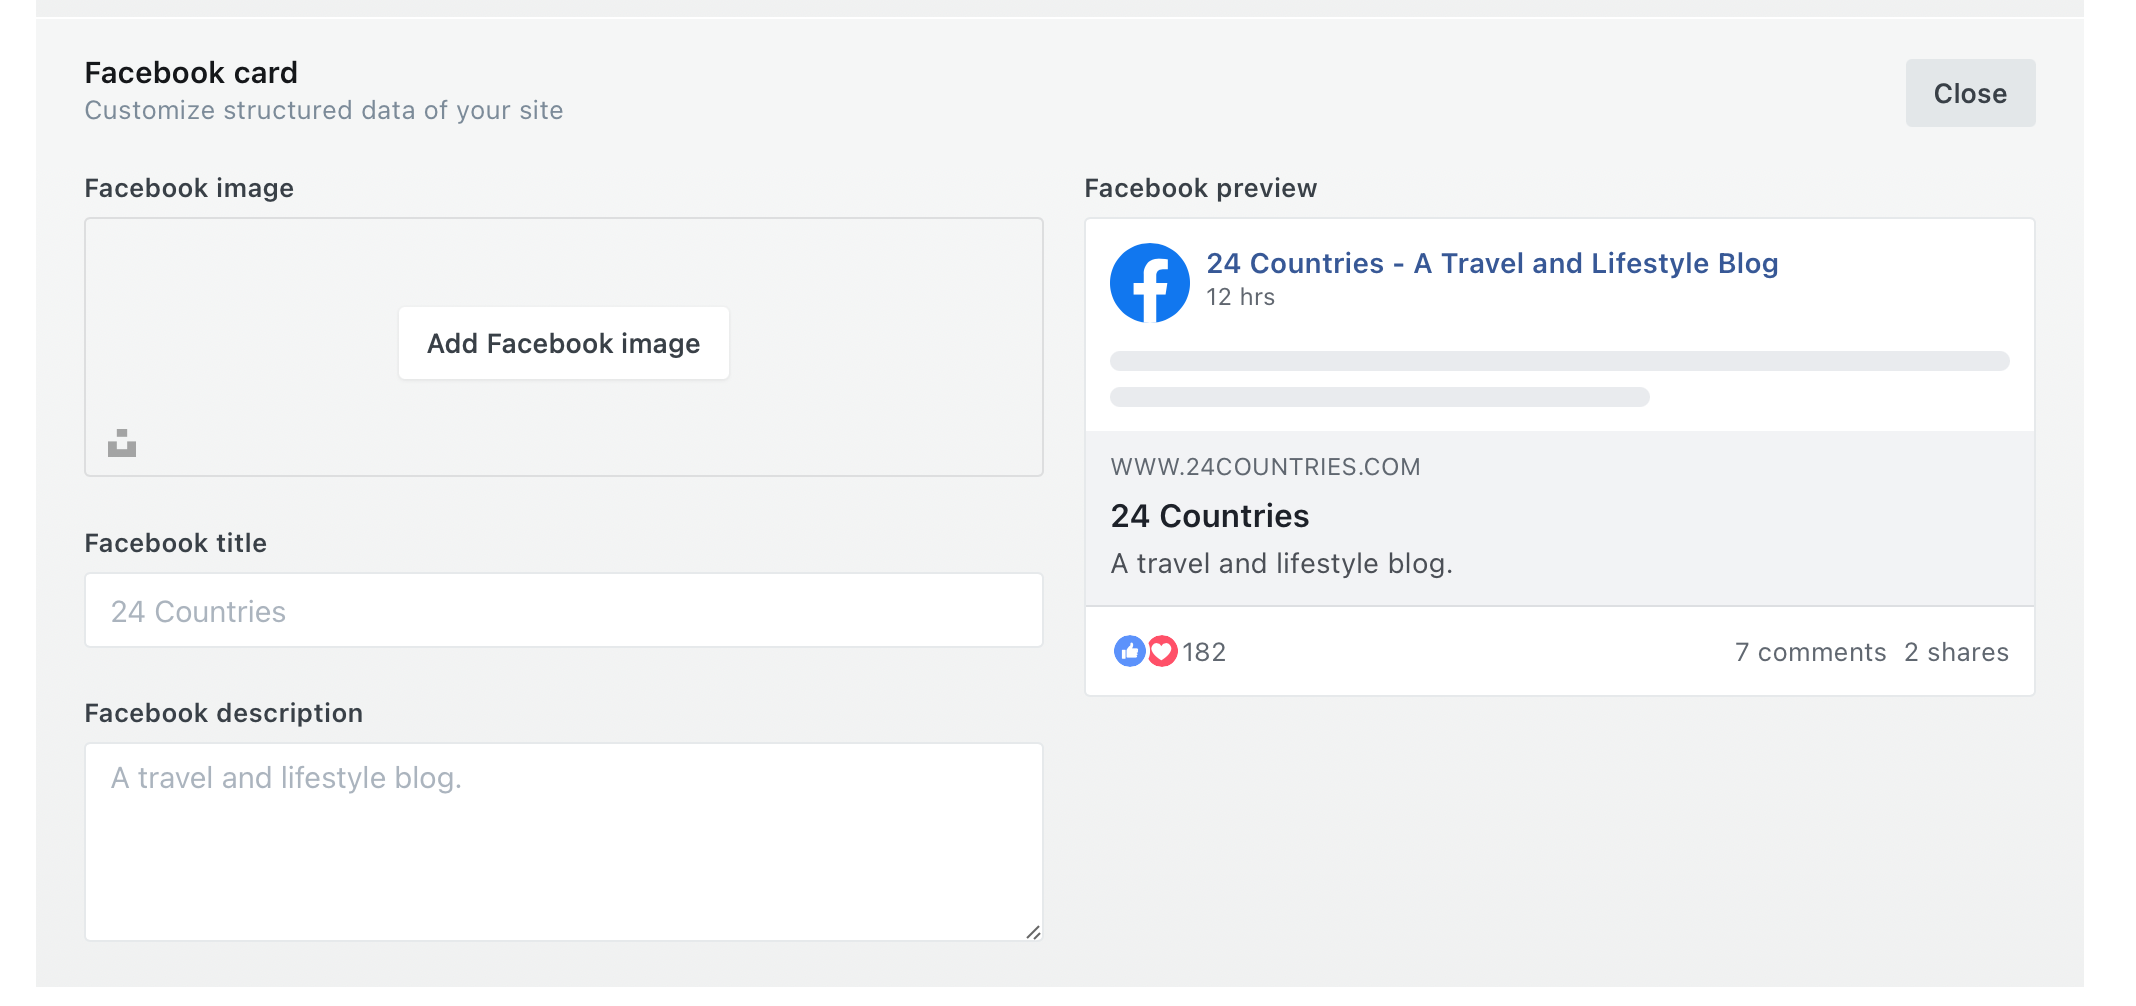
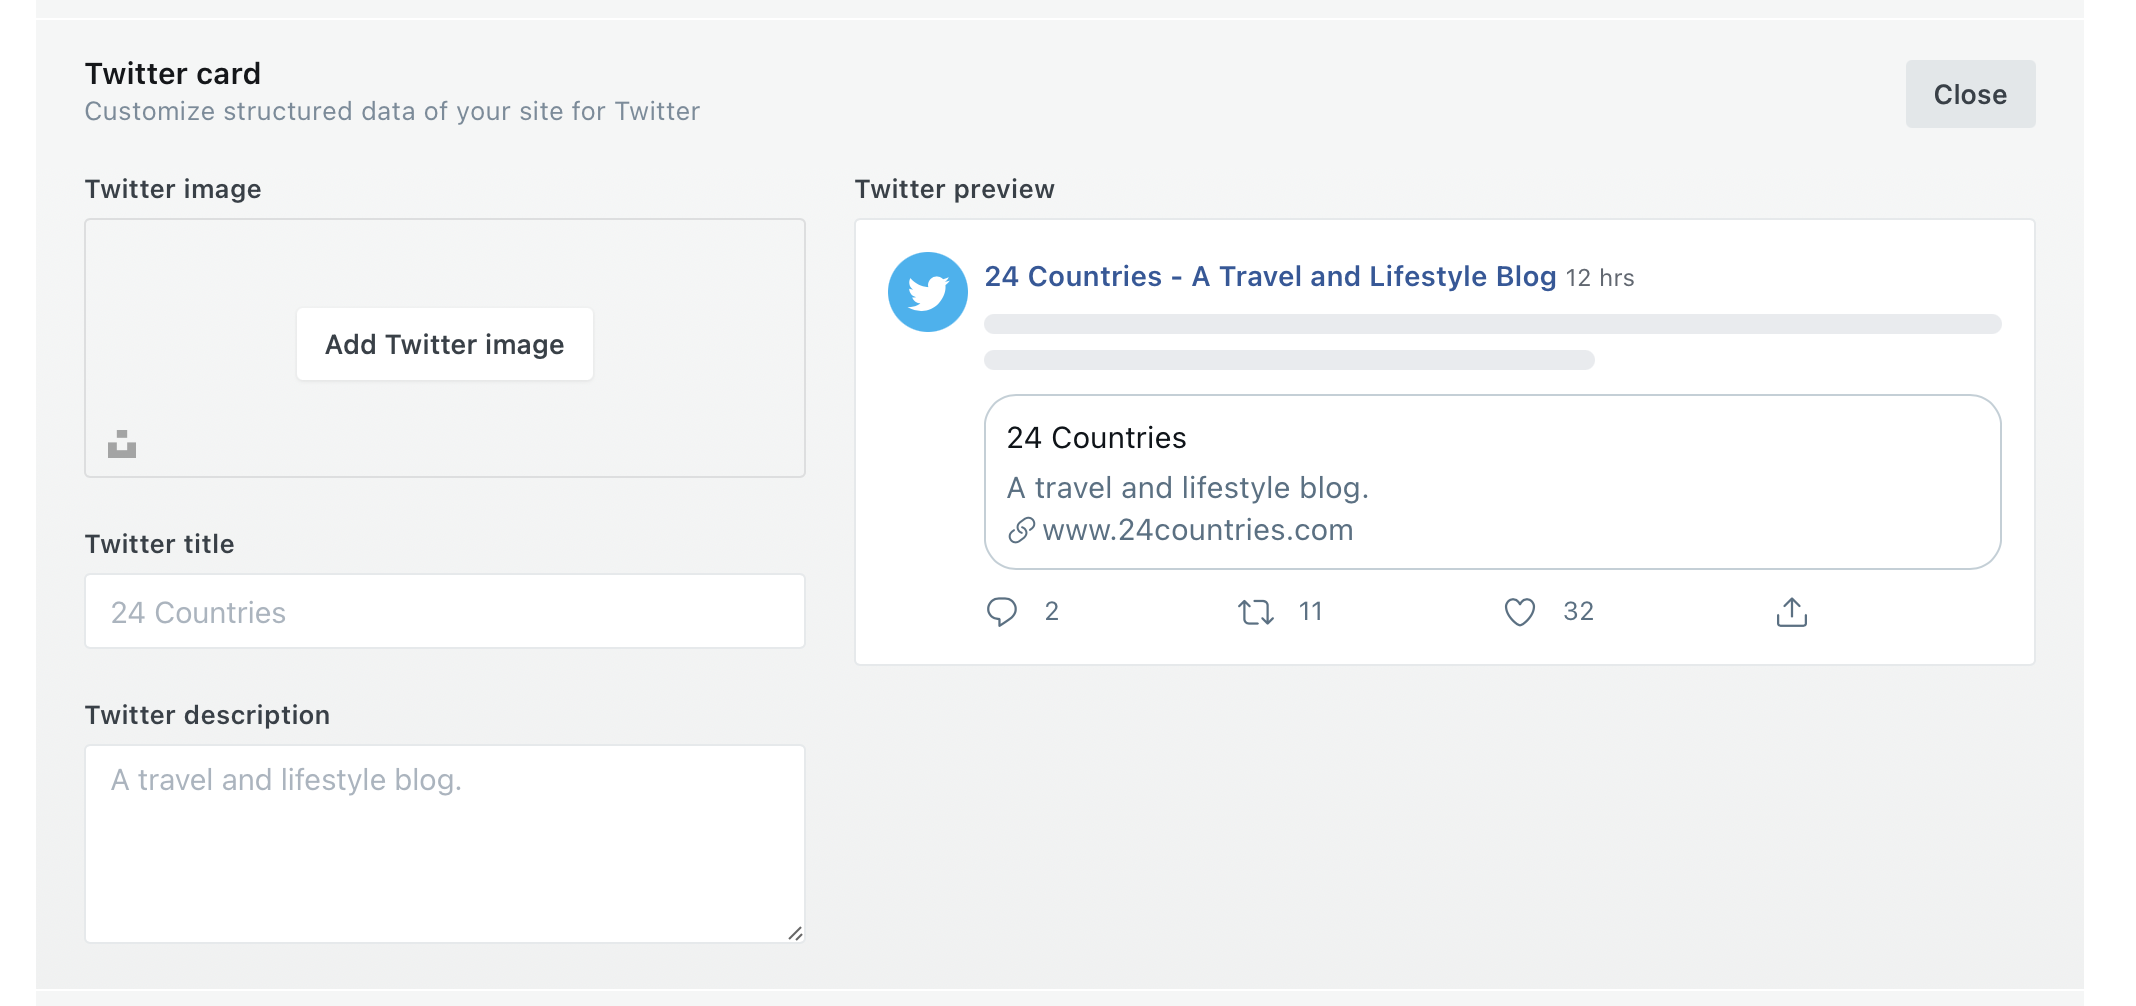
You can also optimise your metadata for Facebook and Twitter, which is very similar to the metadata you provided for search engines above.
STEP THREE: Linking social media accounts
Ghost is only set up to allow you to link your Facebook and Twitter. However, if you wanted to link any other of your social media and add icons for them, you would have to download your theme and edit the code. This is above my skill level for the time being, I'll hopefully get there someday though!
- To link Facebook and Twitter: simply enter your Facebook and Twitter URLs under the 'social accounts' section (pictured below). Then, click 'save settings' up the top right-hand corner of this page.
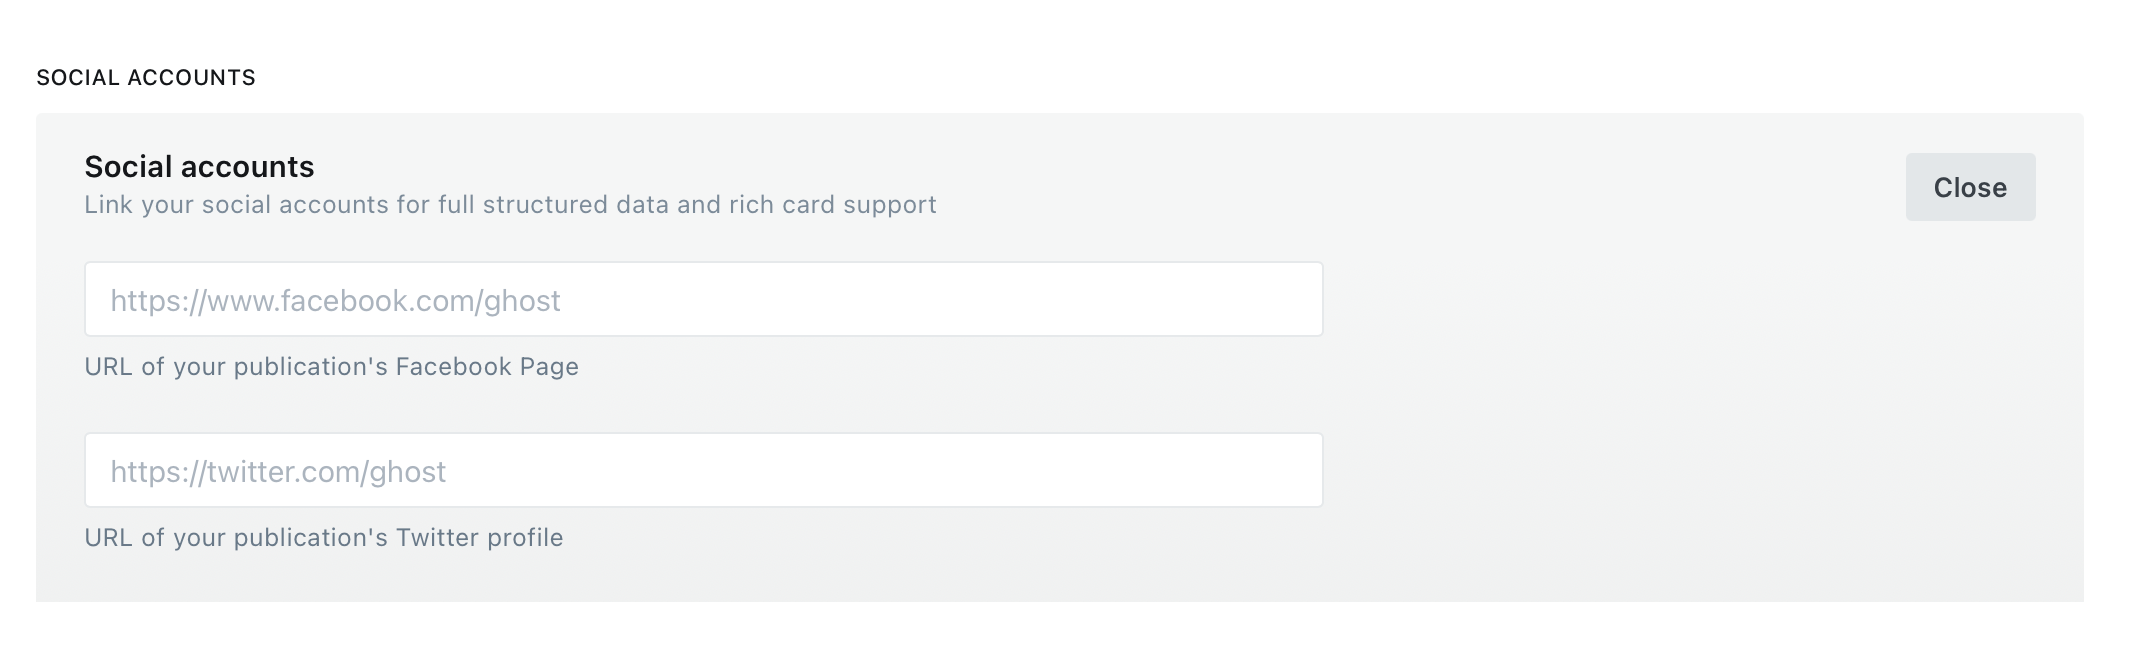
By entering the URLs, it will create a Facebook icon and Twitter icon on your homepage, which when clicked takes you straight to your publication's Facebook and Twitter pages.
If you don't want any Facebook or Twitter icons, leave the boxes blank and it will delete the icons from your site. I've not currently linked Facebook or Twitter accounts as being a new blog, I wanted to focus on Pinterest.
2. Add a Pinterest save button
The Pinterest save button will appear on every picture on your Ghost site.
To add the Pinterest save button, go to 'settings' and under the 'advanced' section, click on 'code injection'. Input this code into the header section and click 'save':
<script src="//assets.pinterest.com/js/pinit.js"
type="text/javascript" async defer
data-pin-hover="true"></script>
STEP FOUR: Set your site as private
Do you want to make your blog private? Well, all you have to do is swipe the button pictured below and click 'save settings' up the top right-hand corner of this page - you should now have a private blog. As soon as you want to make it public again, just swipe it back!
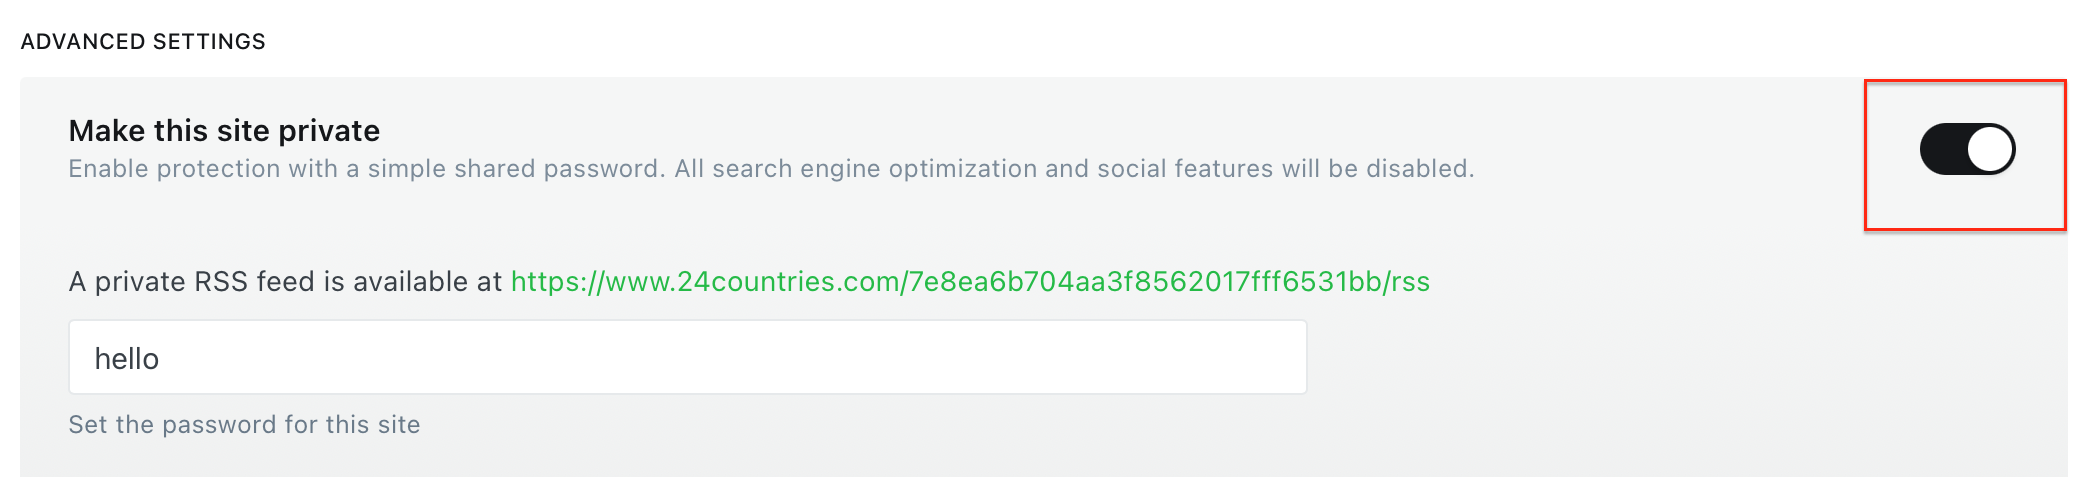
If you have made your website private, you will be given a password for the site. You can give this password to anyone you want to have access to the site. So, when someone tries to access it, they will be met with this:
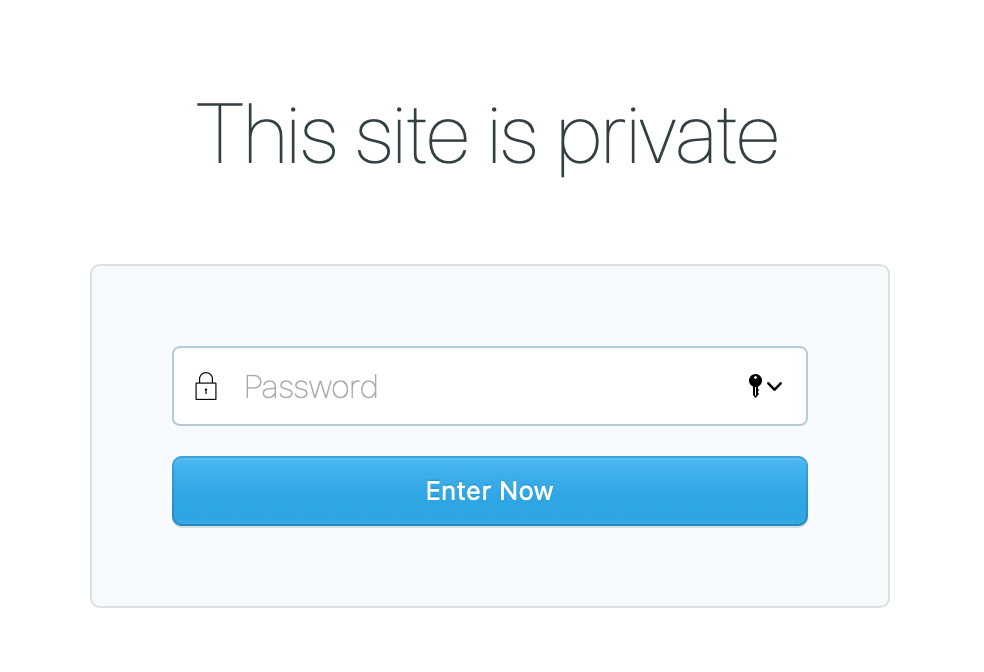
All they have to do is enter the password you supplied them with, and they should be able to view your site.
Please note: This should not be used to protect important data as this password offers very basic privacy.
When your site is private, search engine optimisation and social features are disabled.
Links to the other 'how-to' blog posts:
 Kirsty
 Kirsty
 Kirsty
 Kirsty
If you have any questions about setting up your Ghost.org site, don't hesitate to contact me via the contact form.