#2 HOW TO: Set up your Google Domain and link it to your Ghost.org account.

In this blog post, I will cover how to set-up a Google domain and link it to your Ghost.org account. A domain name is the address of your website that people will input in the browser URL bar to be taken to your website. Having a domain will give your website or blog a more professional look. The domain name also only costs around £10/$14 for the year. So, its definitely something to consider investing in when setting up your website or blog.
There is A LOT of different websites to get your domain from. However, I will only be covering Google domains as this is the only domain site I have experience using.
This blog post will cover:
- STEP ONE: Setting up a domain using Google
- STEP TWO: Linking your Google domain to your Ghost.org account
- STEP THREE: Activating your domain on your Ghost.org account
- Links to the other 'how-to' blog posts
If you need help with other aspects of Ghost.org/Google Domains, follow my 'how-to' blog post series linked at the bottom of this blog. A new 'how-to' blog post will be released every Thursday.
STEP ONE: Setting up a domain using Google
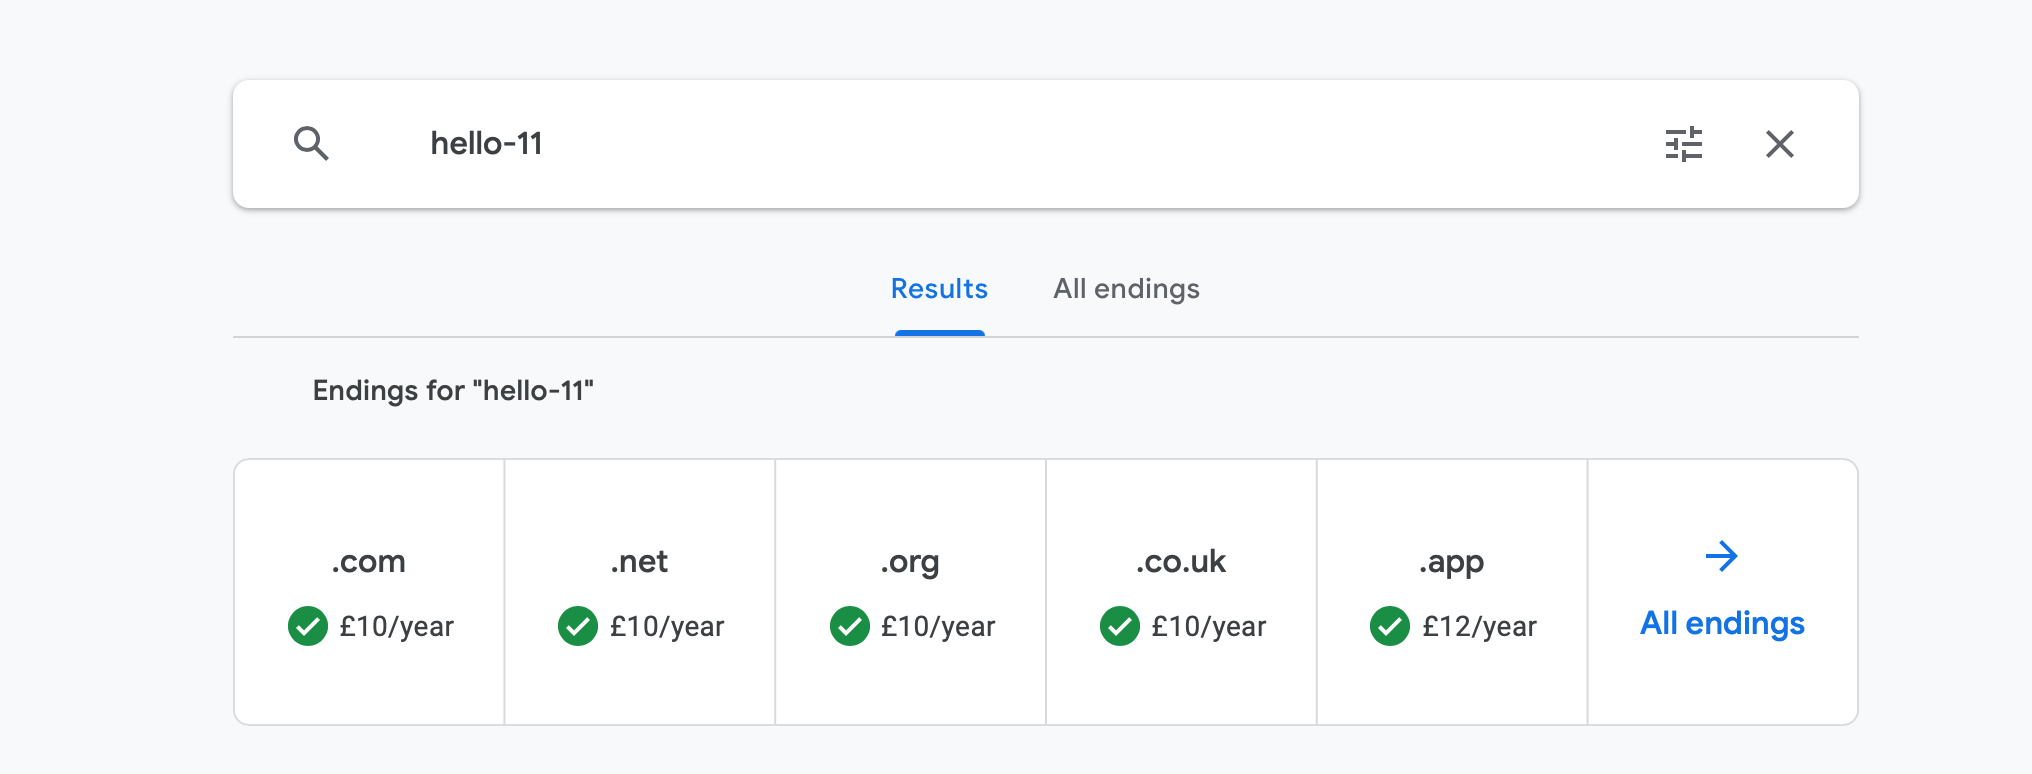
1. Access domains.google.com
2. Search for your new domain and click 'get it'.
3. You will be able to see if your domain is available. It will also give you a list of endings for your name including '.com, .co.uk, .net' etc. I picked '.com' as it is more universally used.
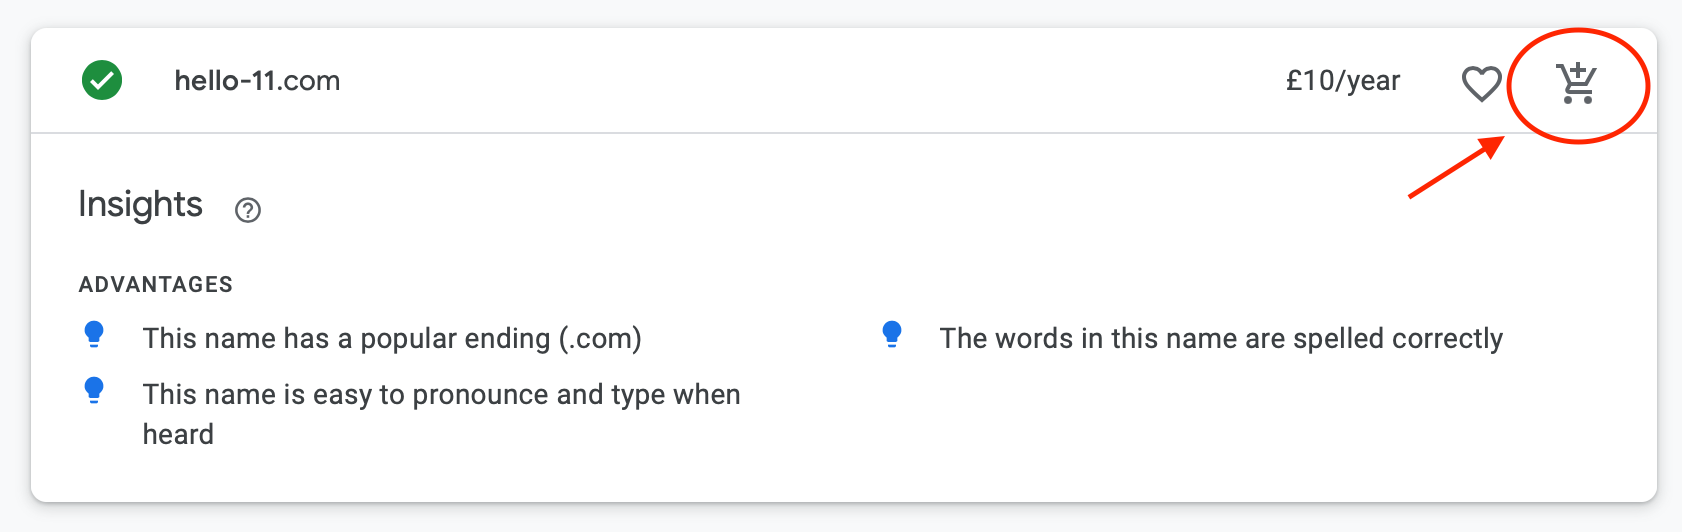
4. Once you have found the domain name you want, click on the little shopping cart icon, next to the heart icon to add it to cart.
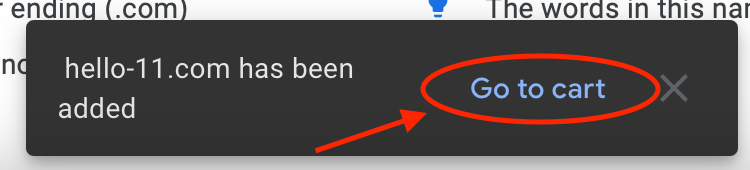
5. Then, click 'go to cart'. Under registration, you can choose to register the domain for up to 5 years. You can also switch on/off privacy protection or auto-renew at this point. As well as, set up a custom email. Once your happy with your selections, go to check-out and fill out your personal details to buy the domain.
STEP TWO: Linking your Google domain to your Ghost.org account
This is where it gets a bit more complicated.
VERY IMPORTANT: You HAVE to set-up billing on Ghost Pro before linking the domain or the domain will not be activated.
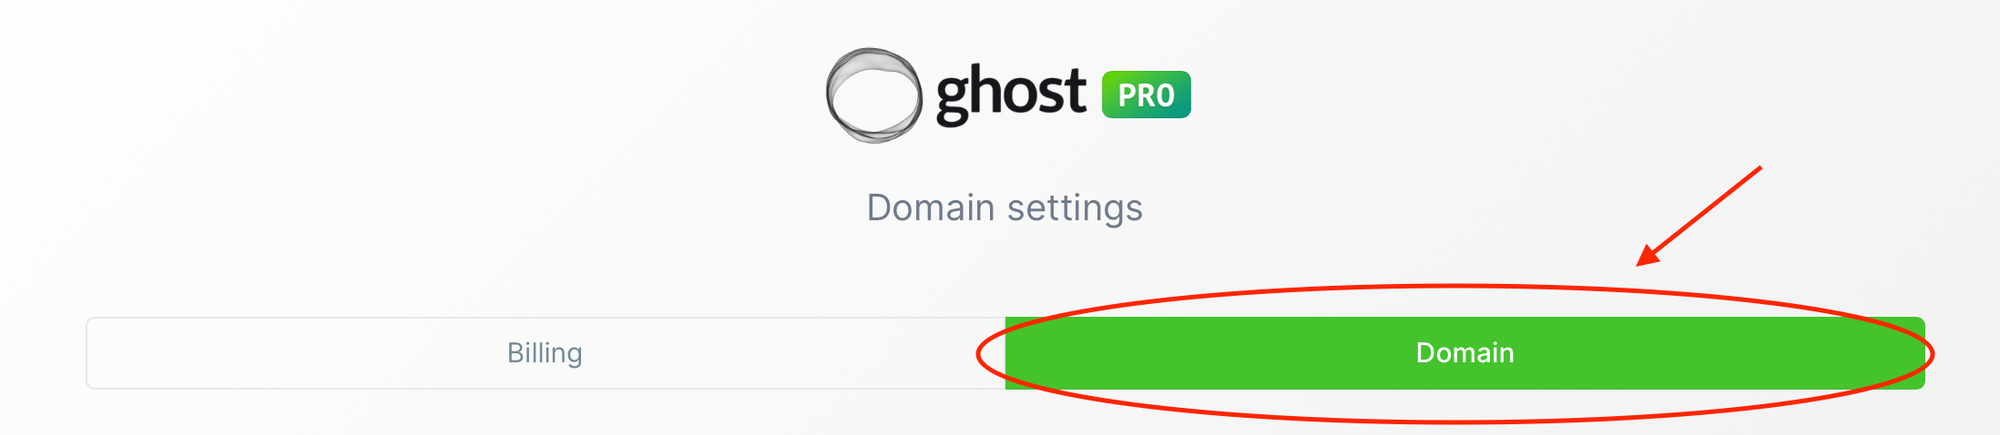
1. Choose Ghost Pro down the left-hand menu.

2. Click the ‘Domain’ tab up the top (next to billing).
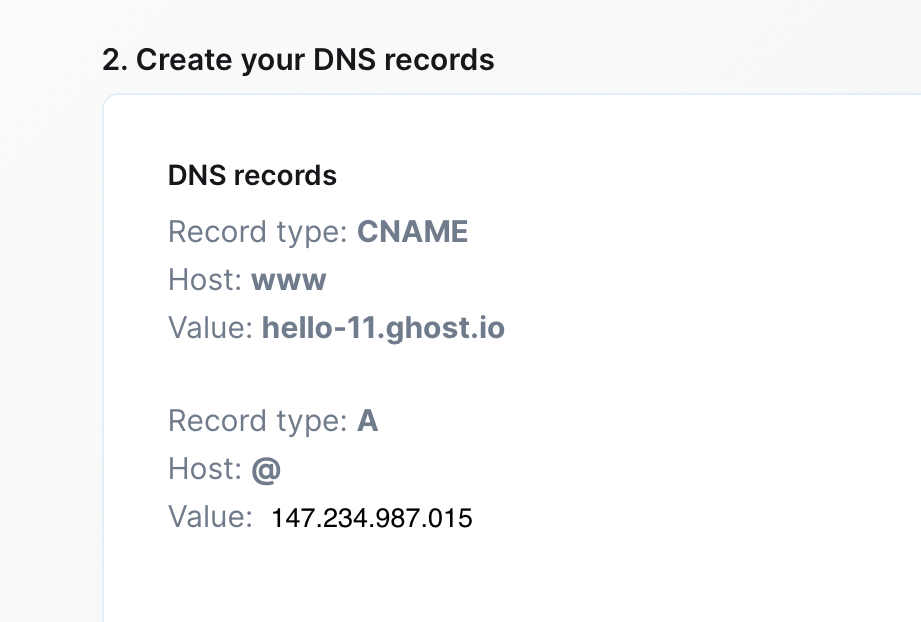
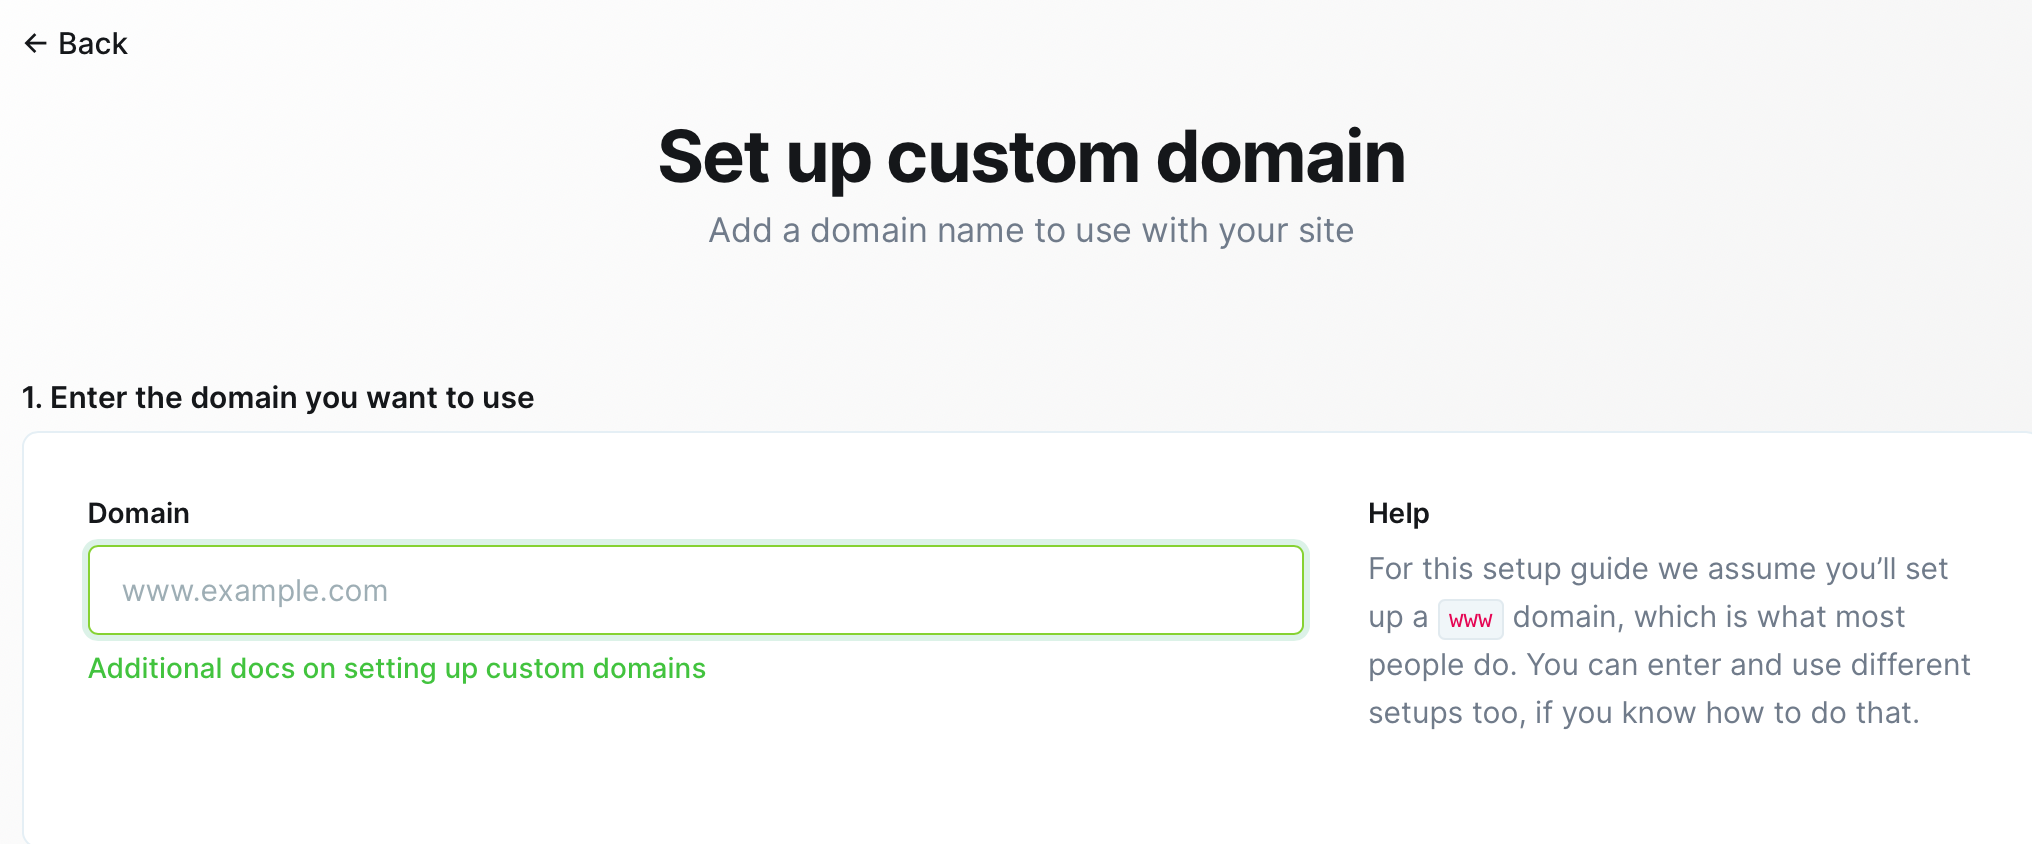
3. Under the custom heading, click 'setup'. Take a note of the information in part 2 of this page under the 'create your DNS records' section (as shown in the picture below).
4. Now head over to your Google domain and in the left-hand column, select 'DNS'.
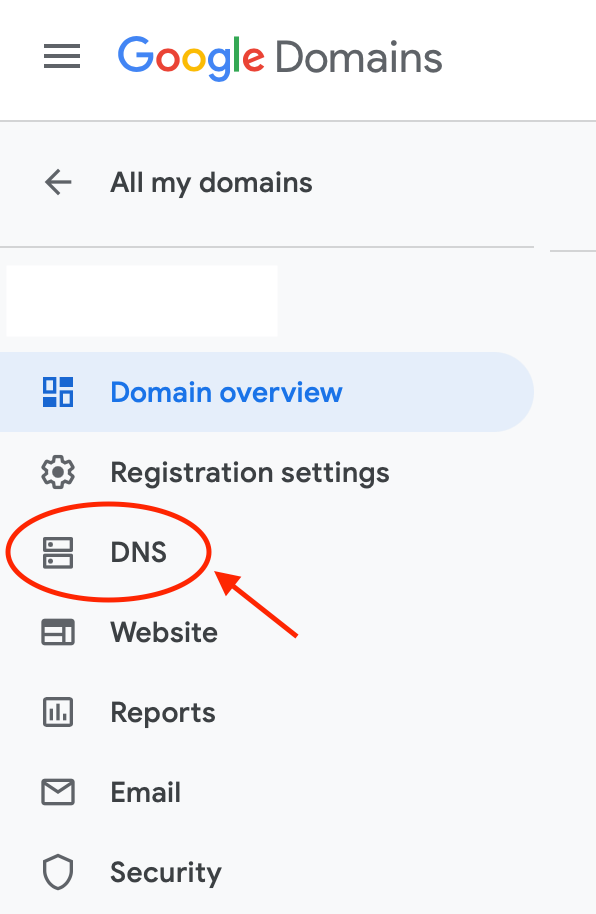
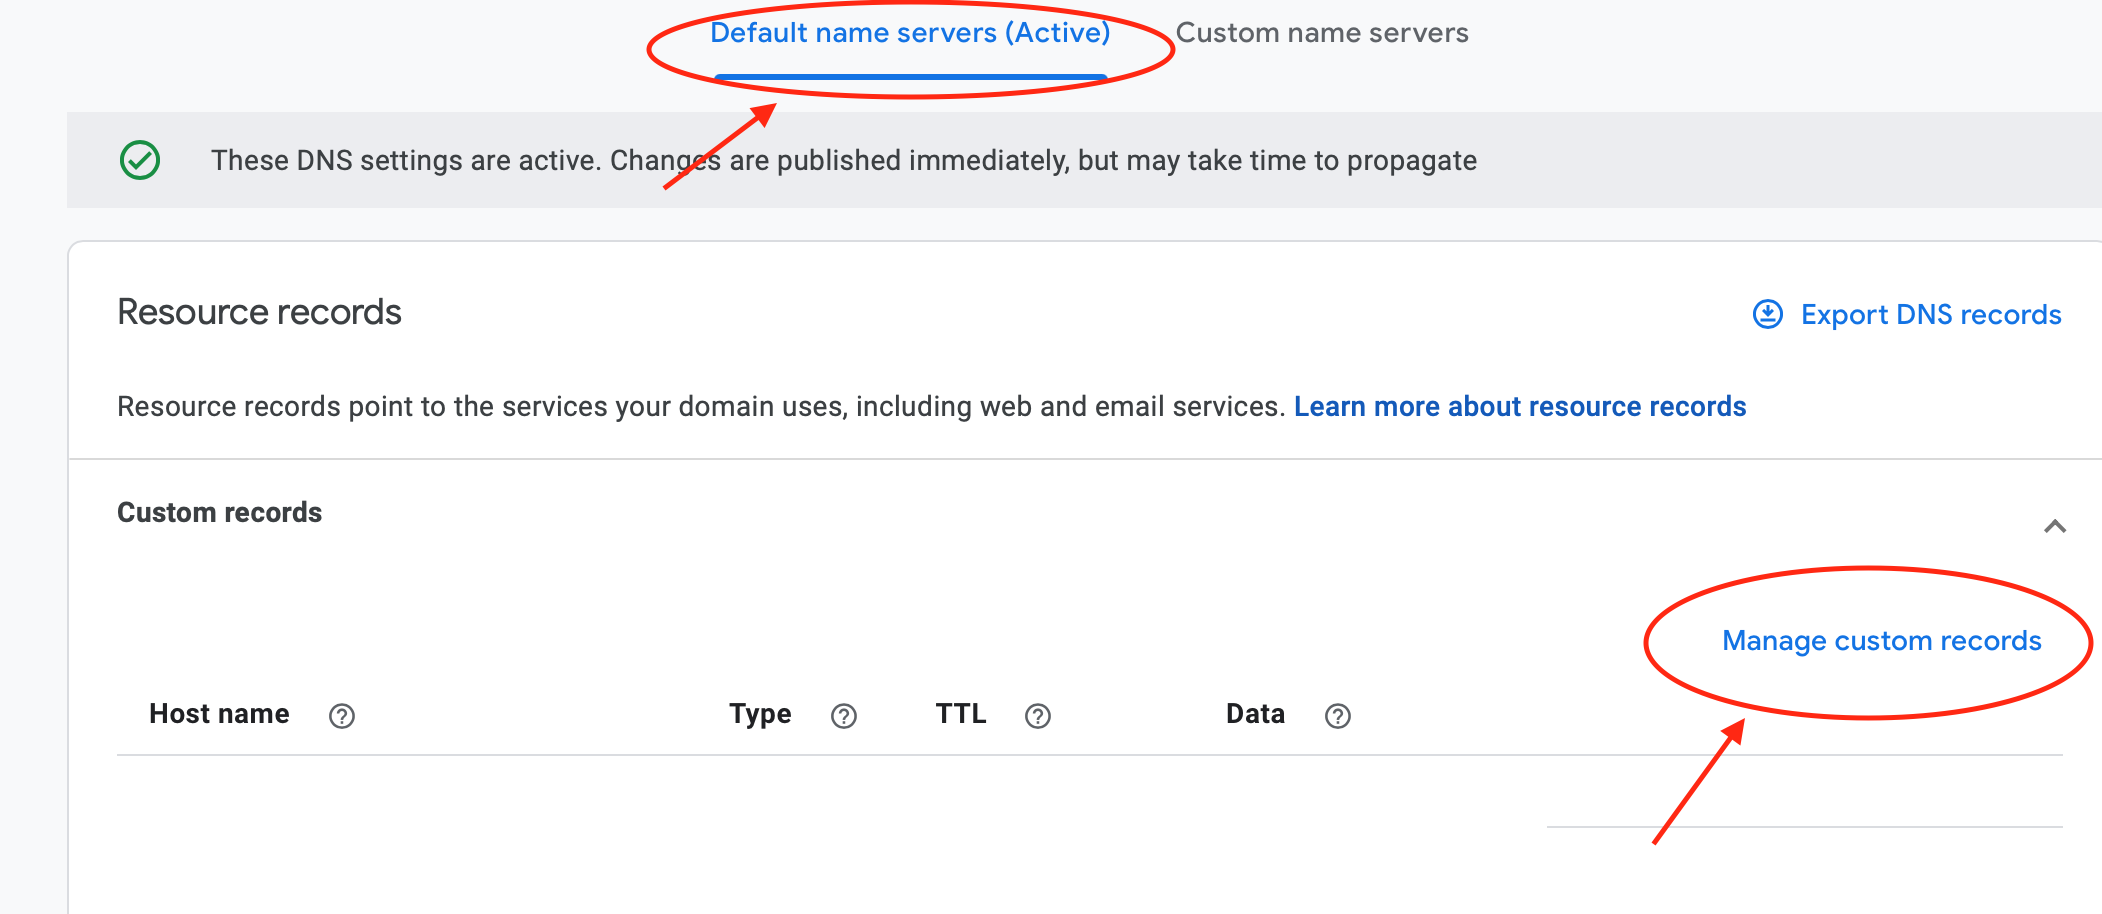
5. Make sure you are on 'default name servers (active)' tab and under resource records, click on 'custom records'.
6. This is where you will input the information from your DNS records. Please do NOT copy this information as your DNS records will be unique to you. The pictures included in this blog are just here as a guide.
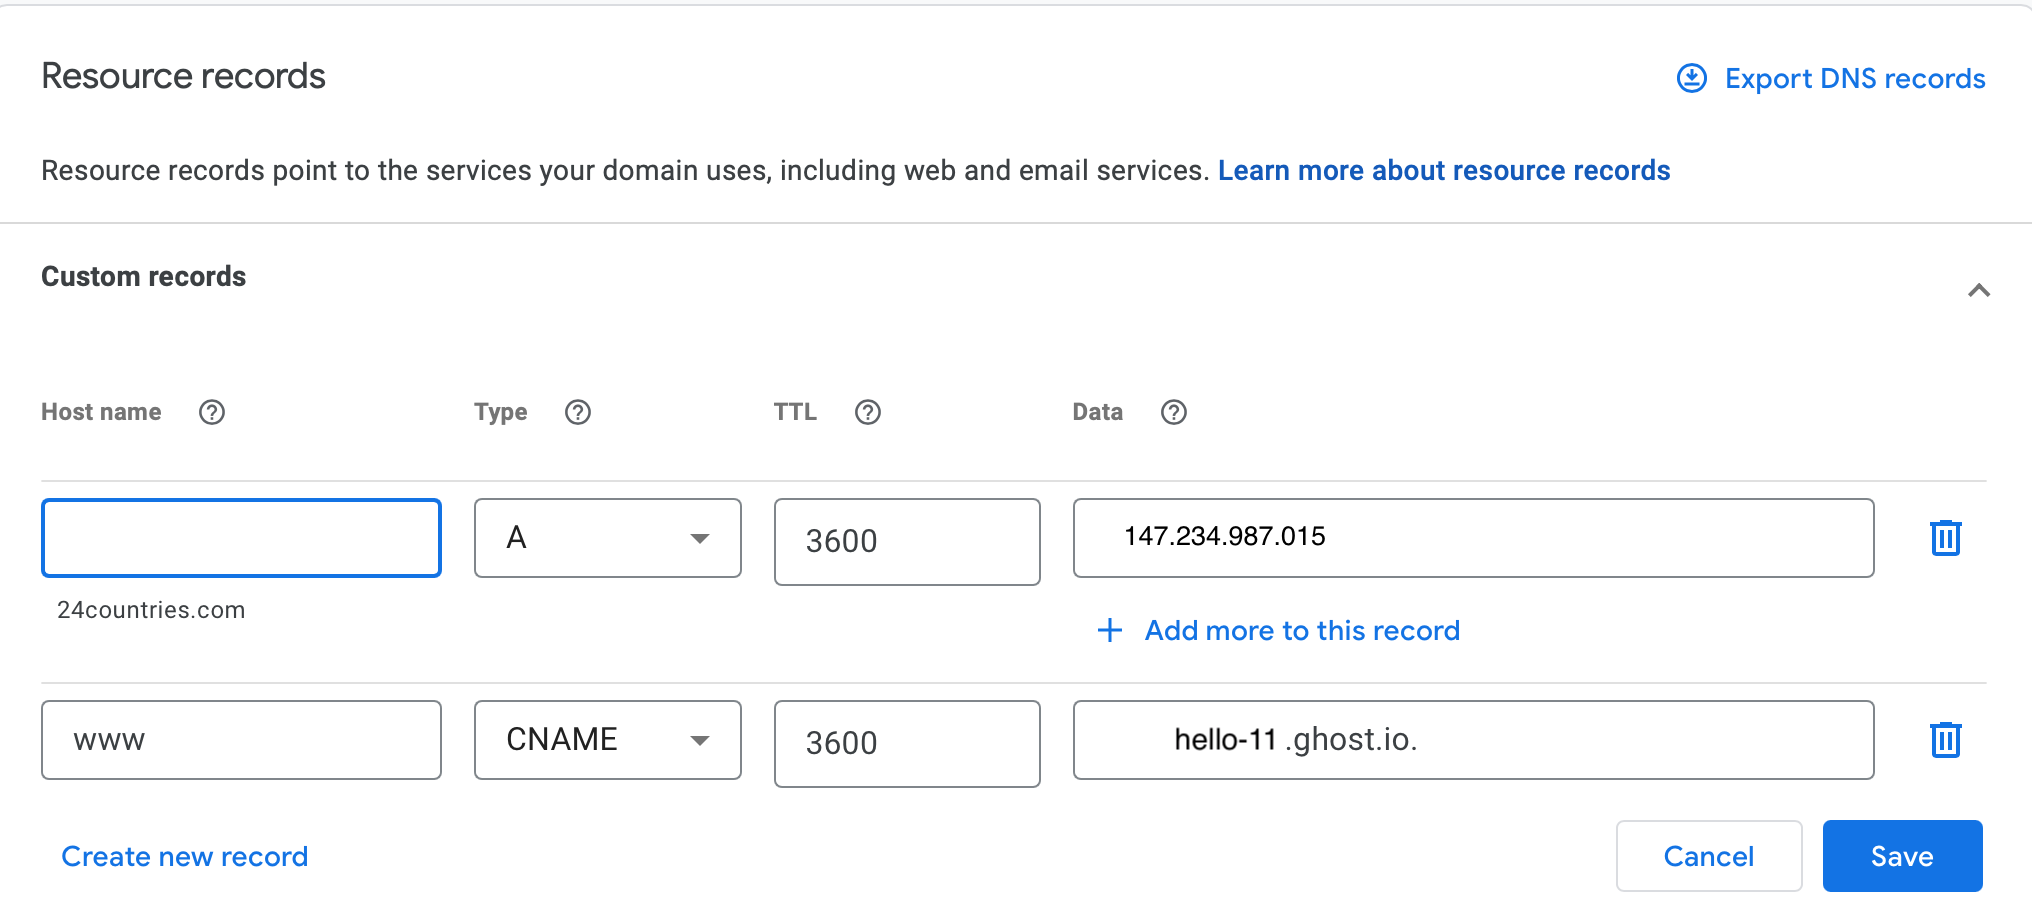
Custom record 1: Leave the host name section blank. Input 'A' in the 'type' box. Keep the TTL (time-to-live) at '3600'. In the data section, put the numbers value. In my case, this is '147.234.987.015' but again, this will be unique to you.
Custom record 2: In the host name box, put 'www'. Input 'CNAME' in the 'type' box. Keep the TTL (time-to-live) at '3600'. In the data section, put your ghost.io name e.g. hello-11.ghost.io.
> Once you have input both these custom records. Click save.
STEP THREE: Activating your domain on your Ghost.org account
1. Go back to your Ghost.org account. Choose Ghost Pro down the left-hand menu.
2. Click the ‘Domain’ tab up the top (next to billing).
3. Under the custom heading, click 'setup'.
4. Under the domain heading, enter the domain name you selected in step 1. Example: 'www.hello-11.com'.
5. Click activate domain. Be patient as this could take time.
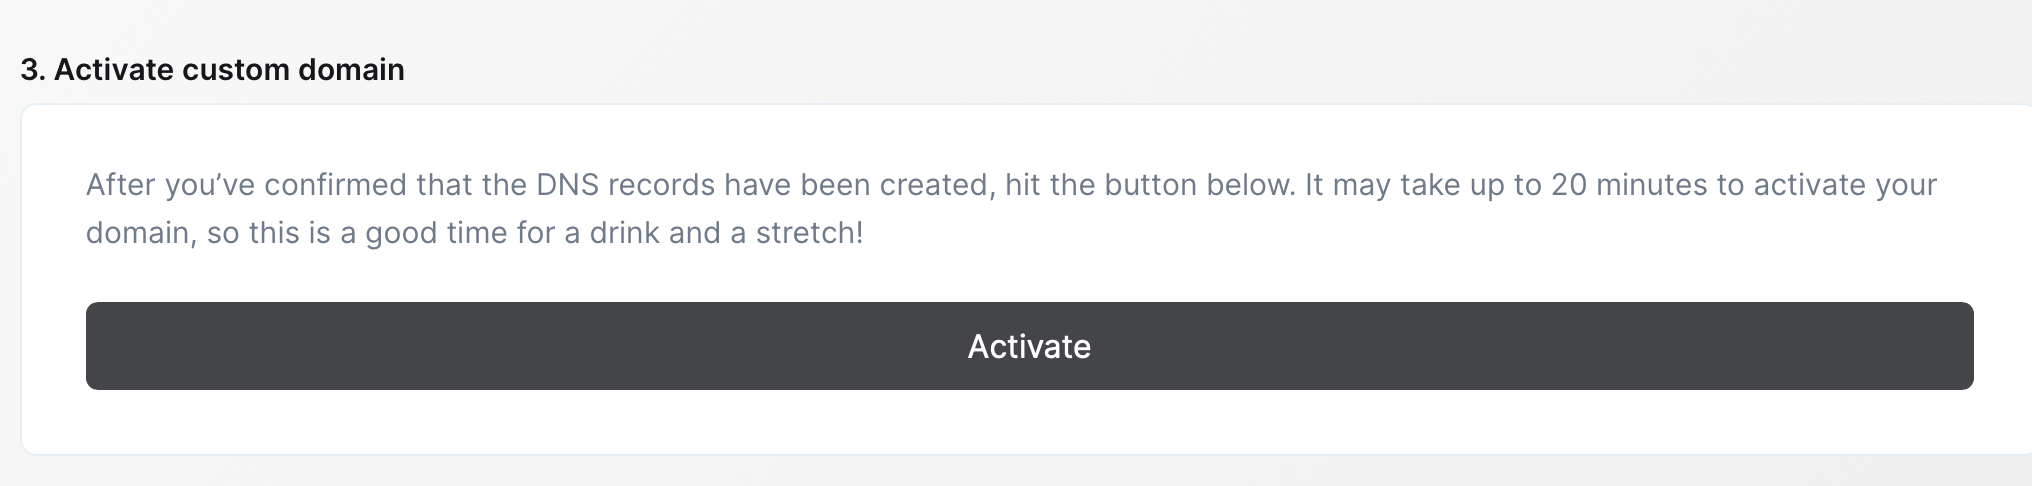
>NOTE: your domain will only become activated if you have paid for Ghost Pro.
Links to the other 'how-to' blog posts:
 Kirsty
 Kirsty
 Kirsty
 Kirsty
Hopefully, you should now have a fully functioning Ghost.org website with an attached domain! Please get in touch via the contact form if you have any more questions.