#7 HOW TO: Add a contact form to your Ghost.org site to connect with your audience

Hopefully you're well and truly in the midst of setting up your Ghost.org site. So far by following my 'how to start a blog' series (linked at the bottom of this blog post)... you should have a snazzy looking website with concise primary and secondary menu's tailored to your niche - this will intrigue any visitor to your site! However, keeping visitors engaged is a different ball game. You need to have really engaging posts, which I will cover in a later 'how-to' blog post and have a space for the audience to connect with you. It's important that your audience know there is a person behind the site and that they can contact you. It helps make your site more personable, build a rapport with your readers and helps keep them interested in your blog. Not to mention... it's also a chance to organise contributions to your site from other bloggers or organise collaborations with brands.
I would suggest having a 'contact' section on your site in either your primary or secondary menus. To set this 'contact' menu up, read this blog post:
 Kirsty
Within this 'contact' menu, instead of giving out any personal data like your personal email address or phone number, you can instead add a contact form to your blog to connect with your audience. In this blog post, I will cover how to set up a contact page, link it to your 'contact' menu then add a contact form to that page. I promise its not as confusing as it sounds. Keep reading to find out!
Another way of allowing your audience to contact you is through social media. By having easy-to-access social media icons on your blog allows the reader to follow you on all social media sites that you have linked and contact you there. I covered linking your social media in this blog post:
Kirsty
I'm just starting a blog and focusing all my attention on one social media site (Pinterest) for the time being. So, I've not added other social media links but this is hopefully something I'll do in the future when I start to build a following. It's personal preference whether you want to add a contact form or social media links or both!
This blog post will cover:
- STEP ONE: Create a 'contact' page
- STEP TWO: Link the 'contact' page to the 'contact' button in your primary or secondary menu
- STEP THREE: Add a 'contact' form to your 'contact' page
- Links to my other 'how-to' blog posts
If you need help with other aspects of Ghost.org/Google Domains, follow my 'how-to' blog post series linked at the bottom of this blog. A new 'how-to' blog post will be released every Thursday.
STEP ONE: Create a 'contact' page
You first need to set up a 'contact' button in either your primary (top of your site) or secondary (bottom of your site) menus. Like this...

If you haven't already done this or aren't sure how to set this up, not to worry... read this post to help you!
KirstyNow that you have a 'contact' button in your primary or secondary menus, you need to set up a 'contact' page.
So to set up a 'contact' page, follow these instructions...
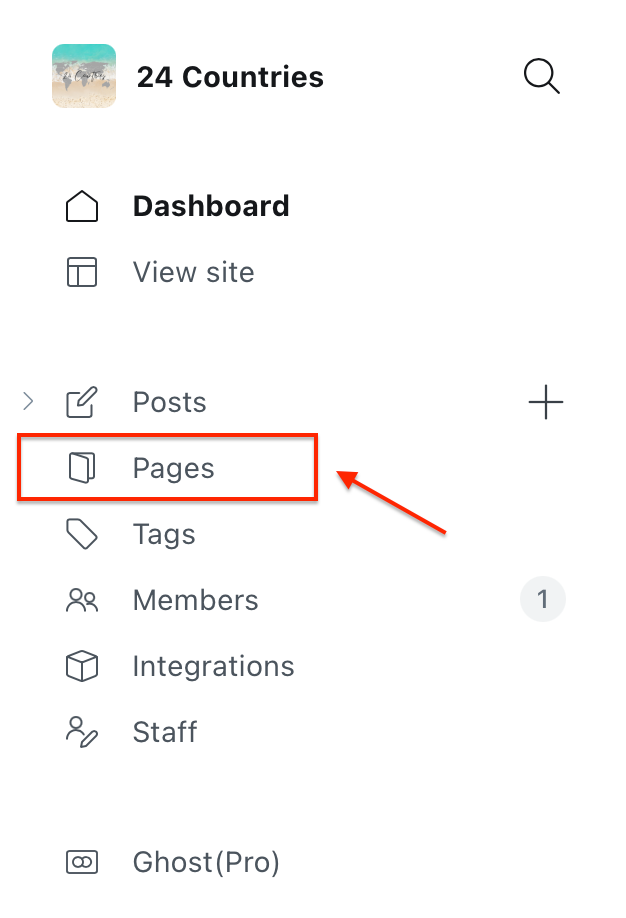
- You need to be logged into your Ghost account and click the 'pages' button on the left-hand menu.
2. Click 'new page' up the top right-hand corner.

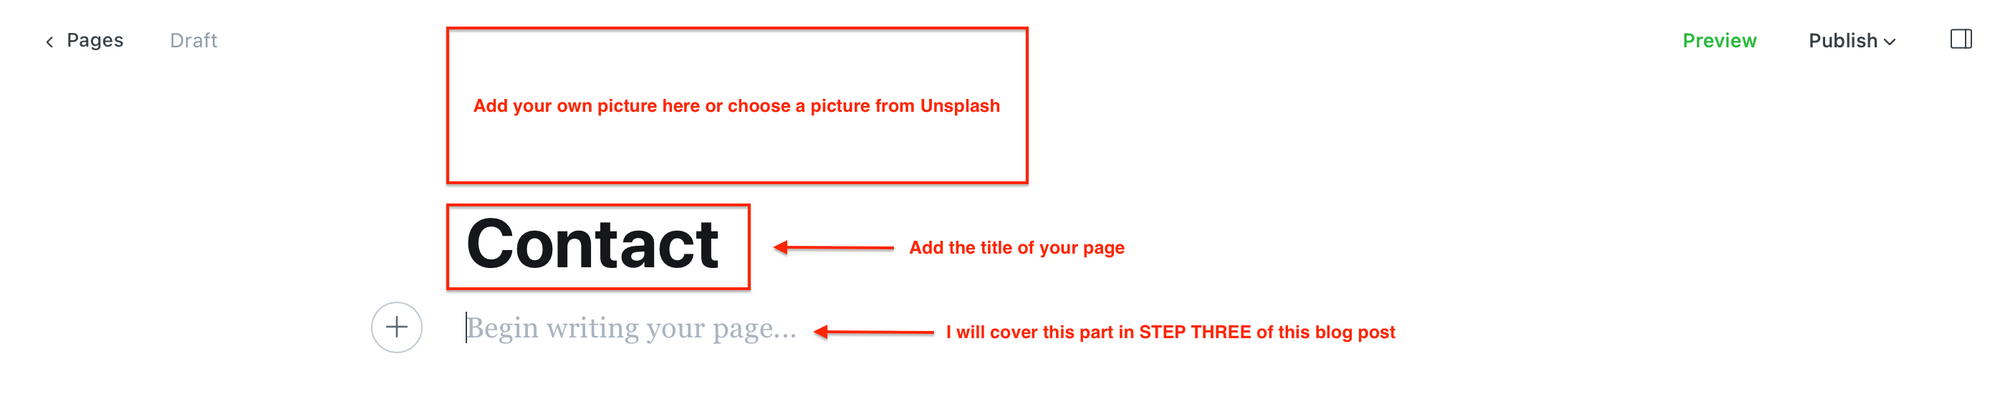
3. Customise your 'contact' page... Add a title and upload/choose a picture, go wild! This page will save as a draft until you choose to publish it.
STEP TWO: Link the 'contact' page to the 'contact' button in your primary or secondary menu
Next, you have to link your 'contact' page to the 'contact' button in your primary or secondary menu. If you don't do this and you click on the 'contact' menu button, you'll be met with a 404 error message.
To link the two, follow these instructions...
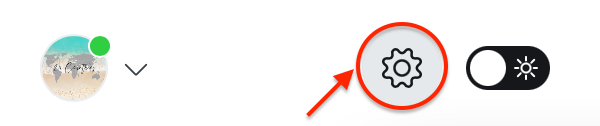
- Log into your Ghost.org account and then click on your settings. This button...
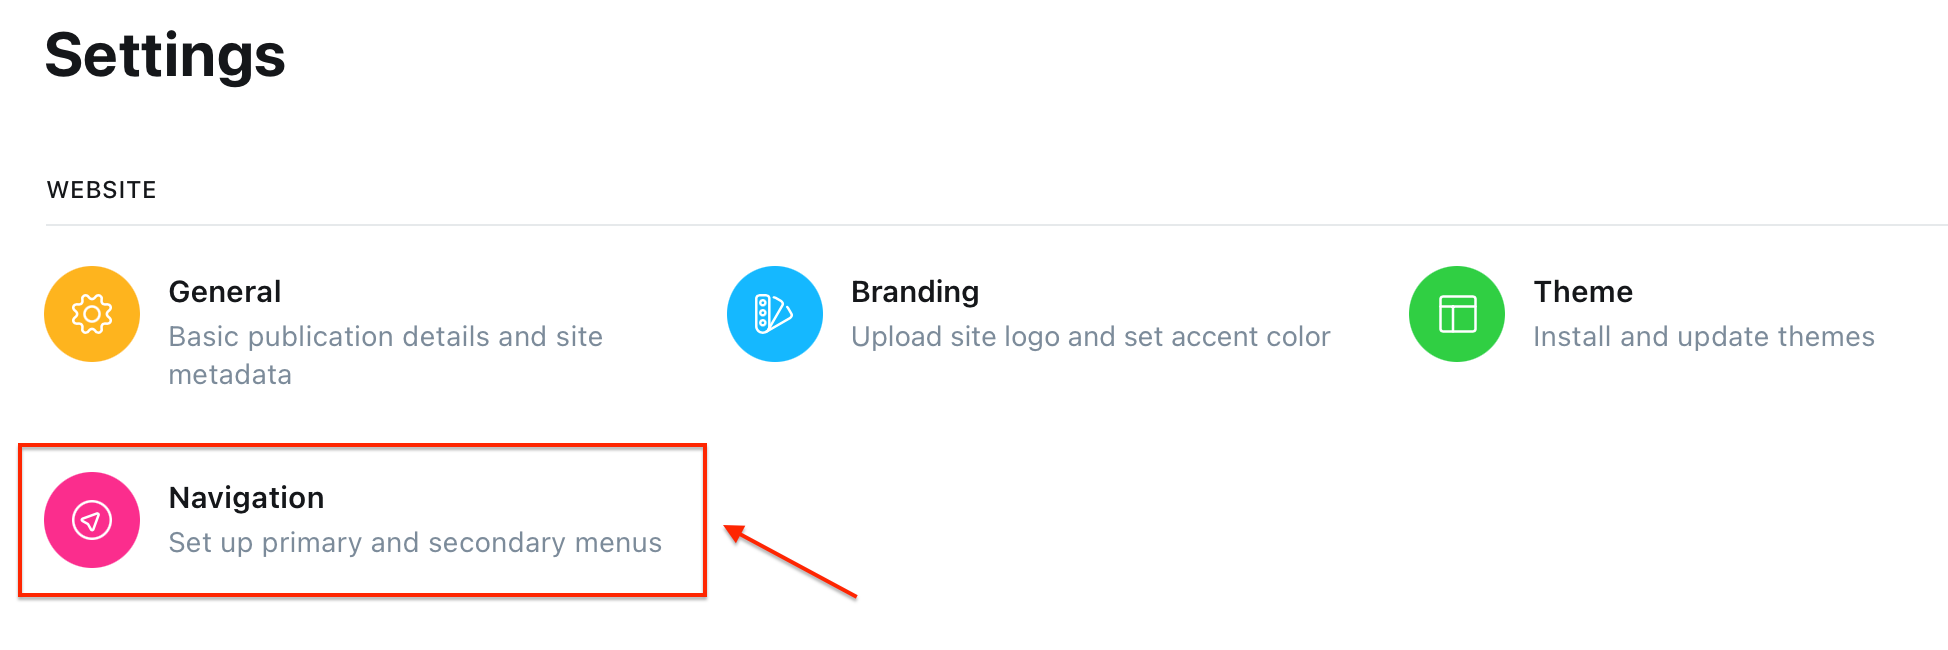
2. Within your Ghost settings and under the 'website' section, click on the 'navigation' tab (highlighted in the picture below).
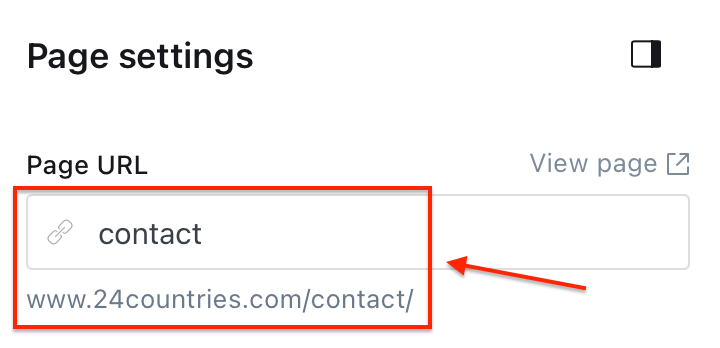
3. Find the 'contact' menu row under either your primary or secondary menus and make the URL end in '/contact/'.

4. Next, click on the 'pages' button on your left-hand menu and go onto your 'contact' page.
5. Click this button up the top right-hand corner of your 'contact' page.
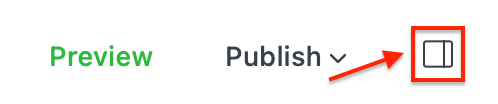
6. Edit your page URL to match the URL above in the primary and secondary menu. This will link the 'contact' page to your 'contact' menu which means now when you click on your 'contact' menu, you will be able to see your contact page once you've published it.
STEP THREE: Add a 'contact' form to your 'contact' page
- Go to https://formspree.io and create an account by clicking the 'get started' button. I use formspree to make my 'contact' form as its free and easy to use.
2. Once logged into your formspree account, go to the 'forms' section and click '+ new form'.

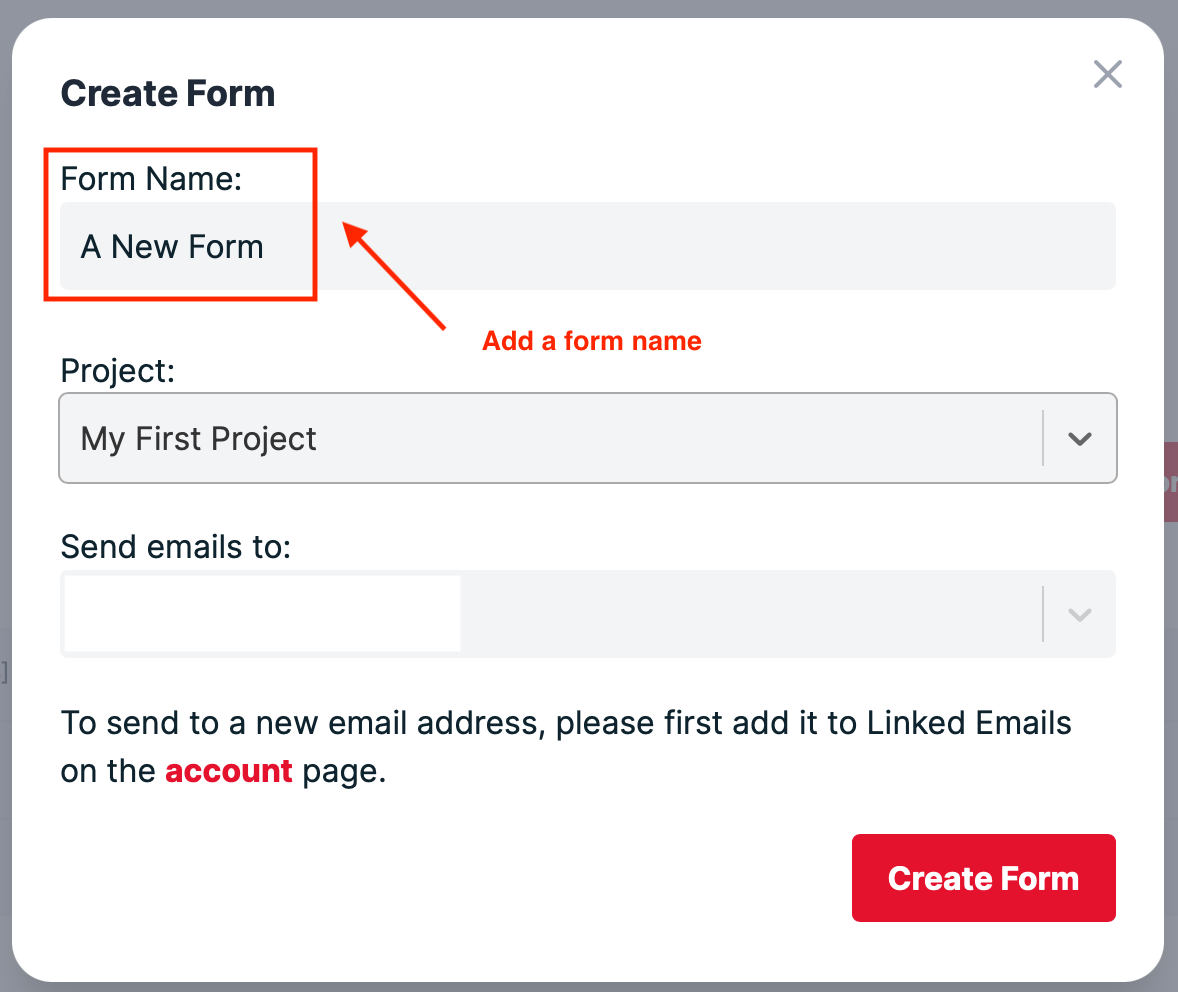
3. Input a name for your form and an email address, then click 'create form'.
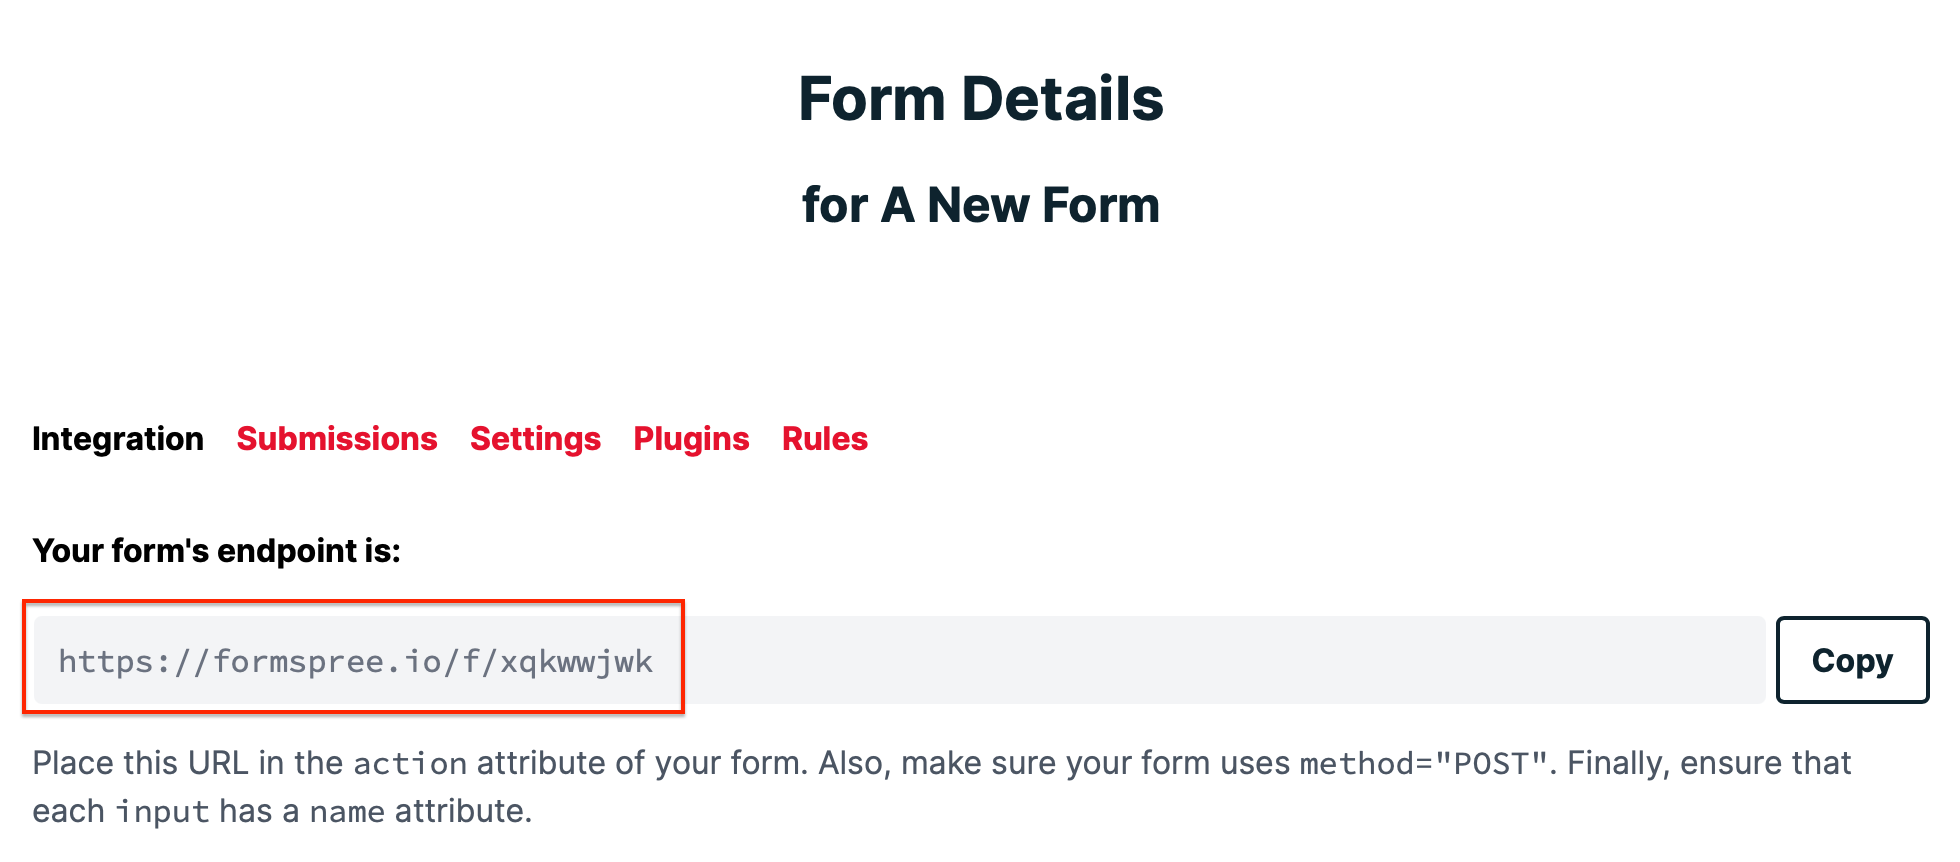
4. Once you've created your form. You will now see your form details. Copy your form's endpoint URL.
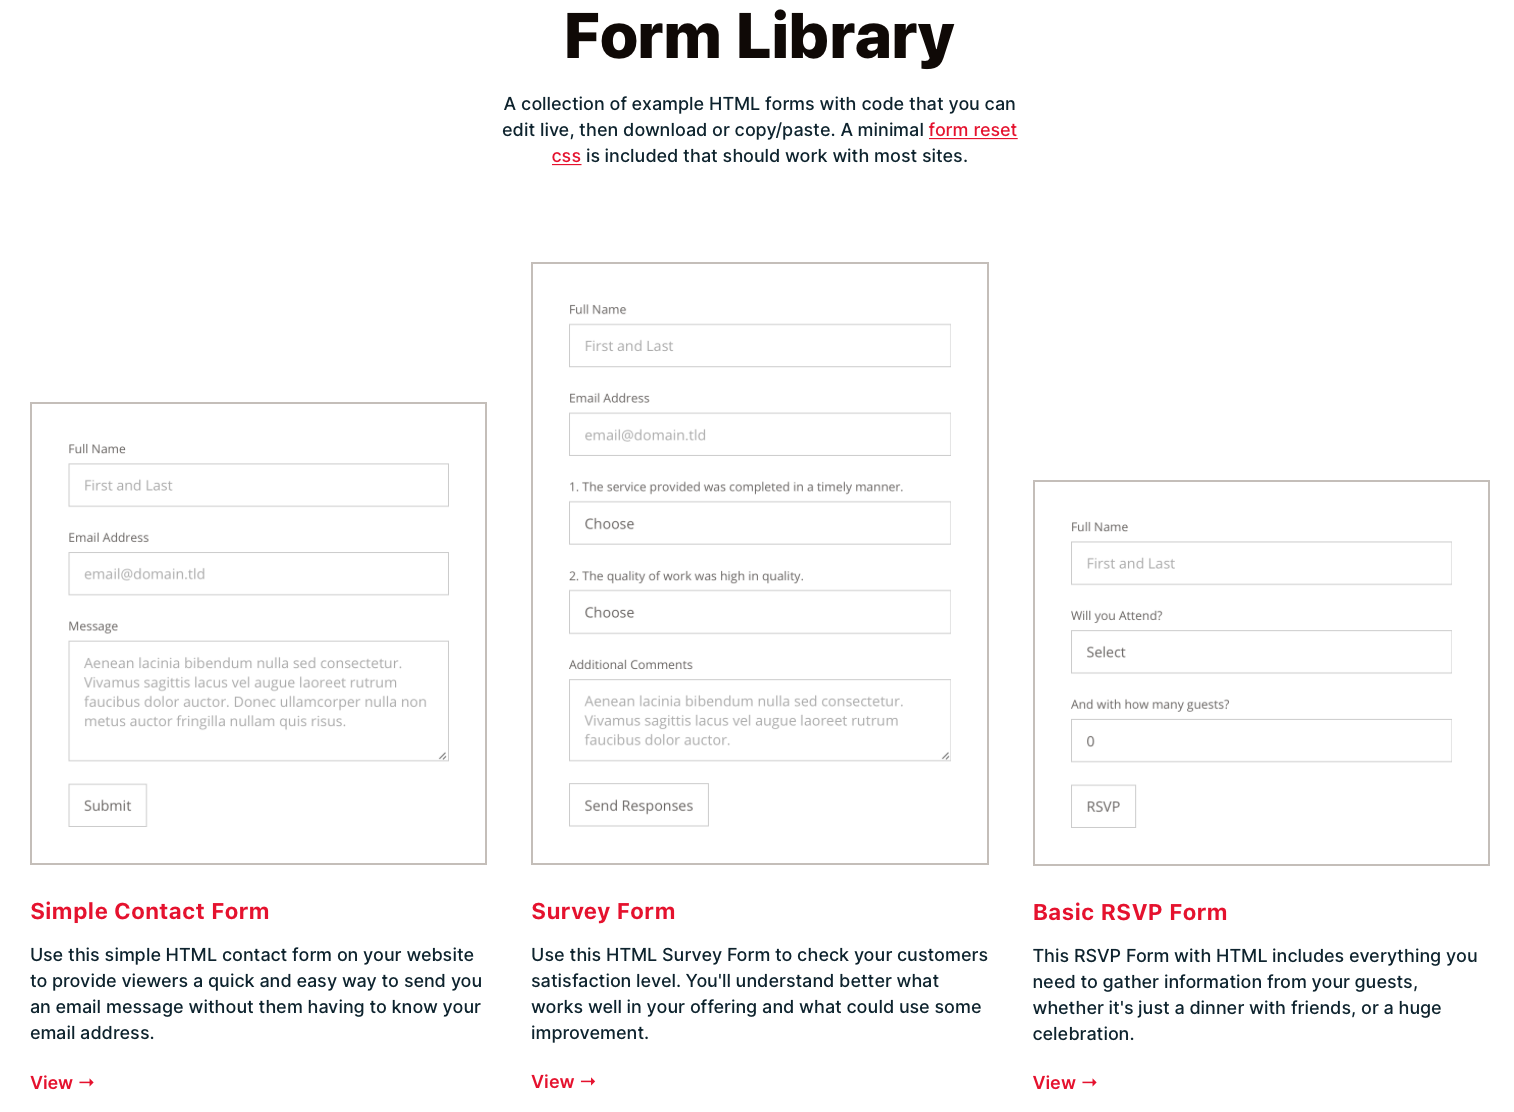
5. Just under your form's endpoint, there should be a heading that says 'see some example'. Click on the red hyperlink under this title.

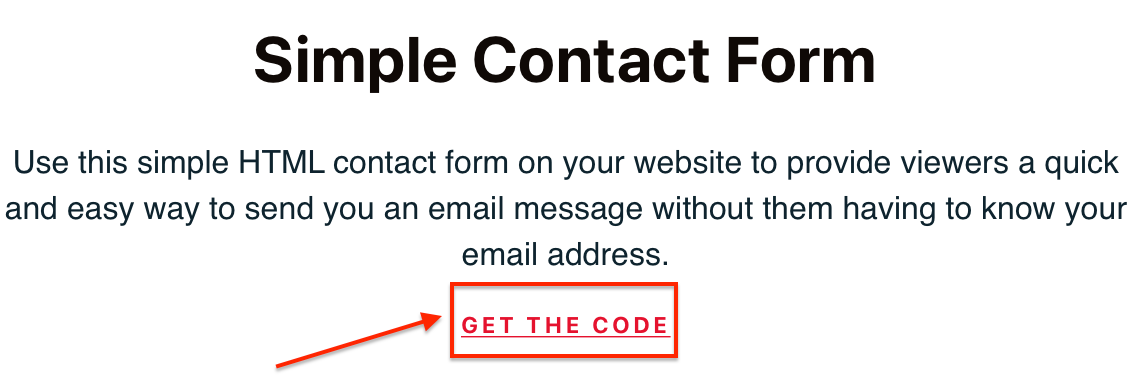
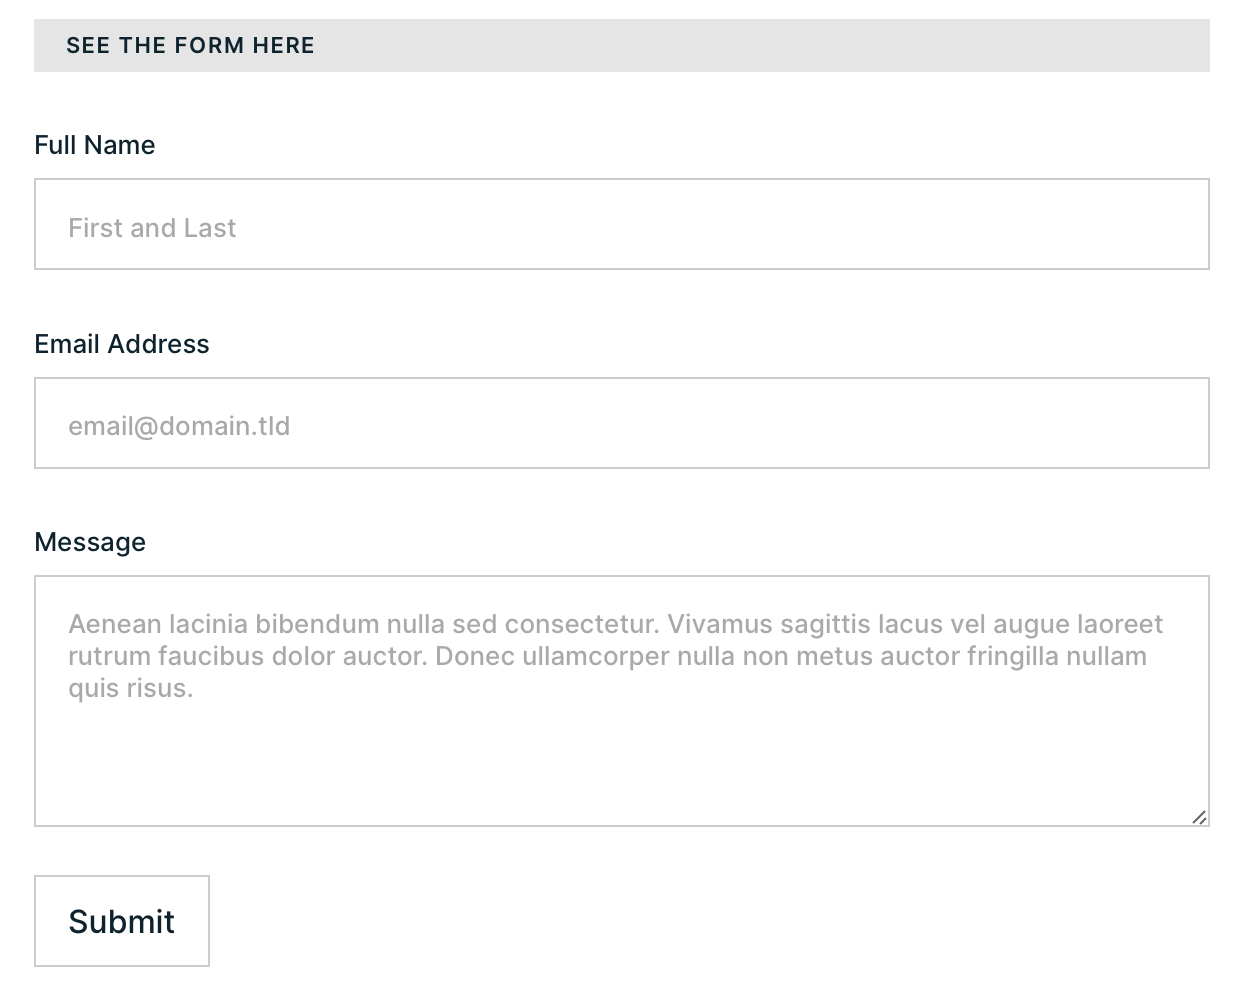
6. In the form library, click on the form you want to use. I choose the simple contact form for my blog.
7. Click 'get the code' on your desired form.
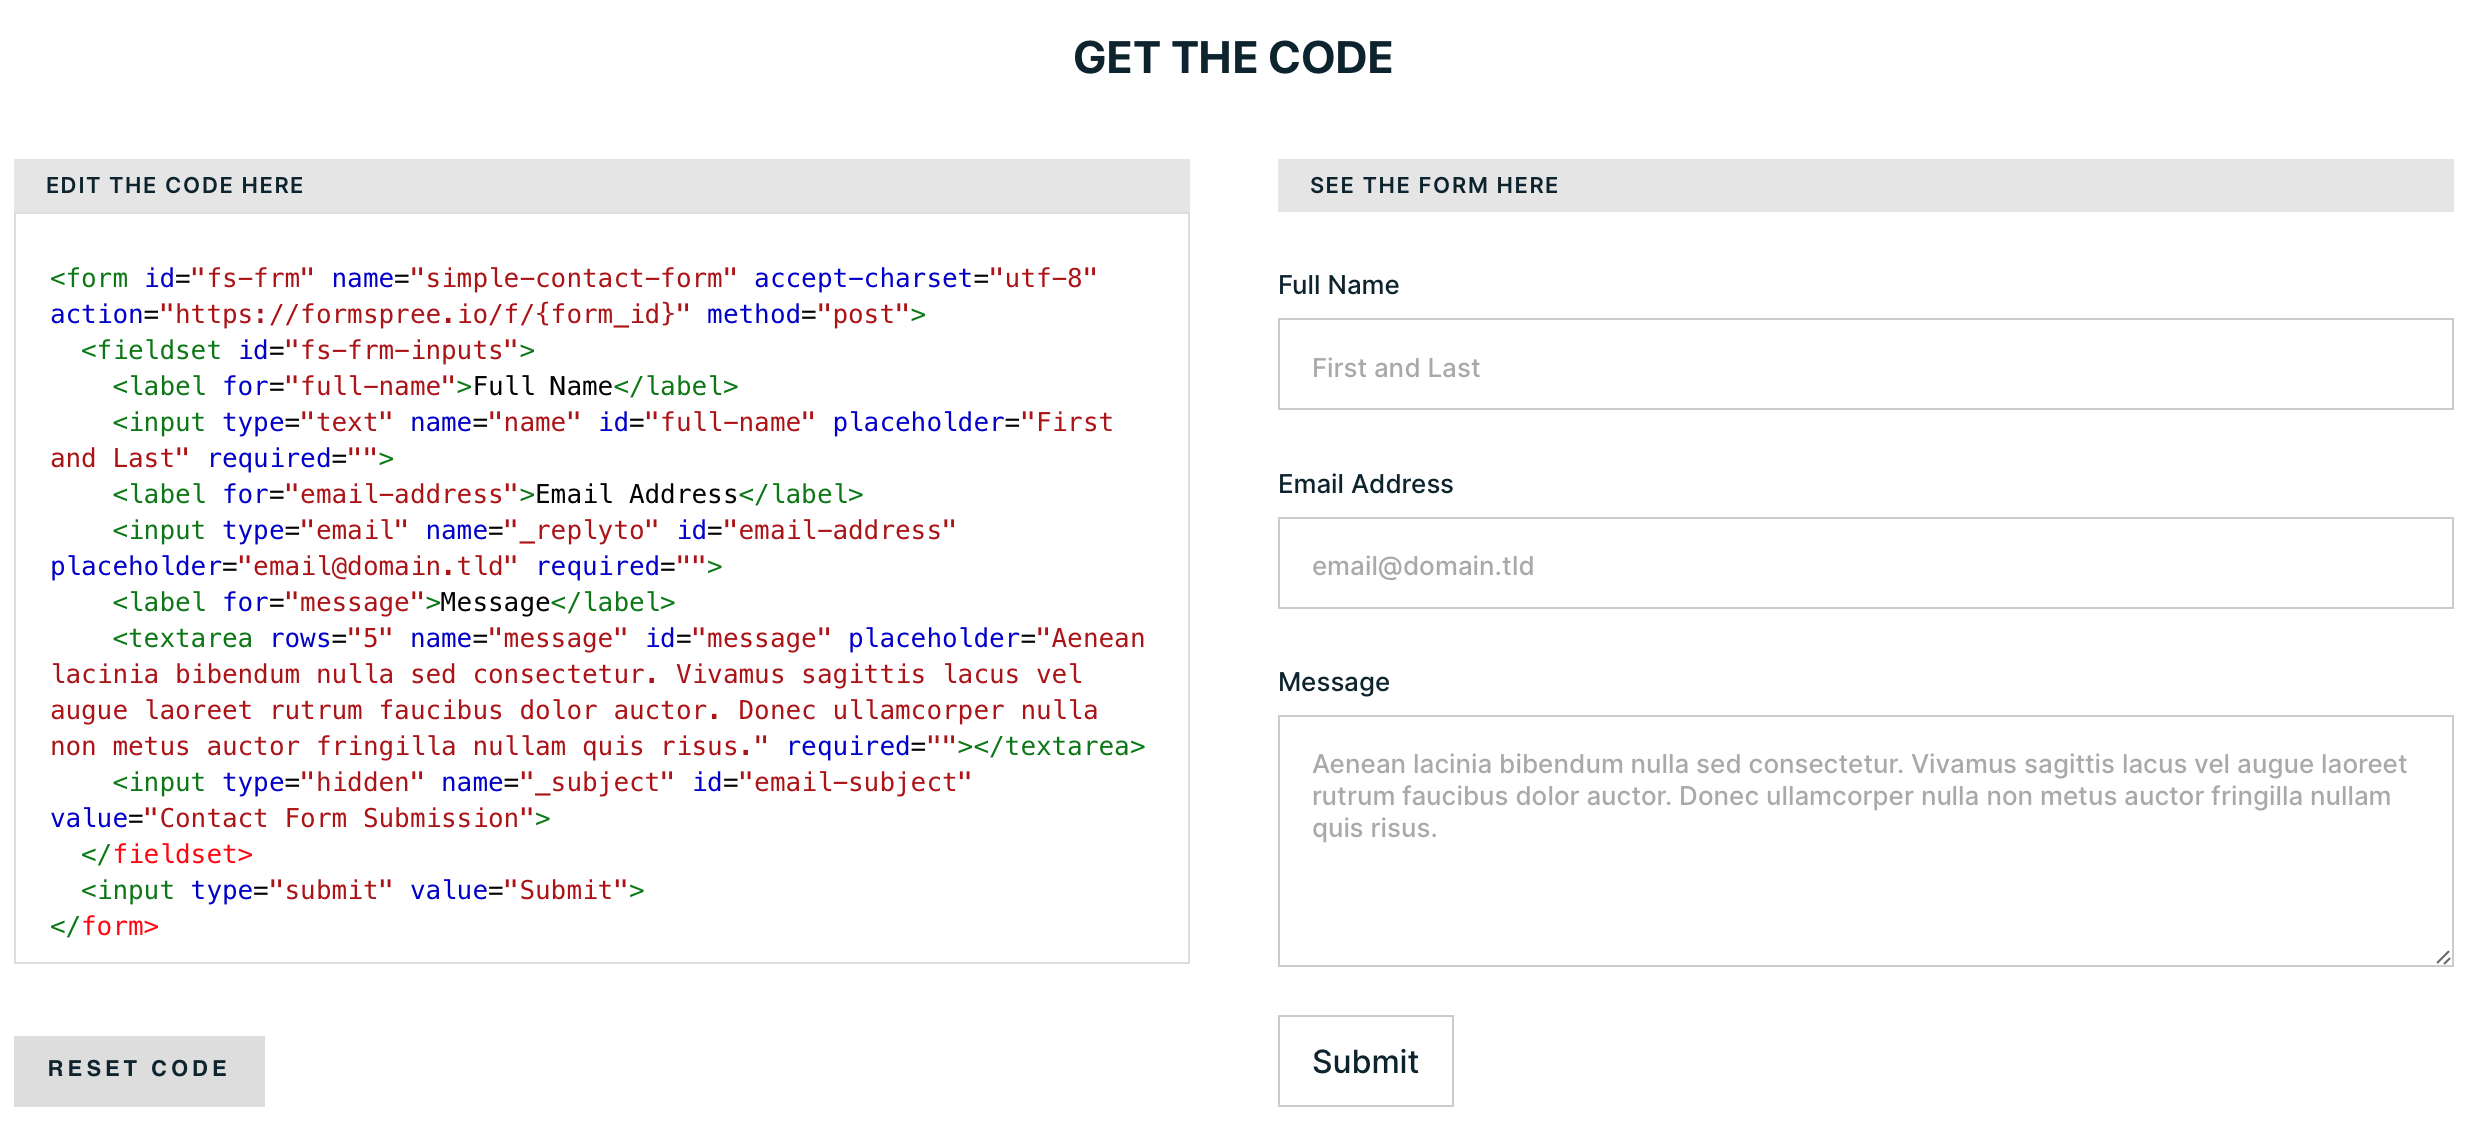
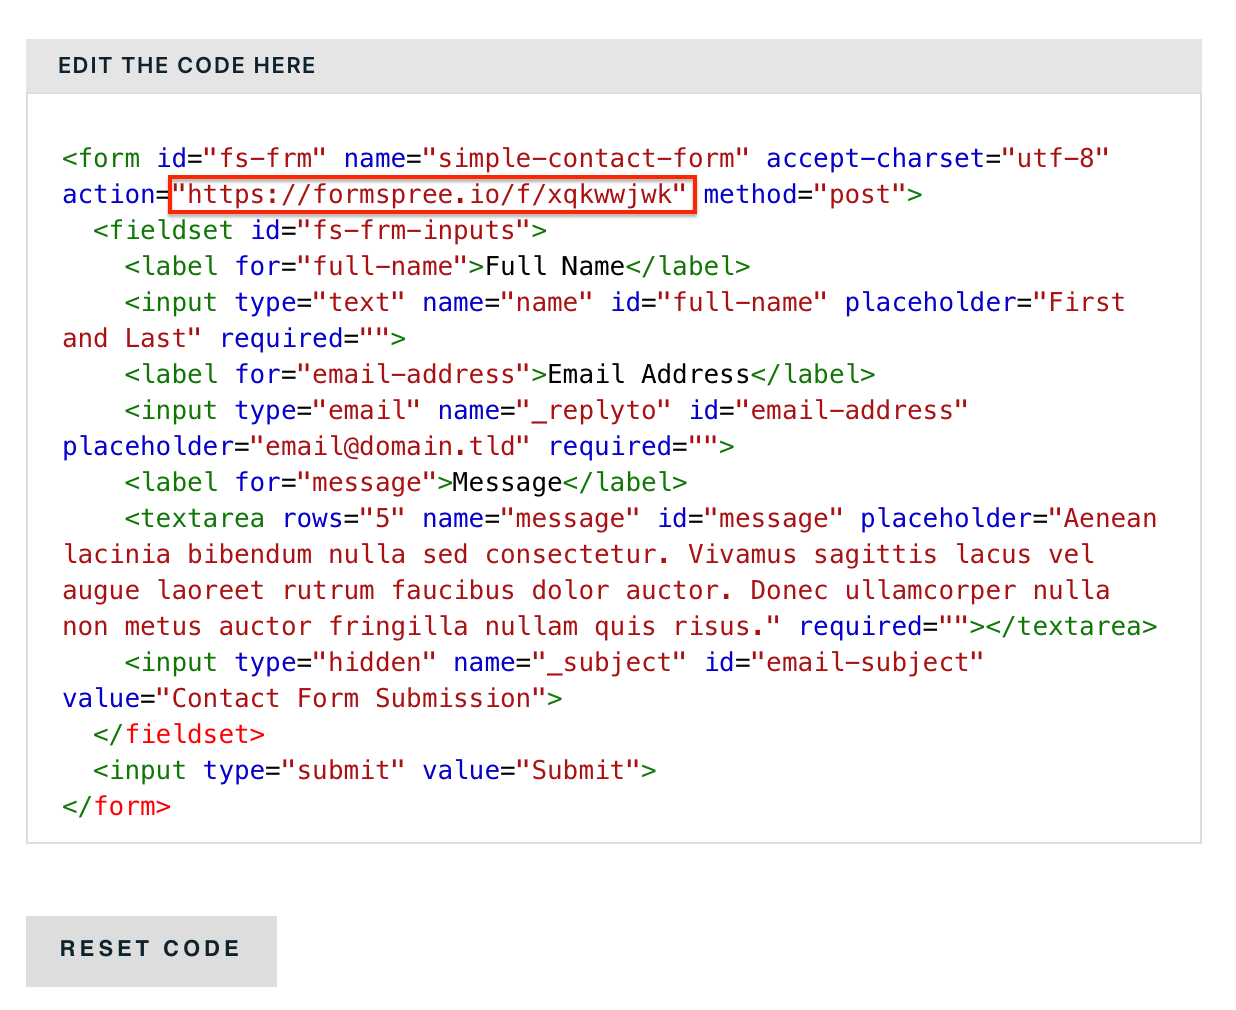
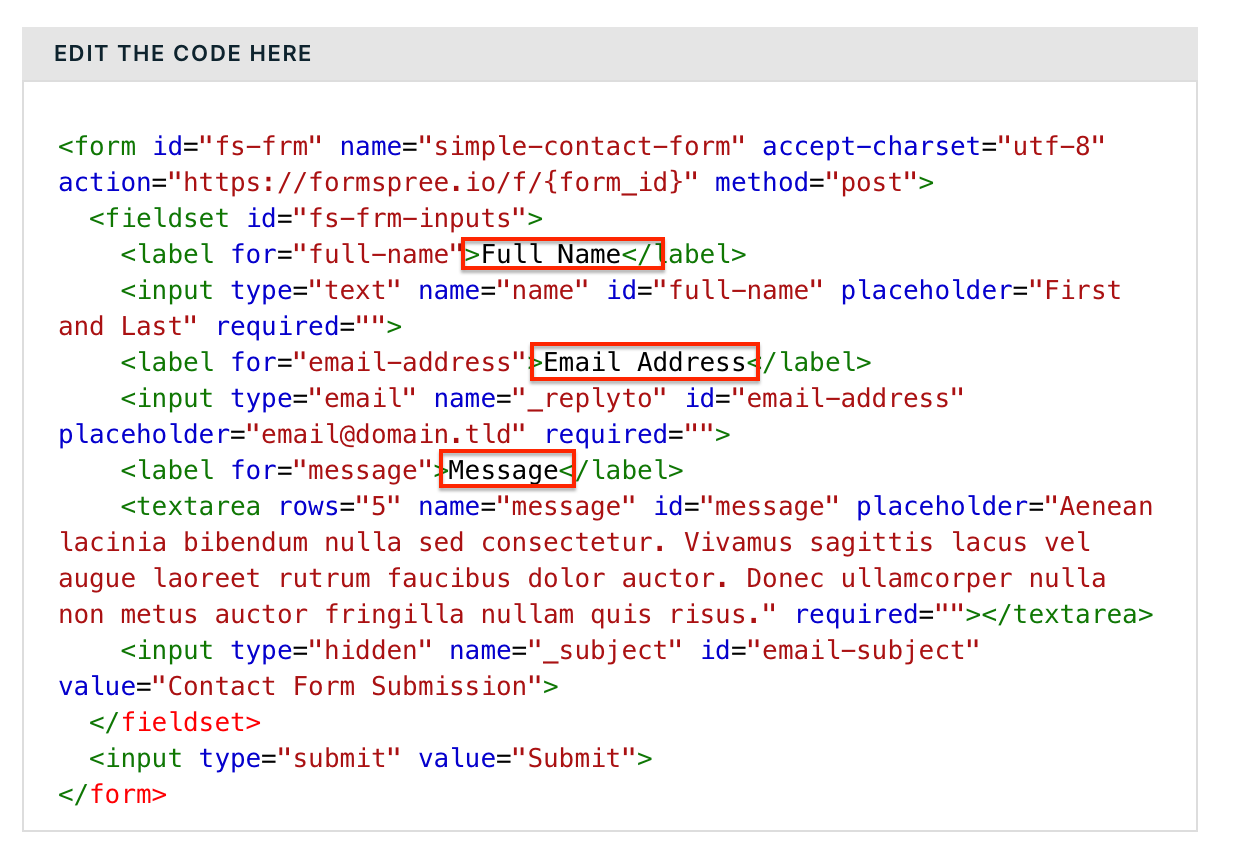
8. Very important step - you have to edit this highlighted section in the picture below and insert your form's endpoint that you copied earlier.
9. Next, edit the code to customise your contact form. For example, I took out the greyed text in the boxes.
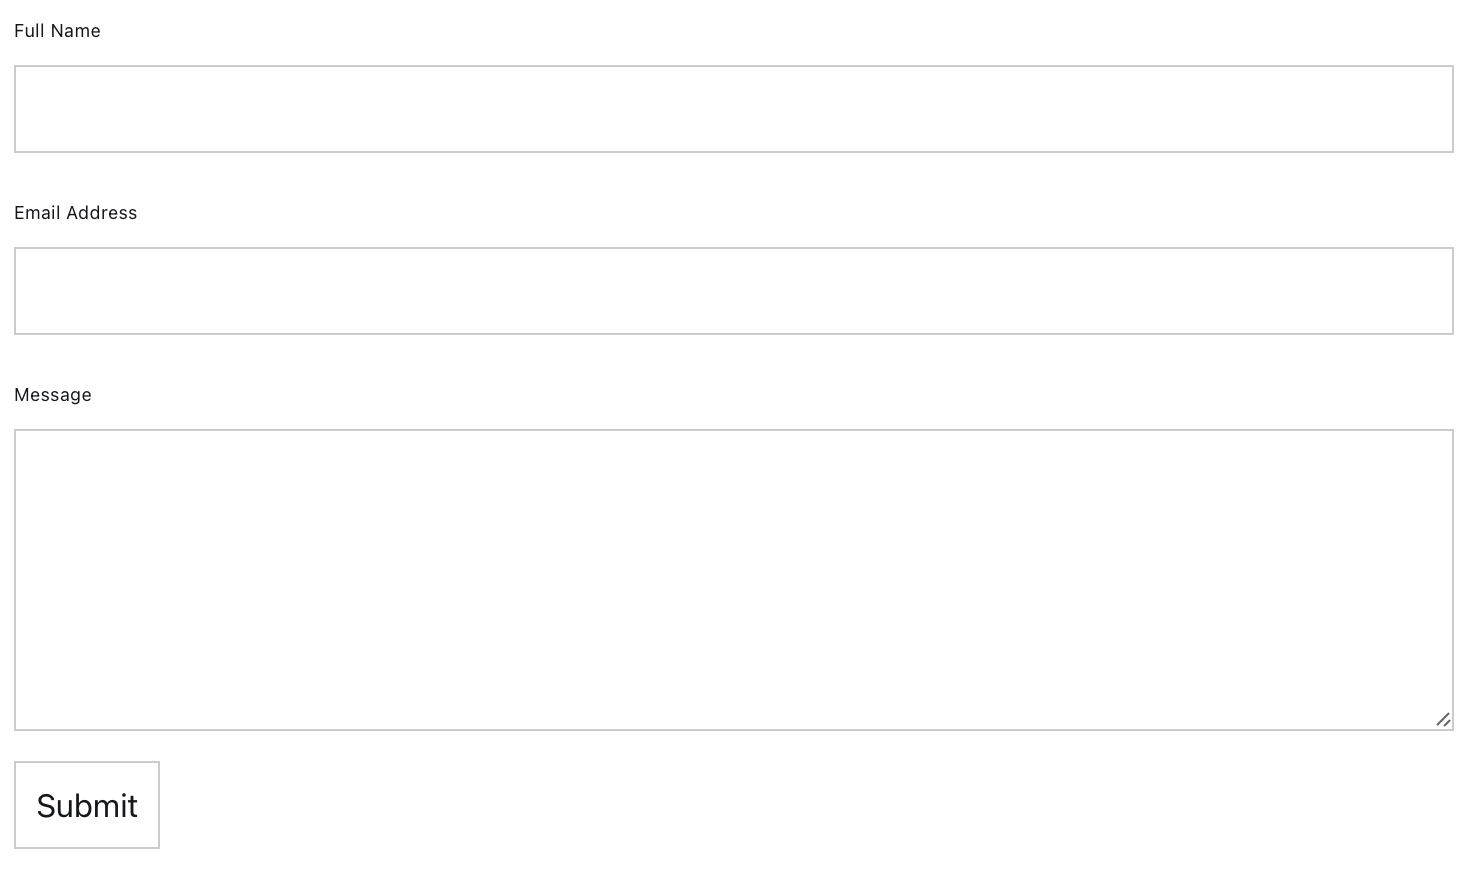
You can see the difference here - The sample version on the left and my edited contact form on the right.
How I did this was by removing the full 'placeholder' sections up to the blue 'required' part of your code:
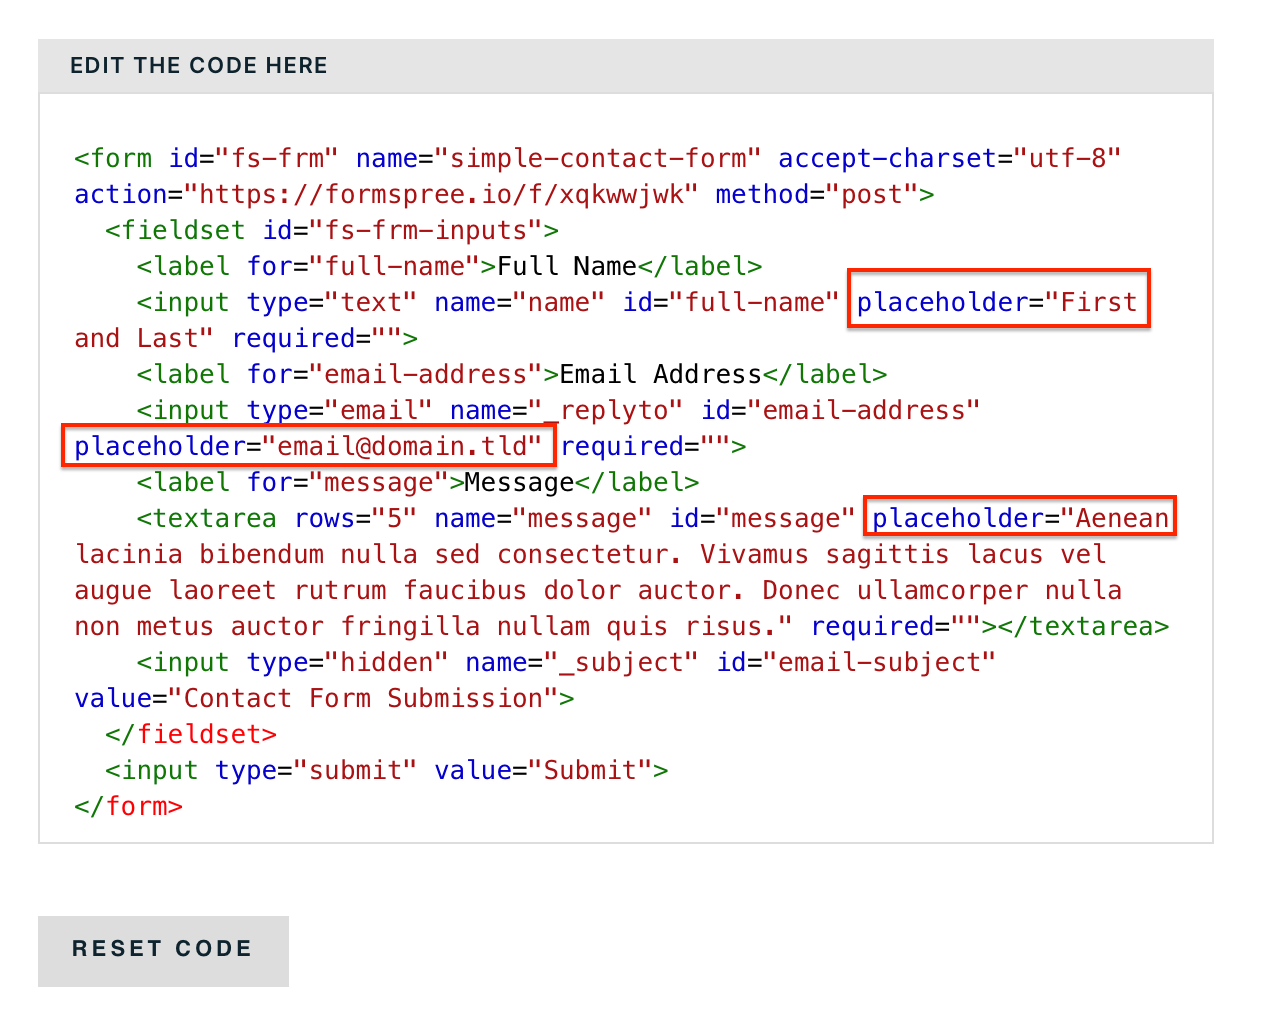
If you want to edit the actual headings in the contact form like 'full name', 'email address' or 'message'. Edit the highlighted sections in the picture below of your code.
10. You can see an example of what your contact form will look like on the right next to your code. If you're happy with it, simply copy all the code.
11. Next, go back to your 'contact' page in Ghost and in this section below, write a little introduction for your 'contact' page.
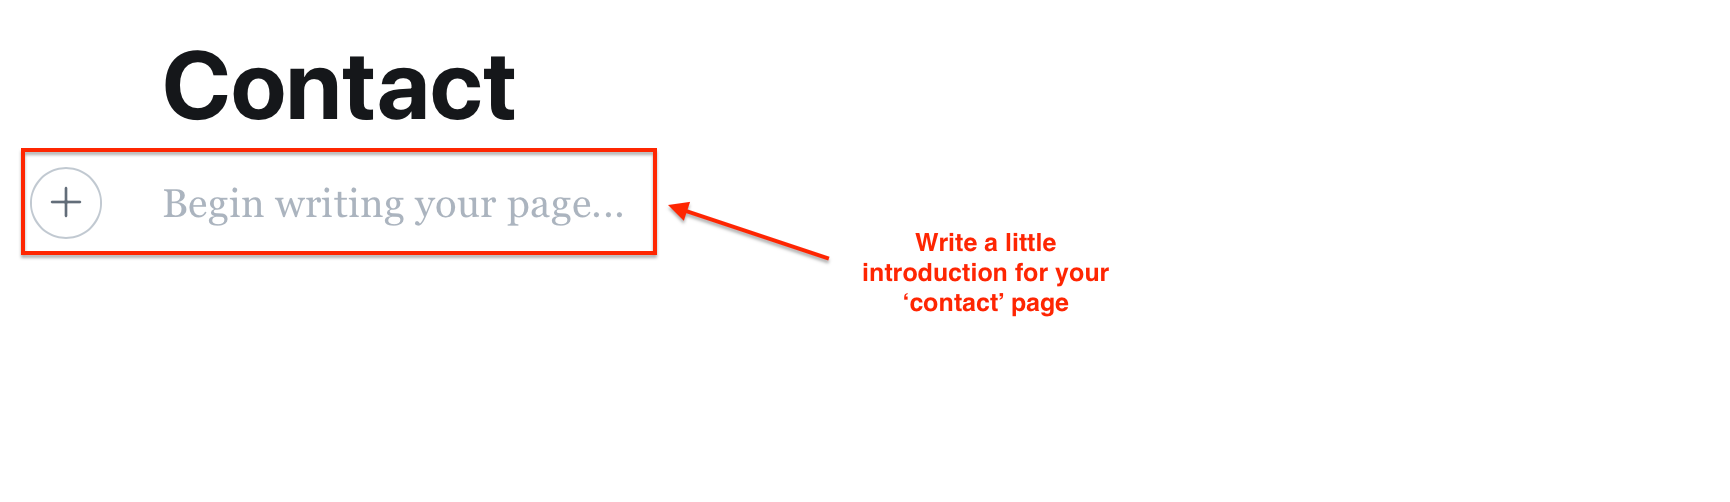
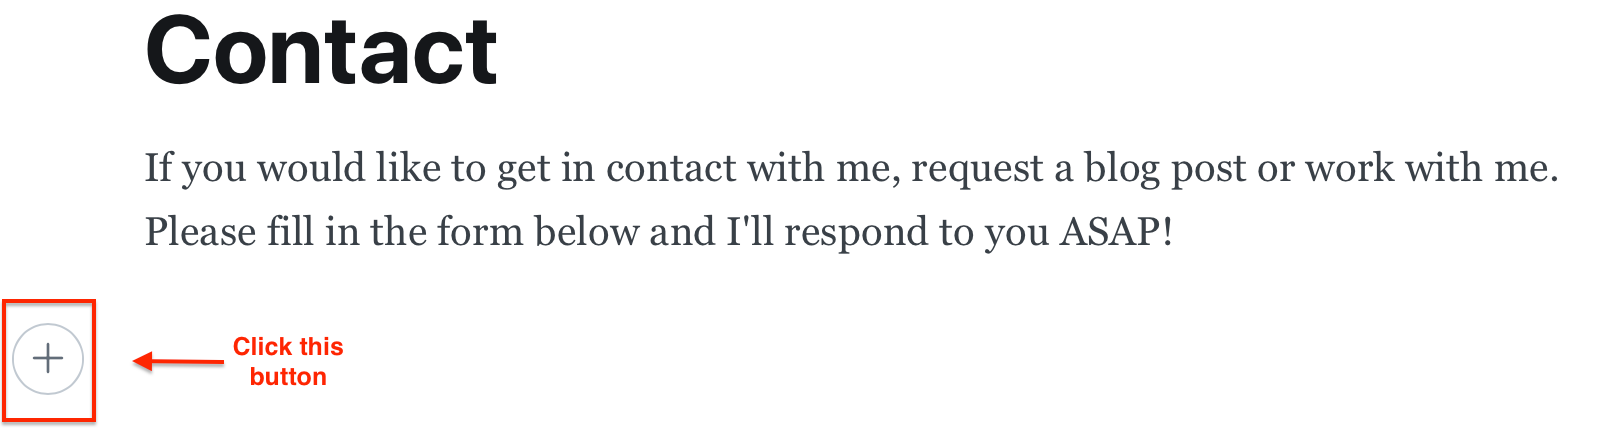
12. Once you've got your introduction, click the plus button.
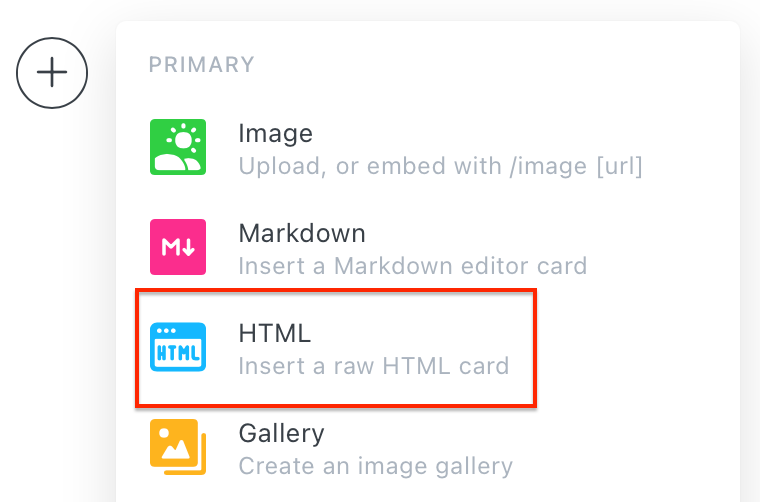
13. Click on the 'HTML' option in the drop down menu.
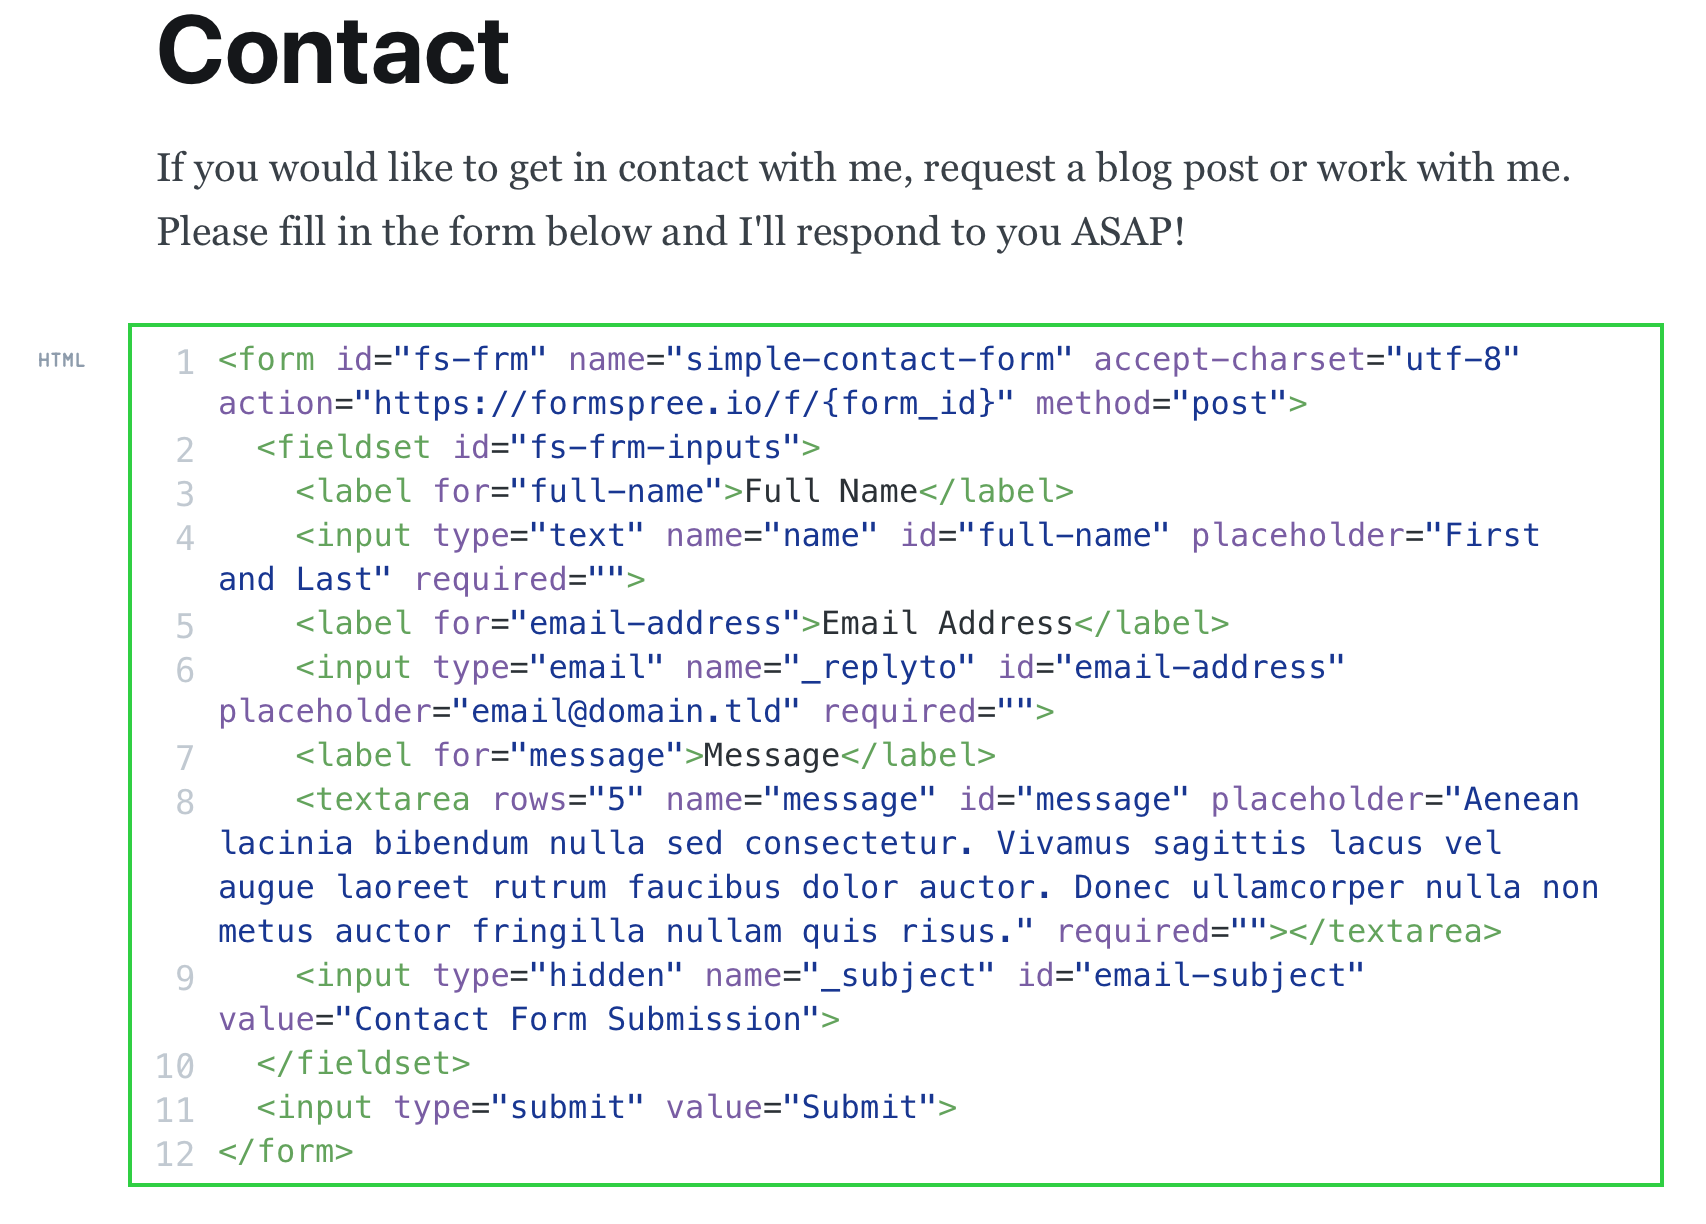
14. Insert your code for the contact form in the HTML box and press the enter button.
15. Now, you should have a contact form on your 'contact' page. All you have to do is publish your page by clicking the publish button up the top right-hand corner.

Links to my other 'how-to' blog posts:
Kirsty Kirsty
 Kirsty
 KirstyKirsty
 Kirsty
In the meantime, if you have any questions please don't hesitate to contact me via the contact form.