#8 HOW TO: Understand pages vs posts on Ghost.org and effectively use tags

Sign into your Ghost.org account and you'll notice, in the left-hand menu, there are subheadings for 'pages' and 'posts'. When I first started my blog I remember thinking... what's the difference?! If you're in the same boat, you've come to the right place.
Before we get into the juicy details about 'pages' vs 'posts'... I know exciting stuff! You're going to want to have your primary or secondary menus made at this point, so you have a location that you want your posts or pages to feature. These menus should be tailored to your niche, so for me as a travel and lifestyle blogger, I have 'travel' and 'lifestyle' primary menus and 'contact' and 'privary policy' secondary menus. If you haven't set up your primary or secondary menus yet, or you don't even know what they are... you might want to look at this post:
 Kirsty
This blog post will cover:
- STEP ONE: Knowing the difference between a page vs a post
- STEP TWO: How to create a page
- STEP THREE: How to create a post
- STEP FOUR: How to use tags to link your posts to your primary or secondary menu
- Links to my other 'how-to' blog posts
If you need help with other aspects of Ghost.org/Google Domains, follow my 'how-to' blog post series linked at the bottom of this blog. A new 'how-to' blog post will be released every Thursday.
STEP ONE: Knowing the difference between a page vs a post
Pages and posts are your two options for creating content on your site. So, it's important you know the difference...
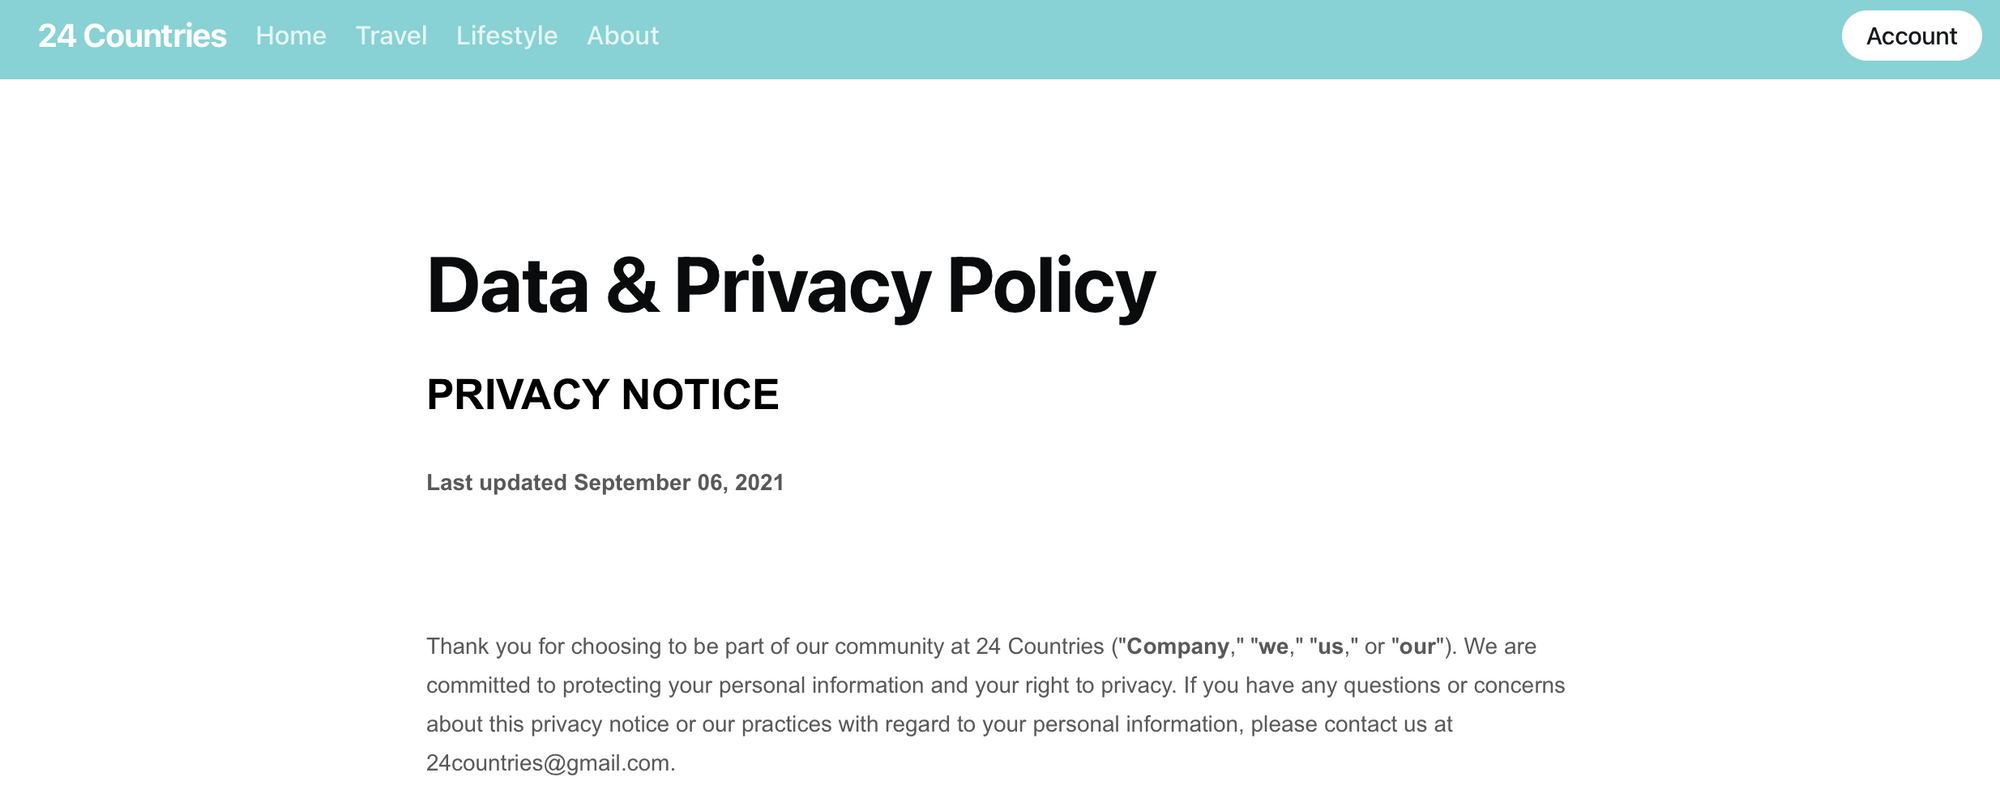
- A page is for one-off content, usually tucked away in one of your primary or secondary menus and it doesn't make an appearance on your main feed. For example: your 'about', 'privacy policy' or 'contact' tabs will all usually be pages. In these pages, you don't need to post regularly, you just need the information to remain there constantly so people can access it. Like this...
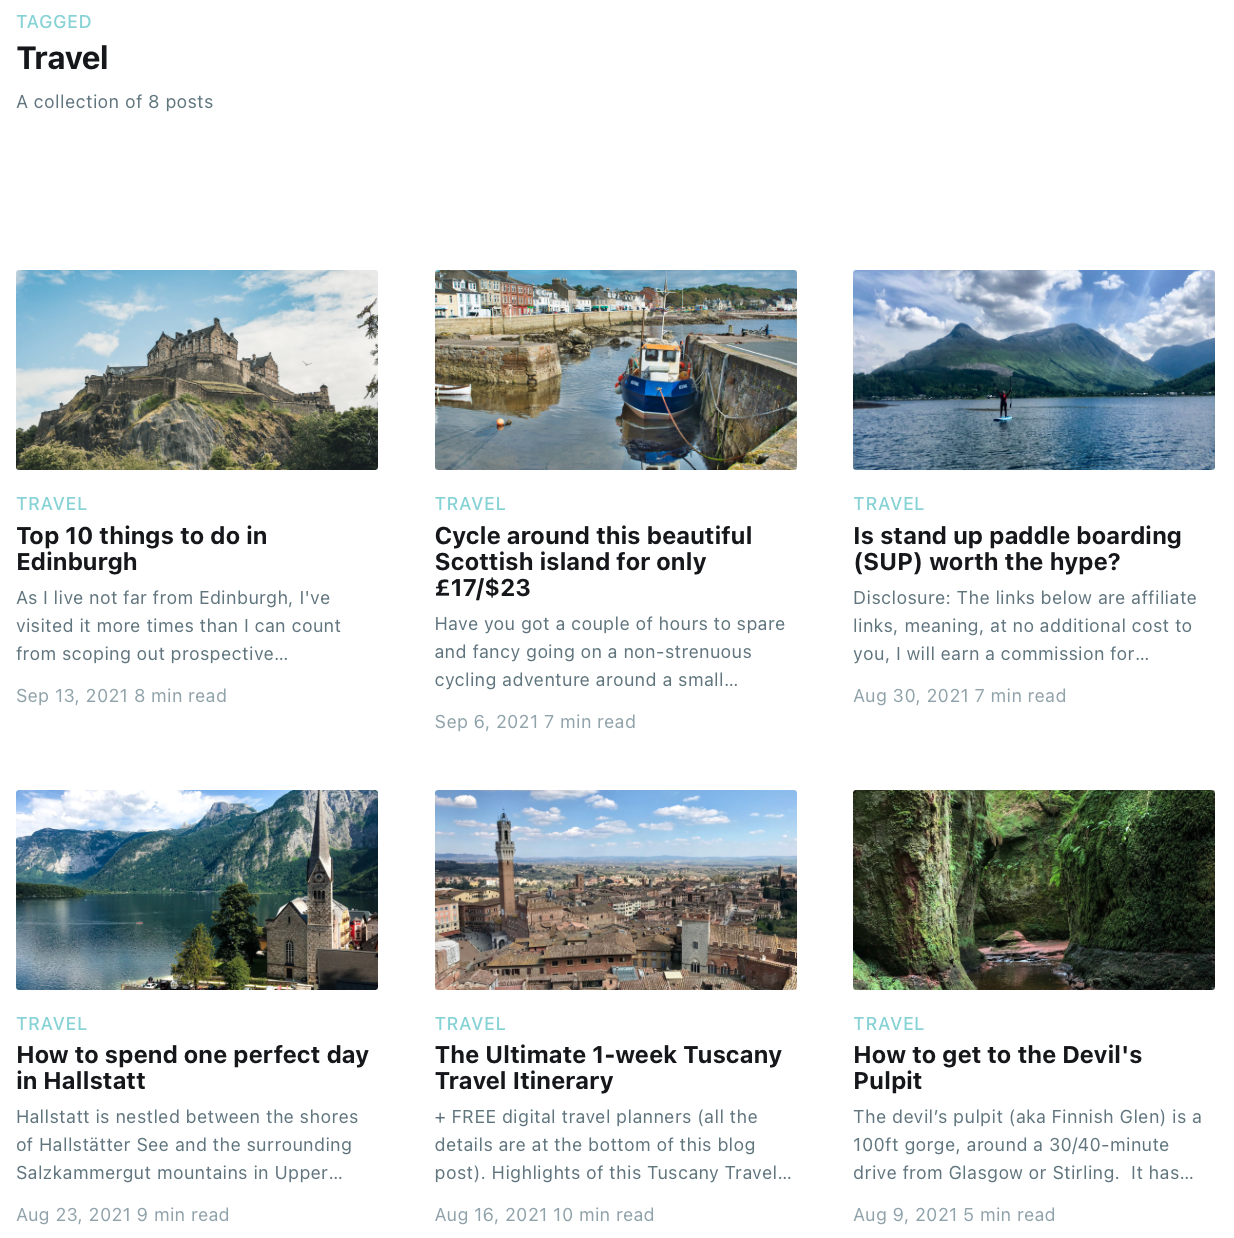
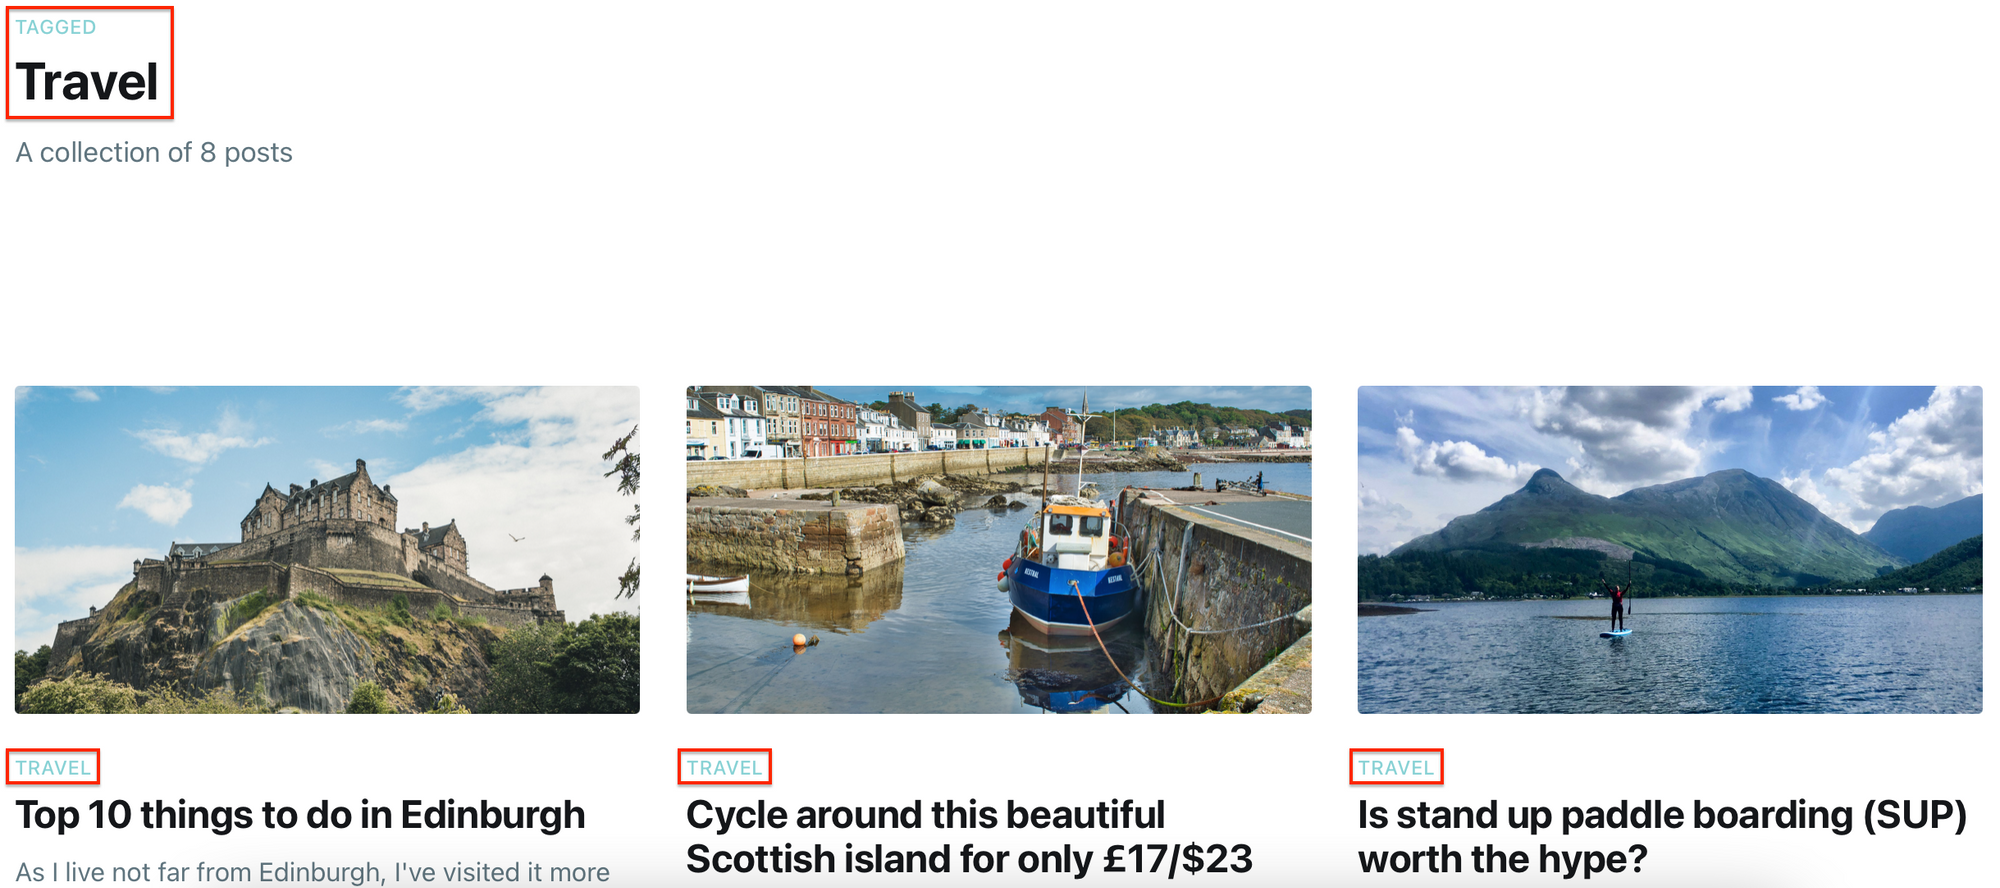
- On the other hand, a post (aka a blog post) is for when you will be creating content on a regular basis. For example, when I write about my travel experience/tips, I will write a post as I will be writing one every Monday. You can also group all the posts together under a primary or secondary menu by using tags. Like this...
STEP TWO: How to create a page
You'll want to create a page for your static content, like your 'about' page, 'contact' page or 'privacy policy'.
Follow this link and read through STEPS ONE and TWO to learn about how to create a page and get it to feature in your primary or secondary menu headings.
Kirsty
STEP THREE: How to create a post
You'll want to create a post for when you are creating content on a regular basis.
To create a post, follow these instructions...
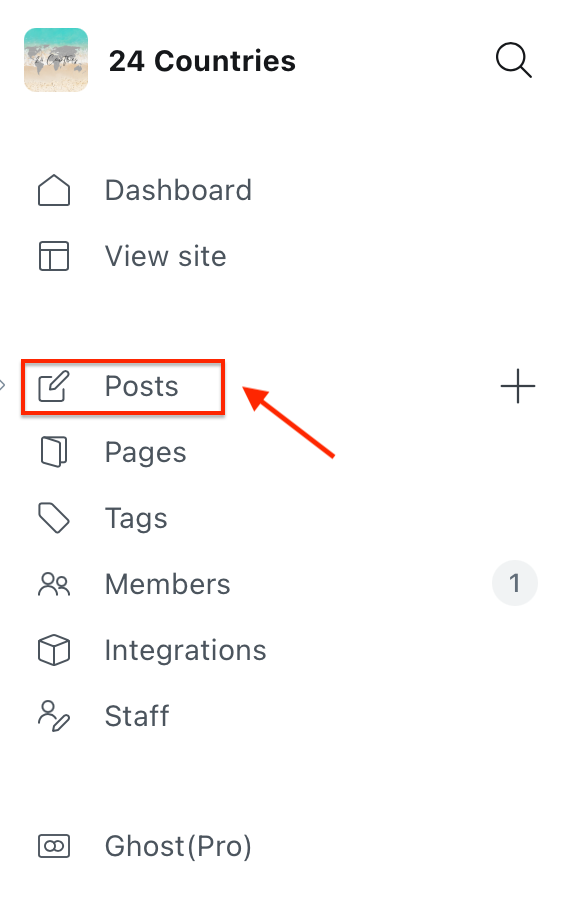
- You need to be logged into your Ghost account and click the 'posts' button on the left-hand menu.
2. Click 'new post' up the top right-hand corner.

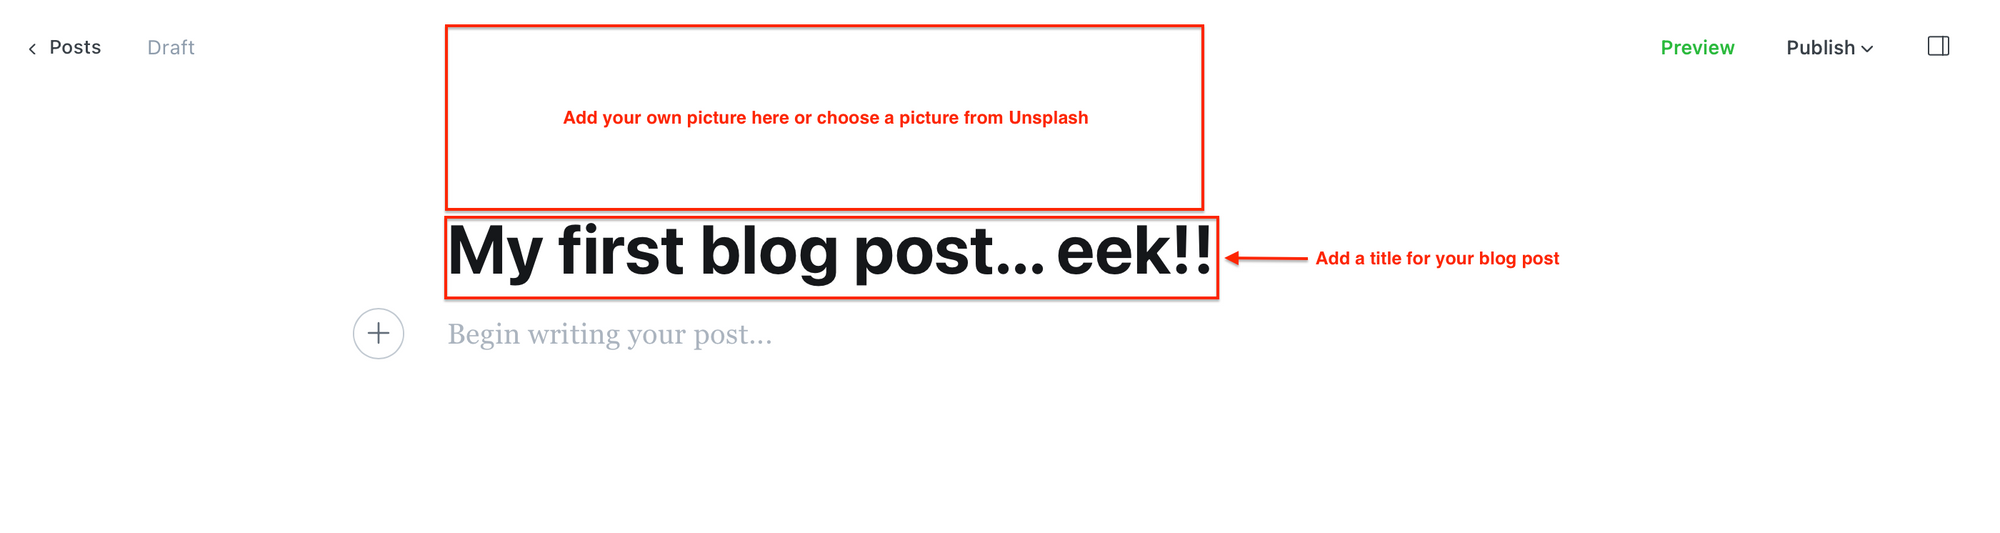
3. Start writing your blog post... Add a title and upload/choose a picture. This post will save as a draft until you choose to publish it. I'll cover writing your first blog post in more detail later in the 'how-to' series but for now, I just want to show you how to create a post and link it to your primary or secondary menus using tags.
STEP FOUR: How to use tags to link your blog posts to your primary or secondary menu
I remember writing my first travel blog post in Ghost.org and I couldn't, for the life of me, figure out how to get it to feature in my 'travel' primary menu. That was until I learned about the importance of using tags.
This can get quite confusing, just take it step-by-step and if you have any questions, please get in contact.
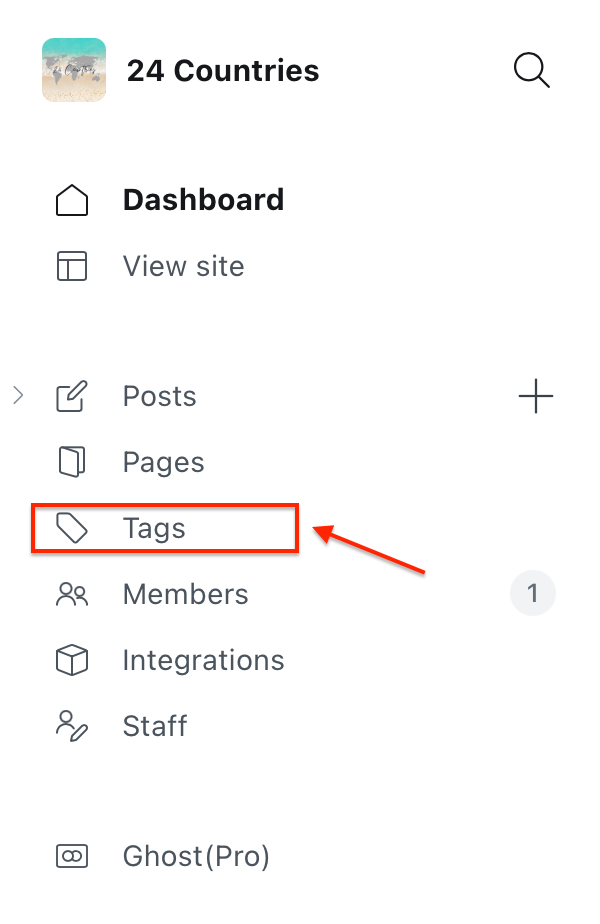
- When you're logged into your Ghost.org account, click 'tags' in the left-hand column.
2. Click 'new tag' up the top right-hand corner.

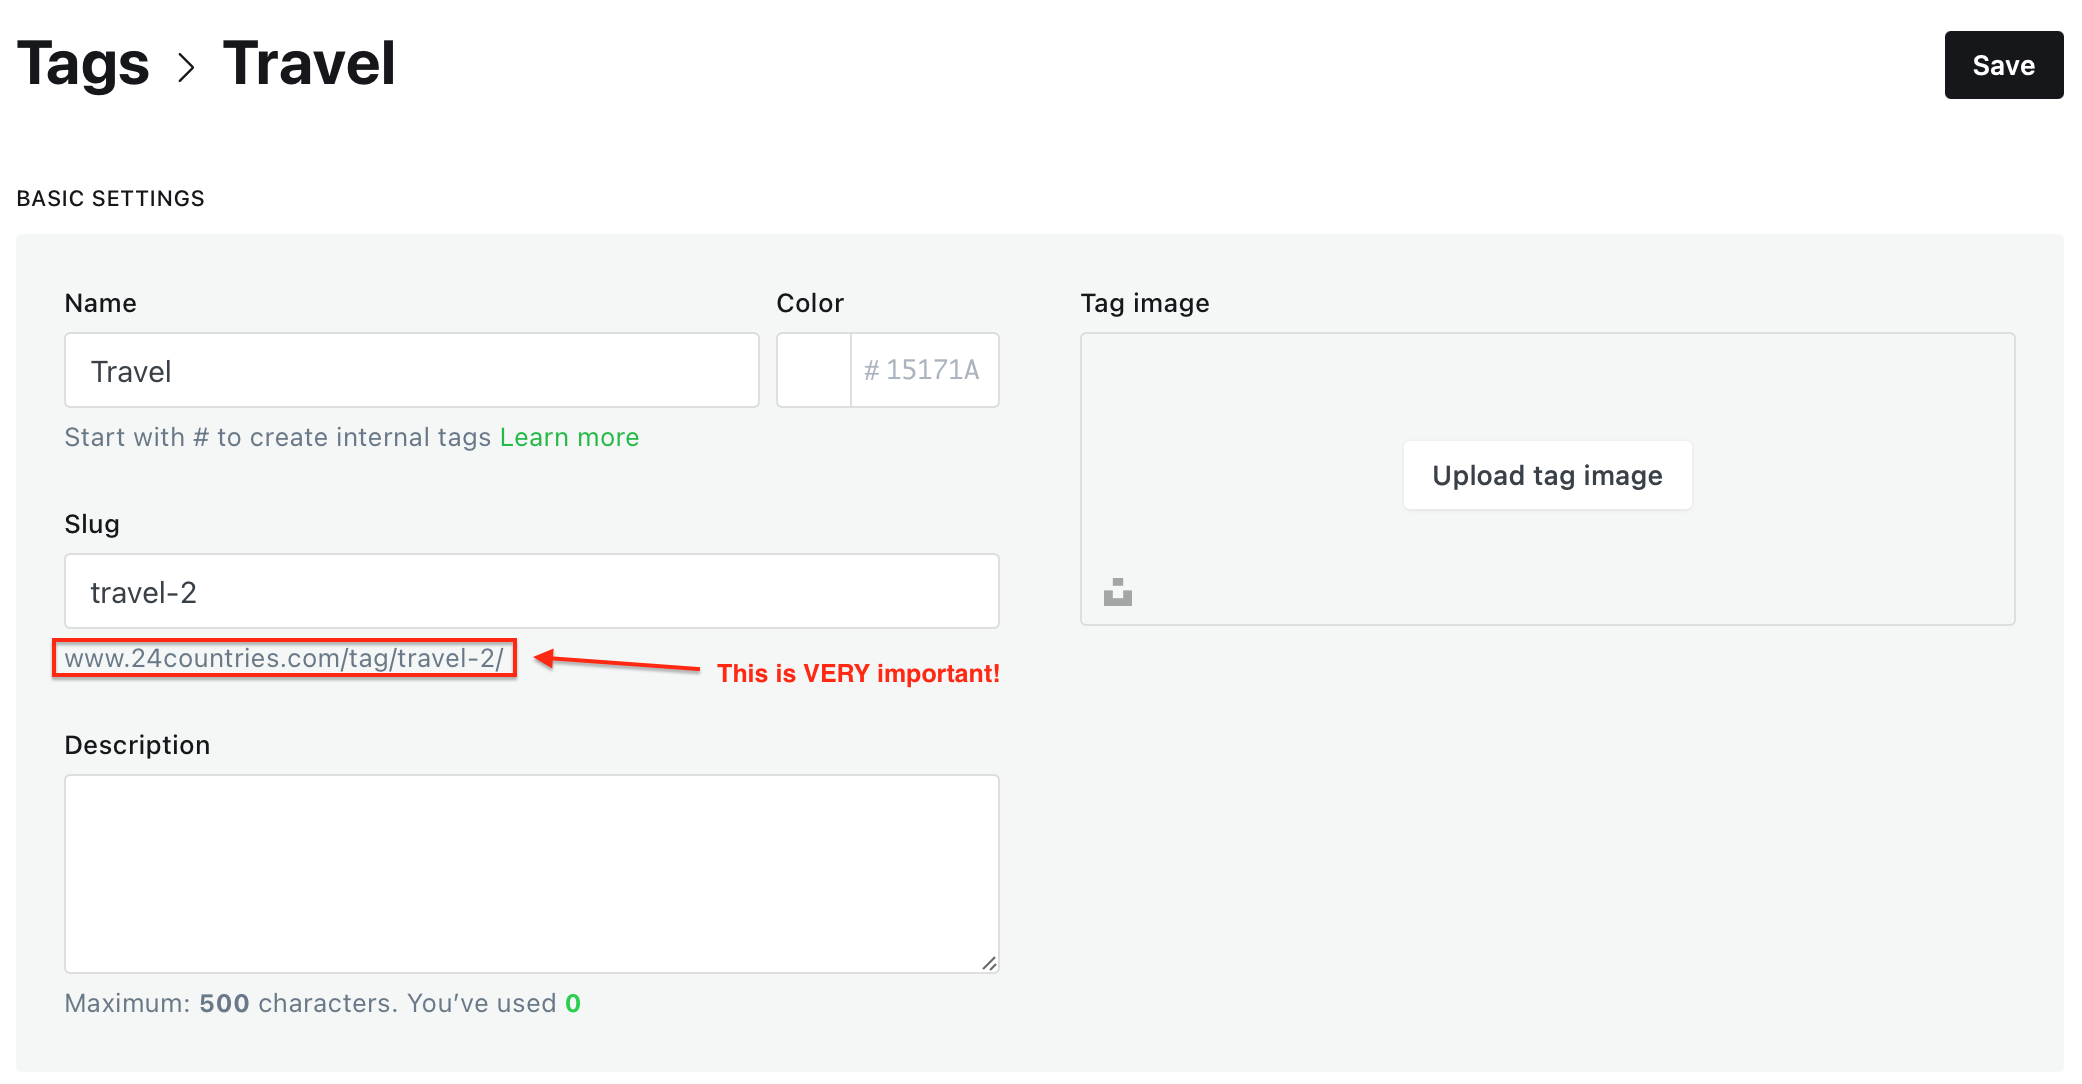
3. Set up your new tag. Firstly, come up with a name for your new tag. I named my tags after my niche; 'travel' and 'lifestyle'. This should automatically generate the 'slug' details from the tag name and if not, just manually type in the tag name in the 'slug' box. The slug URL is going to be very important for linking your tagged posts to your menus so you might want to take a note of it for later. Lastly, click 'save' up the top right-hand corner.
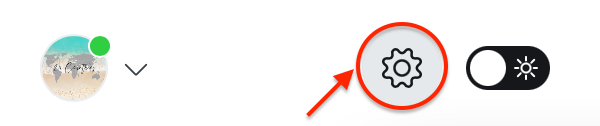
4. Next, click on your settings button at the bottom of the left-hand column when logged into your ghost account.
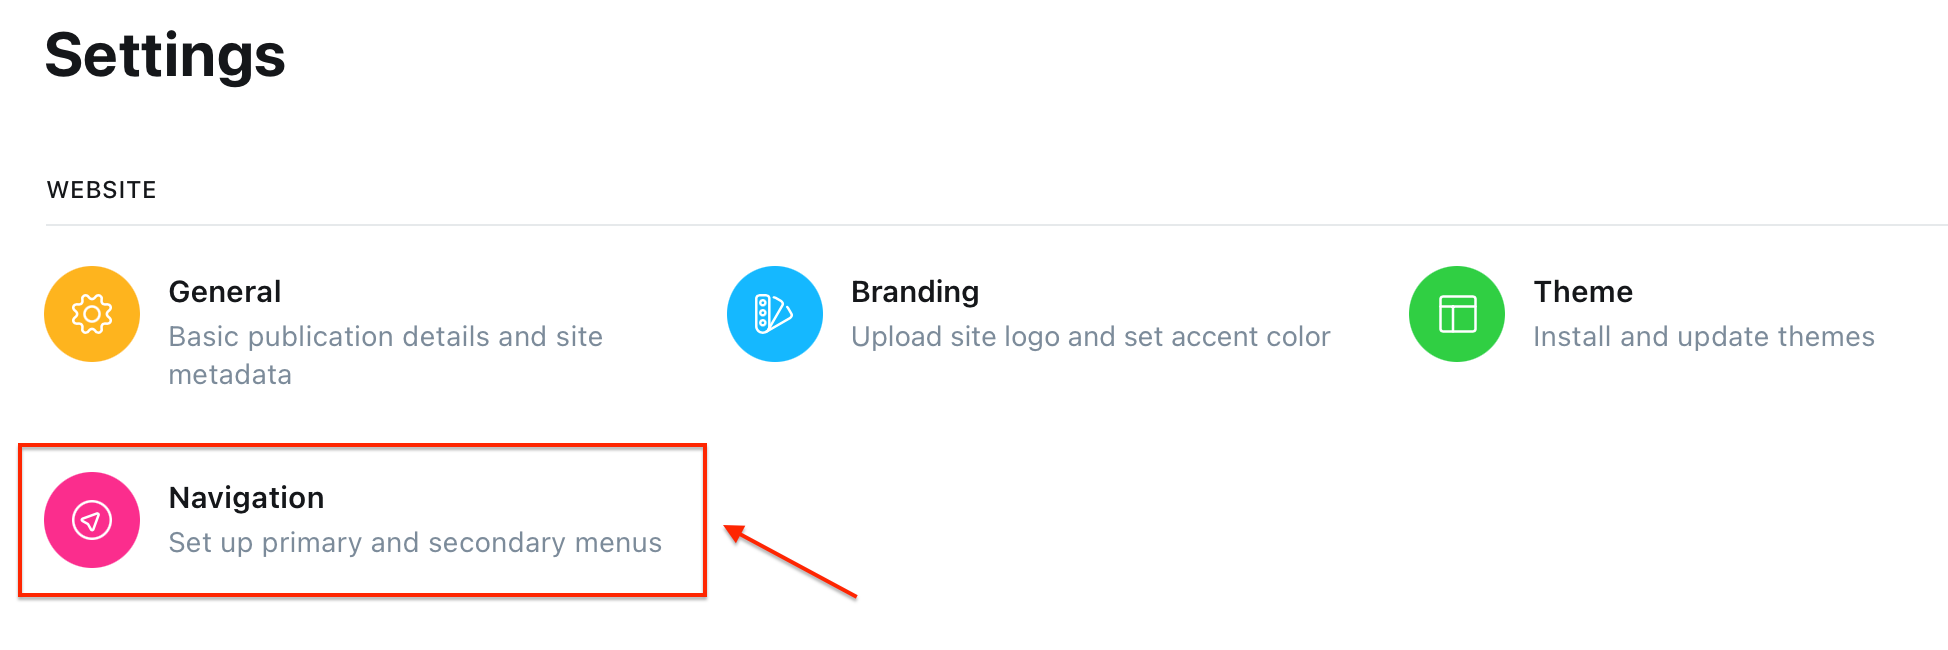
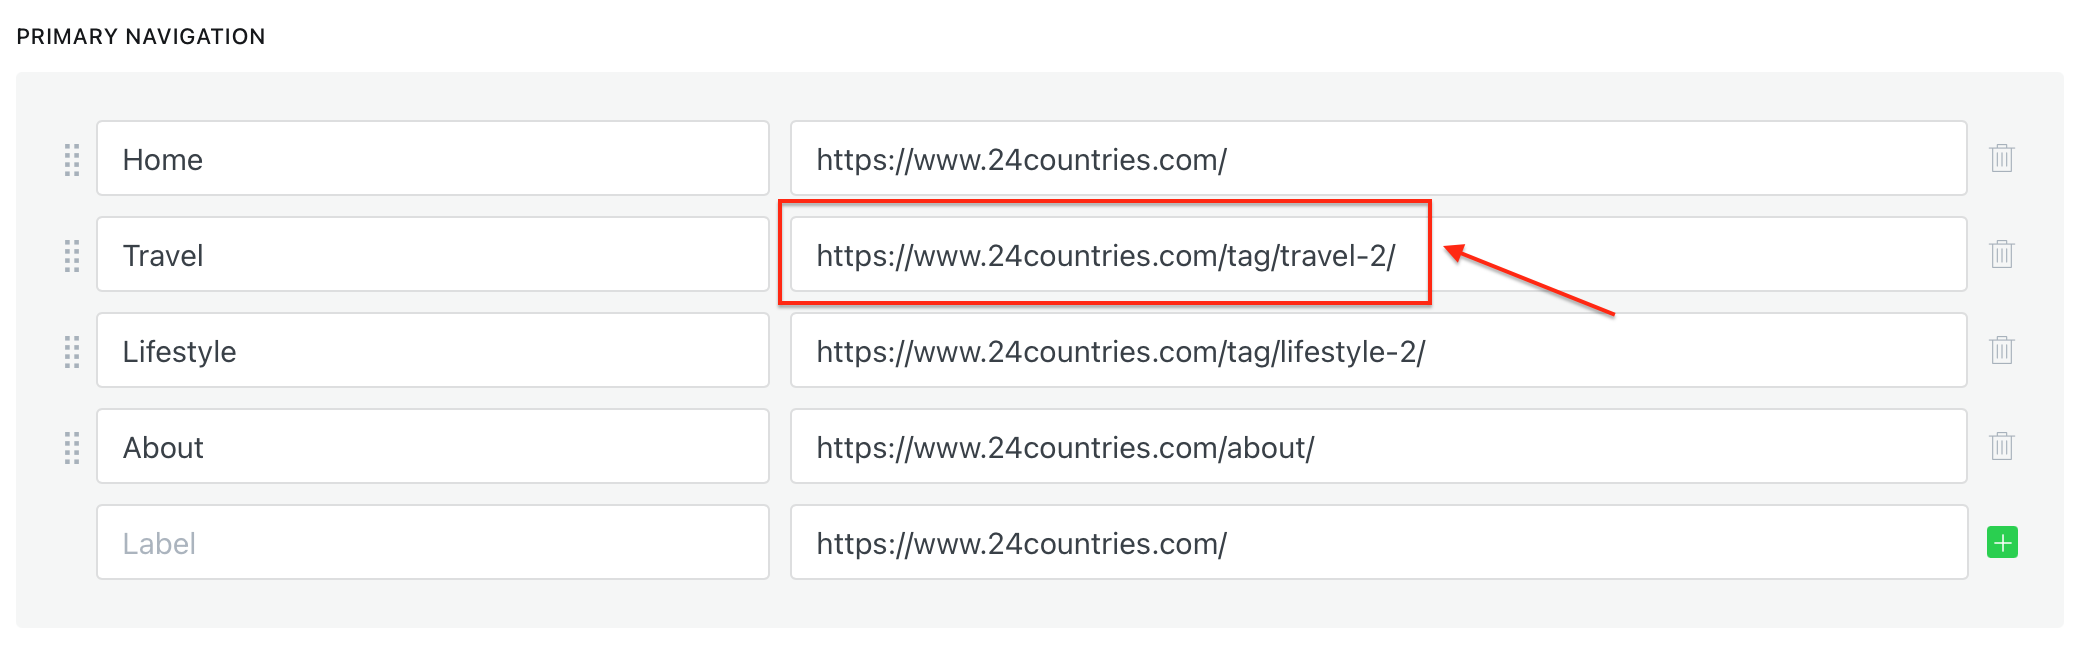
5. Within your Ghost settings and under the 'website' section, click on the 'navigation' tab (highlighted in the picture below).
6. To link the tag to your primary or secondary menus... you NEED to make sure your primary or secondary menu URL (pictured below) matches your tag slug URL (above). This will allow any posts with the tag to feature in that primary or secondary menu.
Like this...
7. Go back onto your blog post that you created in step three and click this button up the top right-hand corner.

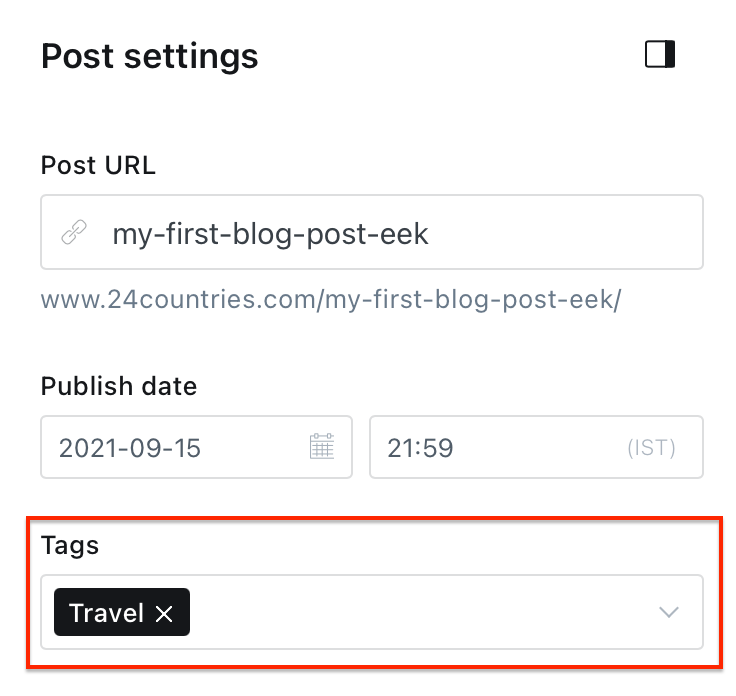
8. Go to the 'tags' section and choose from the tags you have created. So, if I've written a travel post, I'll select the 'travel' tag.
9. Finally, when you publish this blog post, it should now feature under your desired primary or secondary menu. Just make sure to continue tagging future blog posts with the tags you've made and they should all start to group together as a collection under your desired primary or secondary menu.
Links to my other 'how-to' blog posts:
Kirsty Kirsty
 Kirsty
 Kirsty
 Kirsty
 KirstyKirsty
In the meantime, if you have any questions please don't hesitate to contact me via the contact form.