#6 HOW TO: Create the ideal primary and secondary menus for your Ghost.org blog to make your site more user-friendly

The best websites are well organised and structured. They are easy-to-navigate and you can find the information you're looking for quickly. This is important because the harsh truth is, in this day and age with so many other websites grabbing at our attention, no visitor to your site is going to spend more than 10 minutes trying to find something if its confusing and not easy to navigate. You need to make your site user-friendly so that it creates a good first impression.
So... to make your site easy-to-navigate you have to create good primary menus, which allow the reader to understand and navigate your niche, and secondary menus, which cover the essentials like contact form and privacy policy.
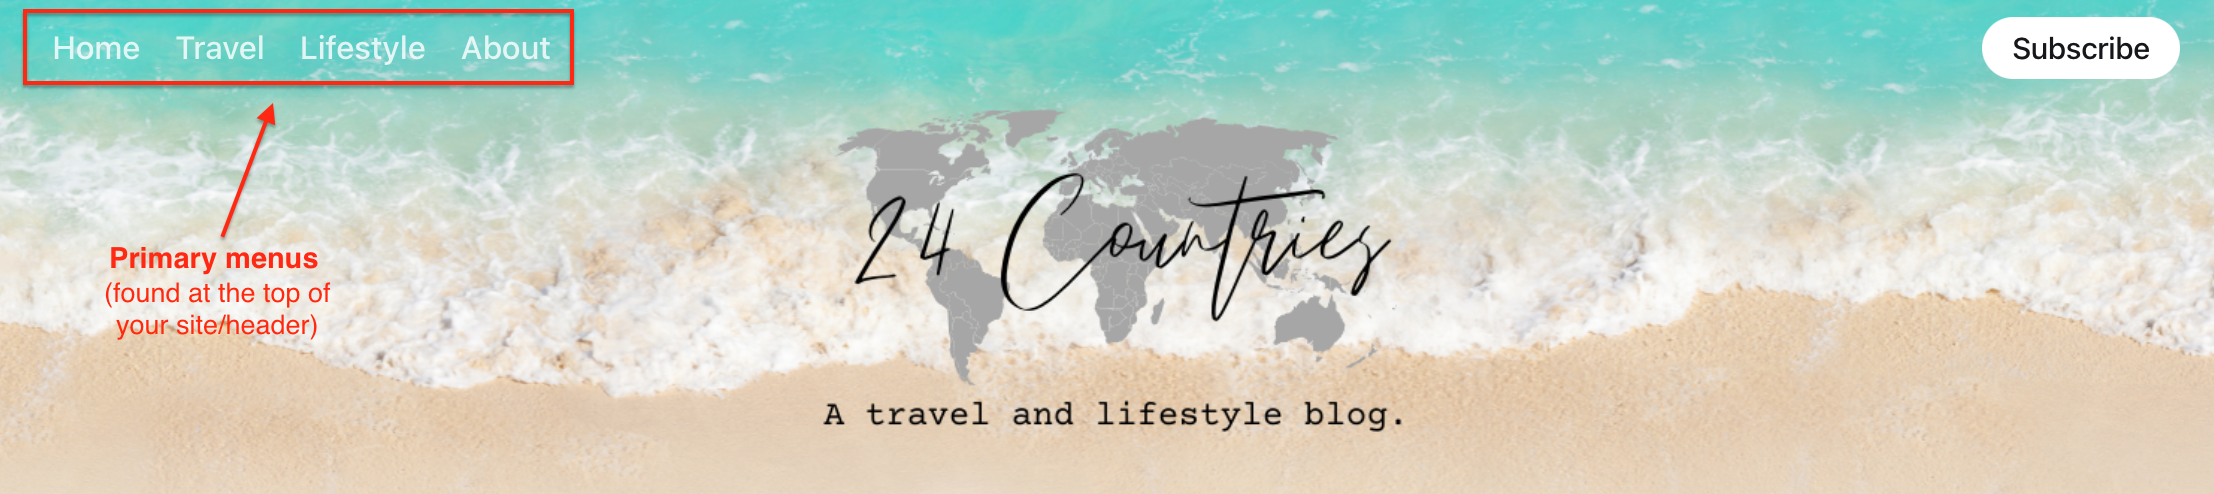
What are primary menus? The primary menus for your site are the headings displayed at the top of your site or in the header of your theme. For me, I use the casper Ghost theme, so they are displayed up the top left-hand corner (picture below).
What are secondary menus? The secondary menus for your site are displayed at the bottom of your blog or in the footer of your theme. For me, again, I use the casper Ghost theme, so they are displayed down the bottom of my site (picture below).

This blog post will cover:
- STEP ONE: Accessing the 'navigation' section of Ghost.org
- STEP TWO: Creating the primary menus for your site
- STEP THREE: Creating the secondary menus for your site
- Links to my other 'how-to' blog posts
If you need help with other aspects of Ghost.org/Google Domains, follow my 'how-to' blog post series linked at the bottom of this blog. A new 'how-to' blog post will be released every Thursday.
STEP ONE: Accessing the 'navigation' section of Ghost.org
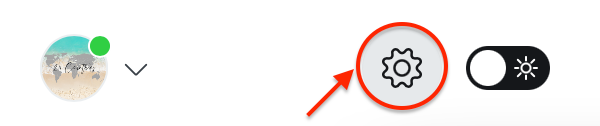
1. You can find 'navigation' under settings in Ghost. To access your Ghost settings, you will need to be logged into your Ghost.org account and then click on this button.
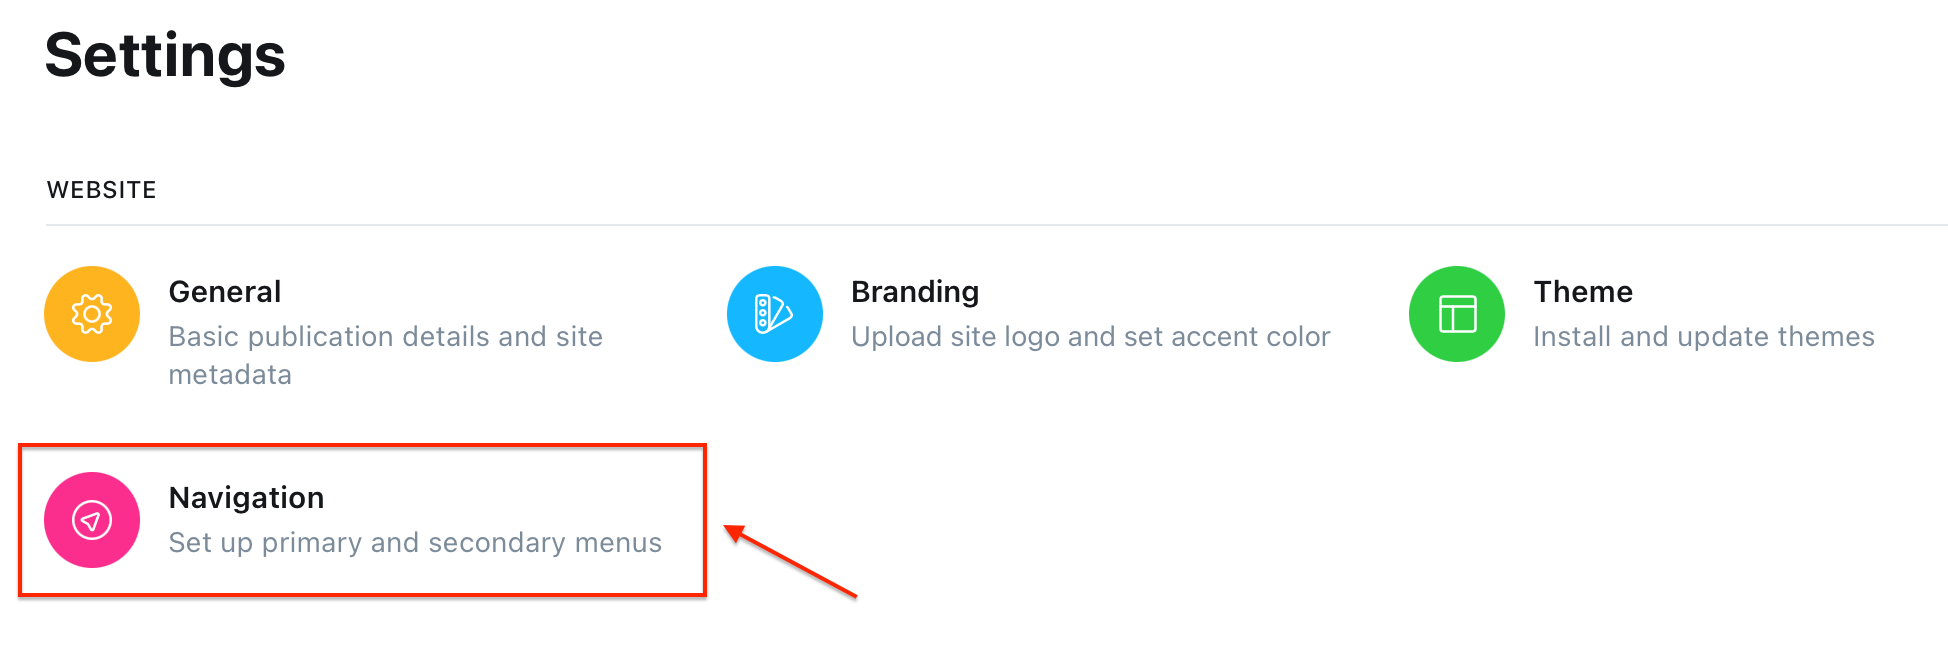
2. Within your Ghost settings and under the 'website' section, click on the 'navigation' tab (highlighted in the picture below).
STEP TWO: Creating the primary menus for your site
3 tips for creating your primary menus...
- Make your primary menus tailored to your niche. I'm a travel and lifestyle blogger so I decided to make one primary menu for each so the reader knows exactly where to go on my blog depending on what they are looking for.
- Make a select few primary menus when you first start your blog, you don't want loads of menus that confuse your reader and plus, you can add more primary menus later down the line.
- Make sure you have a 'home' tab and an 'about' tab. The 'home' tab makes your site more user-friendly as it allows the reader to always be able to navigate back to the home page. The 'about' tab is especially important if you are a blogger. It allows your site to be more personable. Make sure you inject your personality, why you started your blog and what the readers will get out of your blog. I will be making a future 'how-to' blog post which covers writing your 'about' page.
Creating your primary menus...
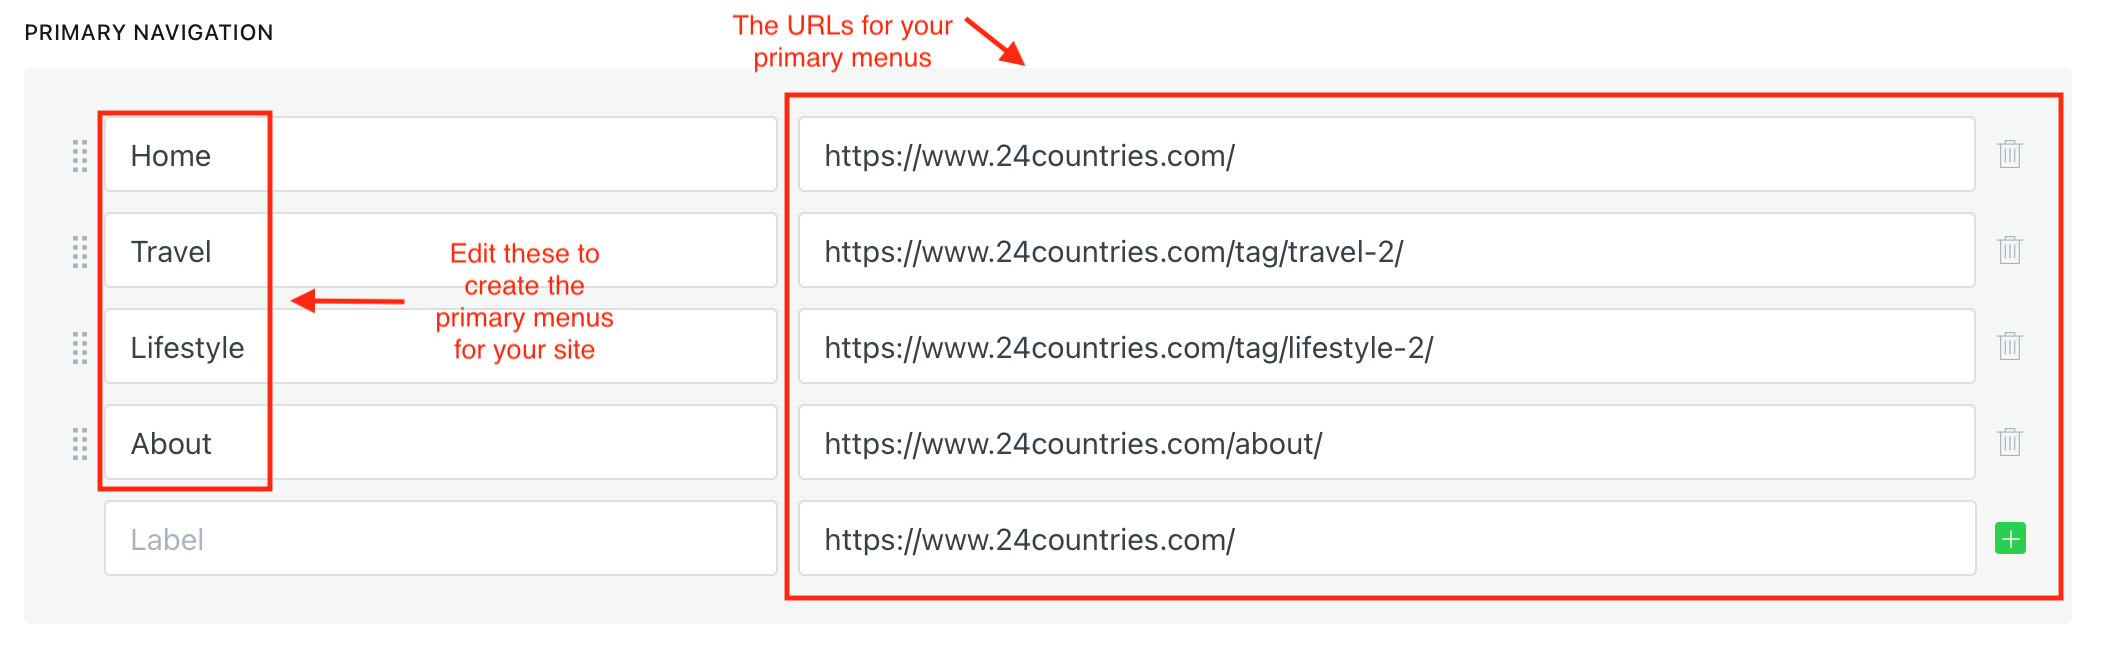
Edit the left-hand column to create primary menus for your site and create the URL's for them in the right-hand column (picture above). The URLs are simply the primary menus site location so when you copy and paste the URL into a search engine (Google, Yahoo etc) search bar, it will take you directly to that page.
Please note: These URLs will be EXTREMELY important later when it comes to posting your first blog post. This will allow certain blog posts to go under specific primary menus. For example; if I write a blog post on a travel itinerary, I obviously want it to show up under the 'travel' primary menu. To do this, I will tag 'travel' on the blog post which will be linked to the primary travel menu via this URL and that blog post should now appear under that primary menu. I will be doing a full 'how-to' blog post on this which I will link here later. As I found this soooooo confusing and time-consuming so hopefully, it'll save you lots of time and frustration!
To add or delete a menu label...

To save any changes to your menus, click the save button up the top right-hand corner (pictured below):

STEP THREE: Creating the secondary menus for your site
2 tips for making your secondary menus...
- Make sure you have a 'data & privacy' section in your blog. This is very important as it protects readers from any potential privacy breaches by informing them of what happens to their personal information and protects you from legal liability. It is mandatory by law in many countries to have a privacy policy. Also, if you're looking to get Google Adsense on your blog, they require you to have a privacy policy. But don't worry you won't have to spend hours researching GDPR... there are websites that can help you to generate your privacy policy and some you don't even need to pay for - bonus!
- Make sure you have a 'contact' section. This allows for readers or even, possible collaborators to get in contact with you. I have added a contact form to my blog to make it more user friendly.
Creating your secondary menus...
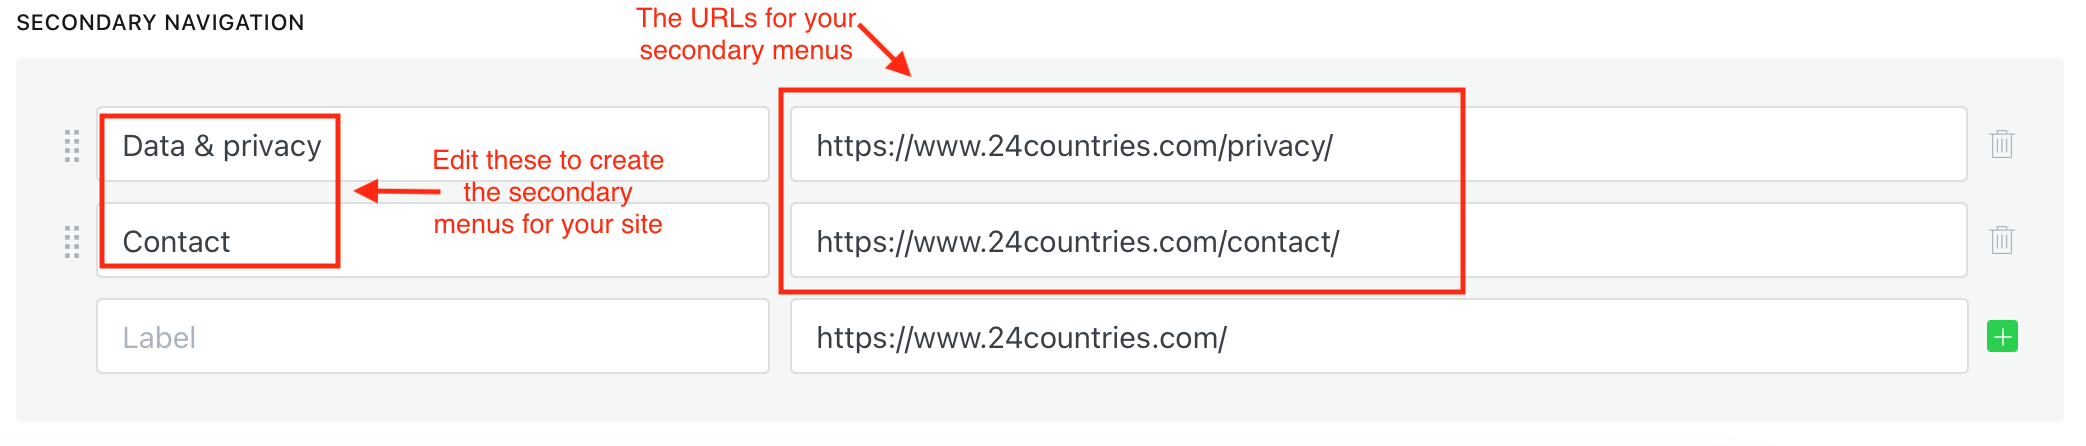
Edit the left-hand column to create secondary menu labels for your site and create the URL's for them in the right-hand column (picture above). The URLs are simply the primary menus site location so when you copy and paste the URL into a search engine (Google/Yahoo etc search bar) it will take you directly to that page.
To add or delete a menu label...

To save any changes to your menus, click the save button up the top right-hand corner (pictured below):

Links to my other 'how-to' blog posts:
 Kirsty
 Kirsty
 Kirsty
 Kirsty
 Kirsty
This blog post means we have now covered all the 'website' section of the Ghost settings in my 'how-to' Ghost series blog posts #1-6. If you have any questions about setting up your Ghost.org site, don't hesitate to contact me via the contact form.