#10 HOW TO: Add staff users (including contributors) to your Ghost.org site

Whether you're a one-man/woman team or a ten-man/woman team, you're going to want to add staff profiles to your Ghost.org site so you can start posting content. By adding staff users and editing staff profiles allows you to give certain access privileges to staff members and also, gives your readers an insight into each individual author and get an understanding of that authors reading style.
There is such a huge benefit of having more staff users (and contributors) to your site like being able to provide more content for your readers, free promotion of your site by staff users on their own personal sites/social media and even, attracting a bigger audience. Adding contributors is something that I'm looking to do in the future. However, I'm currently not at that point as I just started my blog earlier this year. So, I'm currently a one-woman operation and writing every blog post.
Keep reading for all the deets on how to add staff users, remove staff users, edit staff profiles and even, remove authors name.
This blog post will cover:
- STEP ONE: Add or remove staff users (including contributors)
- STEP TWO: Edit staff user details
- STEP THREE: Removing authors names from posts
- Links to my other 'how-to' blog posts
If you need help with other aspects of Ghost.org/Google Domains, follow my 'how-to' blog post series linked at the bottom of this blog. A new 'how-to' blog post will be released every Thursday.
STEP ONE: Add or remove staff users (including contributors)
Adding a staff user
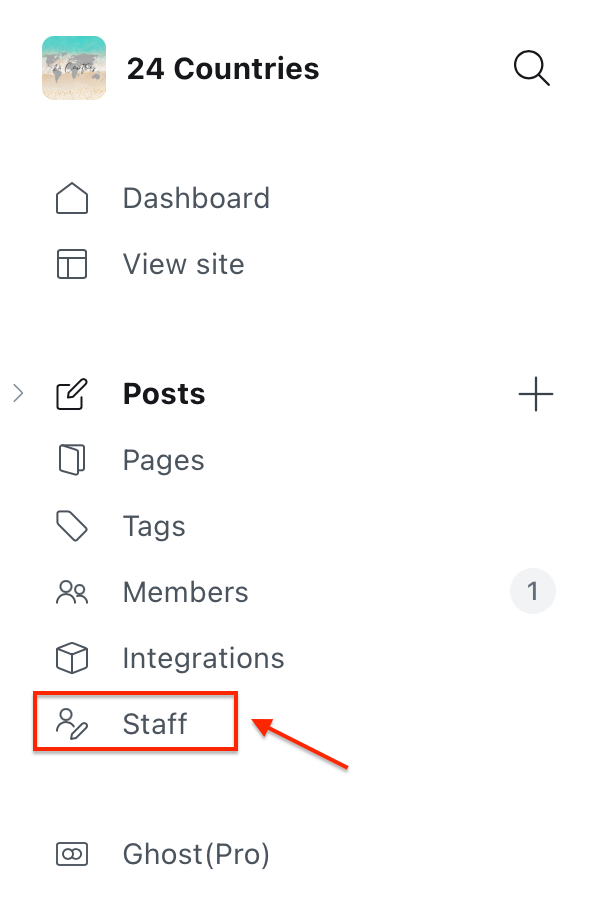
- You need to be logged into your Ghost account and click the 'staff' button on the left-hand menu.
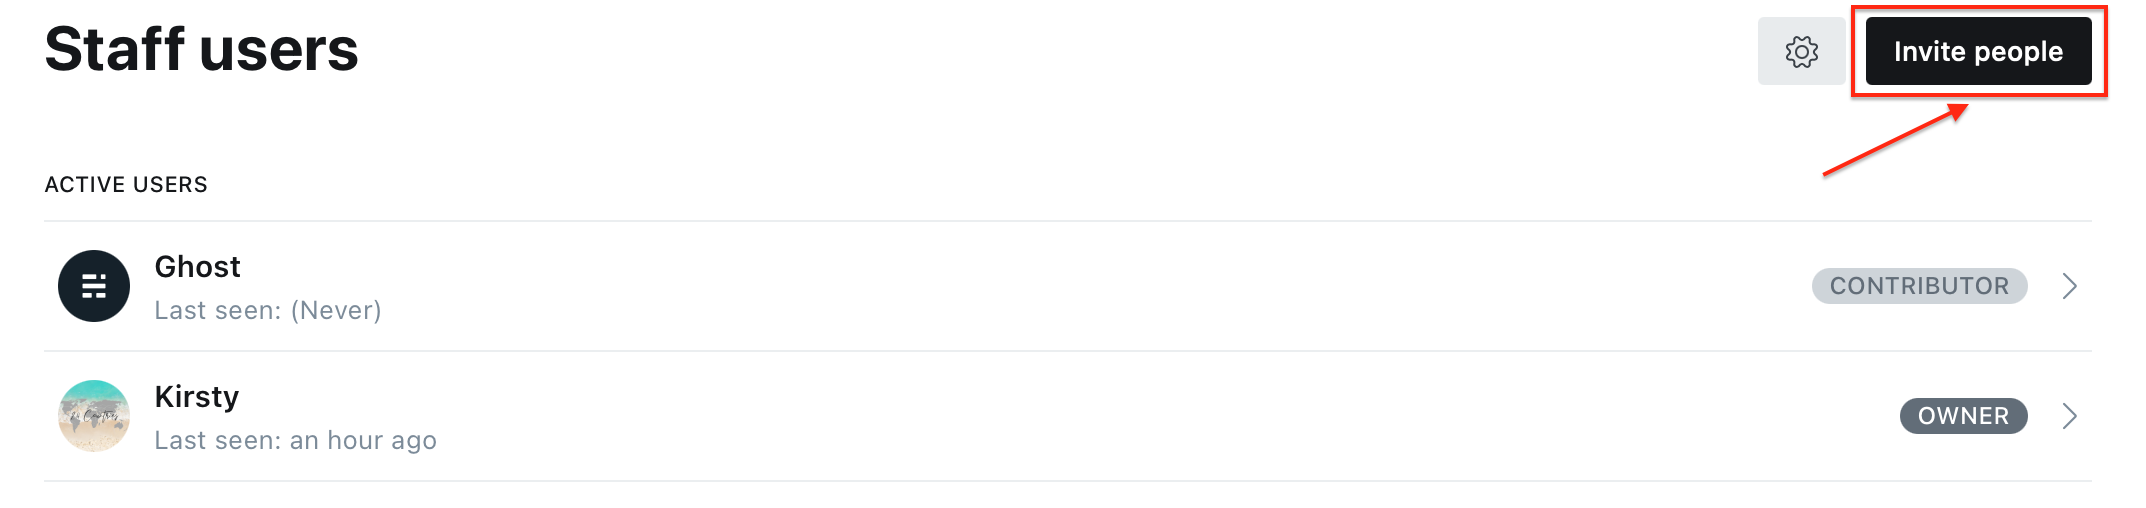
2. Click 'invite people' up the top right-hand corner.
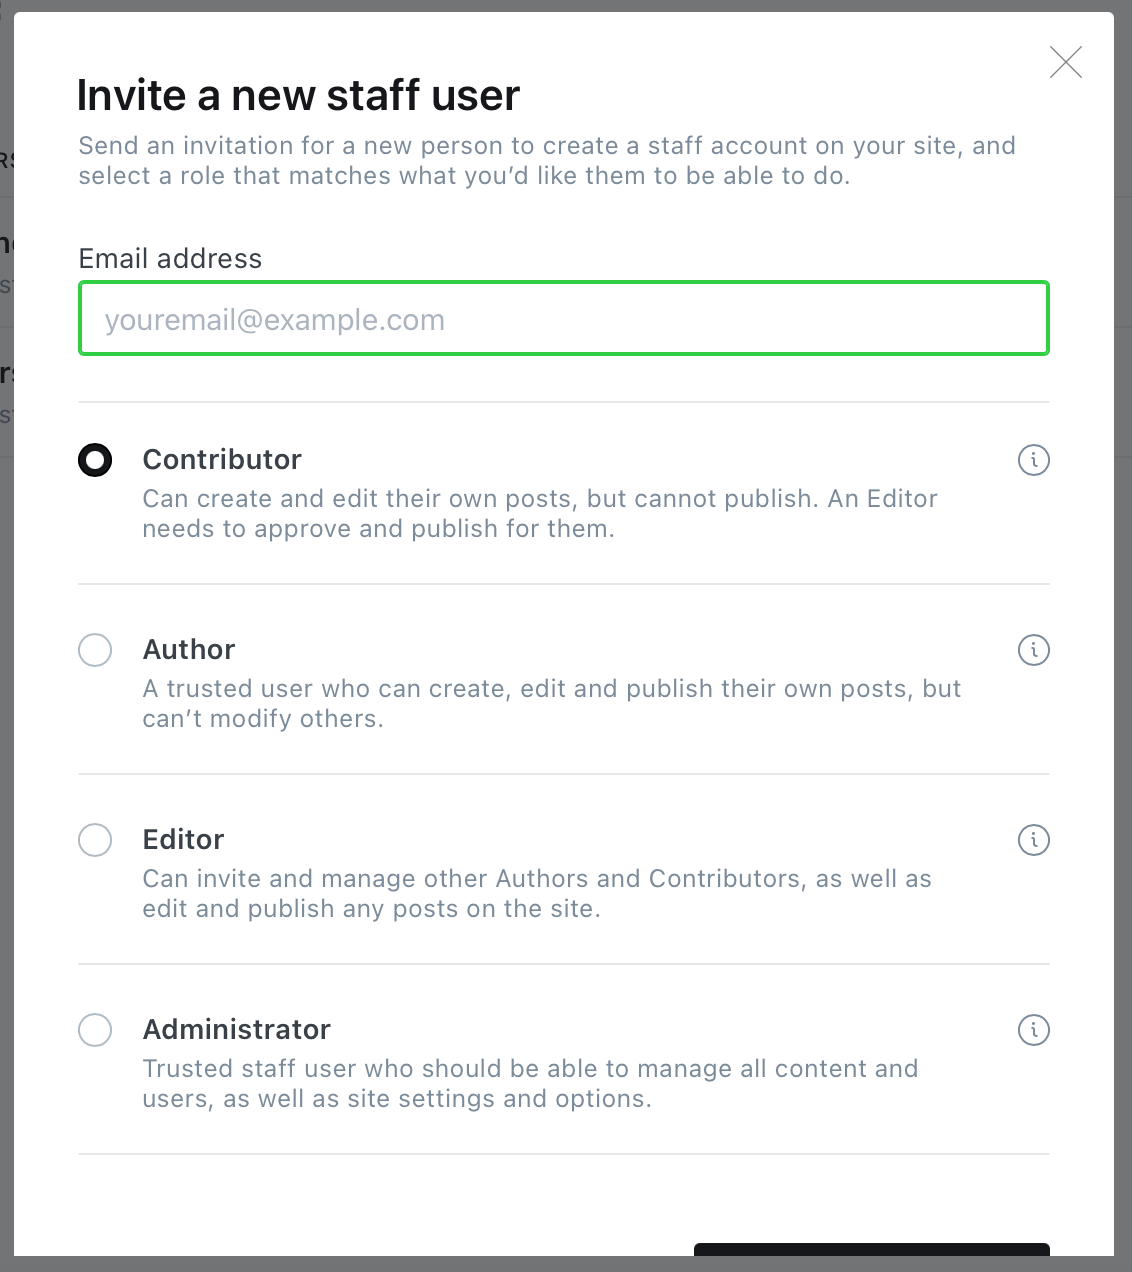
3. Input the email address of the new staff user and whether they will be a contributor, author, editor or administrator.
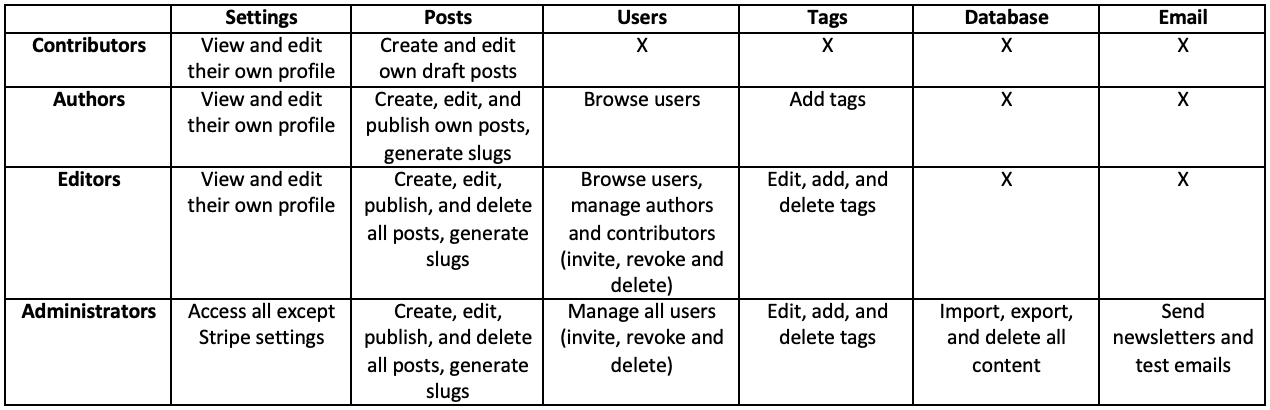
So... what's the difference between contributor, author, editor and administrator? Look below at this handy table to find out each users capabilities:
4. Once you have picked the whether the user will be a contributor, author, editor or administrator. Simply press 'send invitation now'. Your new staff member should receive their invitation and be able to respond shortly. There invitation will expire after 7 days but you can also 'revoke' or 'resend' the invitation.

Removing a staff user
- You need to be logged into your Ghost account and click the 'staff' button on the left-hand menu.

2. Click on the gear icon from the user’s profile in the Staff dashboard and select Delete User.
STEP TWO: Edit staff user details
To edit your staff profile, follow these steps. By editing the staff profile allows the readers to gain a sense of each author's personalities and recognise the individuals who have written the posts.
- Simply click on the individual staff user and depending on your user capabilities, you may be able to edit the staff profile.
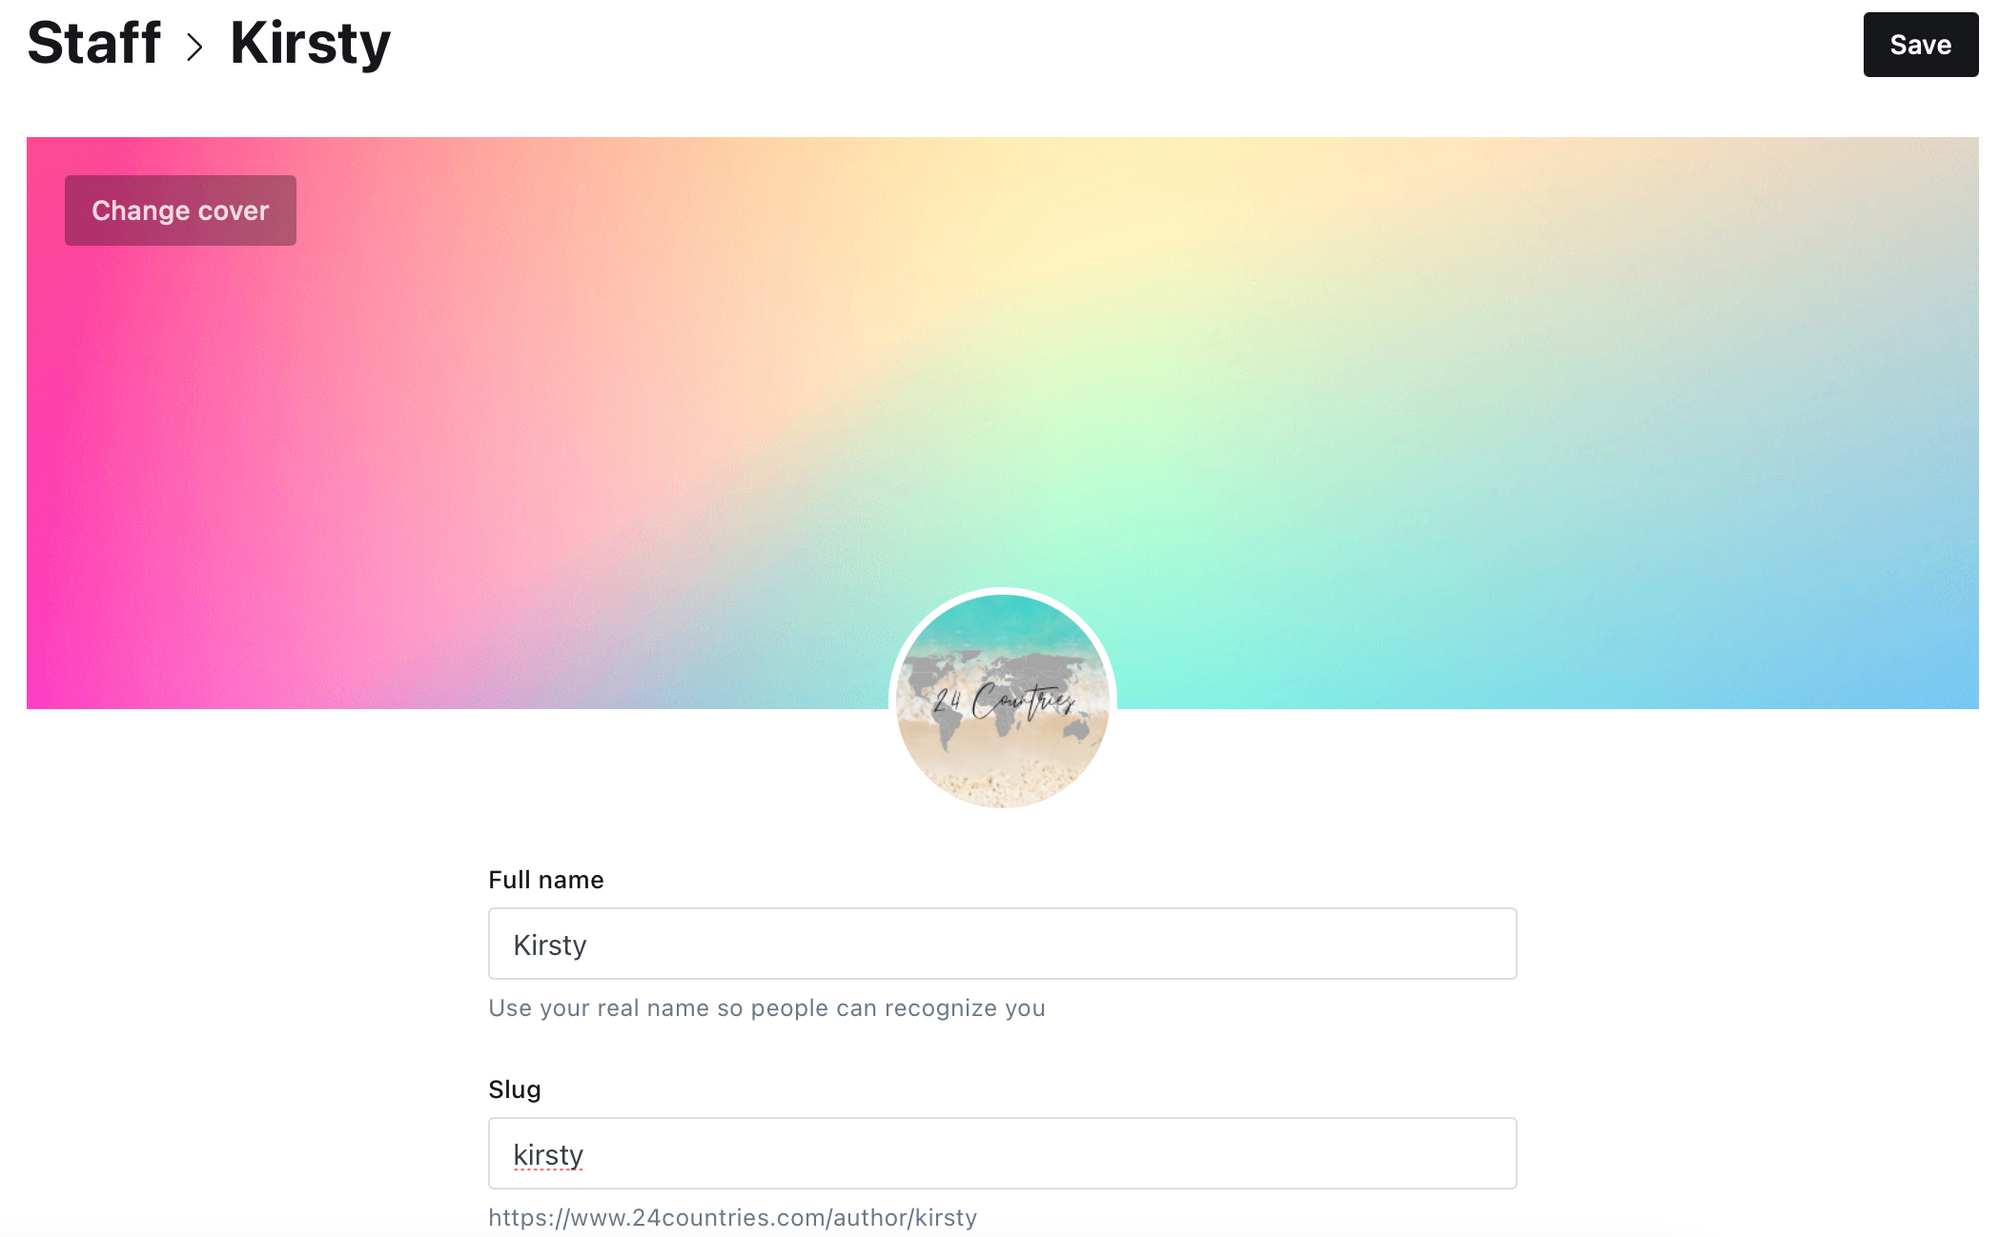
You'll see a URL link under 'slug', if you input this into the search bar, you will get all the posts written by that author.
2. Details you can add to a staff user profile include: full name, email, location, website, Facebook and Twitter links, a bio and even, change passwords. Then, simply click 'save' up the top right-hand corner once you're done editing.
STEP THREE: Removing authors names from posts
If you're a one-man/woman operation, then you might not need to include the authors name (your own name) under each post. This was certainly the case for me, since this is a personal blog, I am writing every post anyways and found that having my name under every blog post wasn't required and actually was quite distracting. Here's how I stopped my name appearing under every post:
- Go to your 'settings' and under the 'advanced' section, click on 'code injection'.

2. Input this code into the header section and click 'save' up the top right-hand corner:
<style>
.author-list,
.author-name,
.post-card-byline-content span:first-of-type {
    display: none;
}
.post-card-byline-content {
    margin-left: 0;
}
</style>
Please note: I'm using the 'Casper (default)' Ghost theme. I'm not sure if this code works for other Ghost themes. Feel free to let me know if it does!
Links to my other 'how-to' blog posts:
 Kirsty
 Kirsty
 Kirsty
 Kirsty
 Kirsty
 Kirsty
 Kirsty
 Kirsty
 Kirsty
If you have any questions about setting up your Ghost.org site, don't hesitate to contact me via the contact form.