#13 HOW TO: Add a contents list to your Ghost.org post

You include a contents list at the beginning of your post (or page) and it informs the reader, in a concise format, what the post entails. They can click on a point in the contents list and they will fast forward to that segment of your post.
When someone visits your site, you've only got a couple of minutes of that readers attention to keep them interested and engaged in your posts. A contents list is beneficial for your reader, allowing them to see exactly what the post contains and they can skip forward to the part that suits what they're looking for. If you include a contents list your posts will be better organised, more visually appealing and convenient. Essentially, boosting user experience, increasing the chance of your readers spending more time on your site and potentially, making that anonymous visitor into a follower of your brand/site.
Having a contents list also boosts your Search Engine Optimisation (SEO). This means Google can understand your content better and what your post contains. Ultimately, allowing you to rank higher on Google and driving more traffic to your site.
A contents list for a post (or a page) on your Ghost.org site is really important especially, if its a long post or if you've got loads of different segments to your post. I would recommend including one in the majority of your posts!
This blog post will cover:
- STEP ONE: Write a contents list
- STEP TWO: Make headings throughout your post
- STEP THREE: Link the headings to your contents list
- Links to my other 'how-to' blog posts
If you need help with other aspects of Ghost.org/Google Domains, follow my 'how-to' blog post series linked at the bottom of this blog. A new 'how-to' blog post will be released every Thursday.
STEP ONE: Write a contents list
- Type out your contents list at the beginning of your Ghost.org post (like the one above). In your contents list include the main points of your post. So that someone can click to skip forward to the point they want to read. Here's another example of a contents list below...
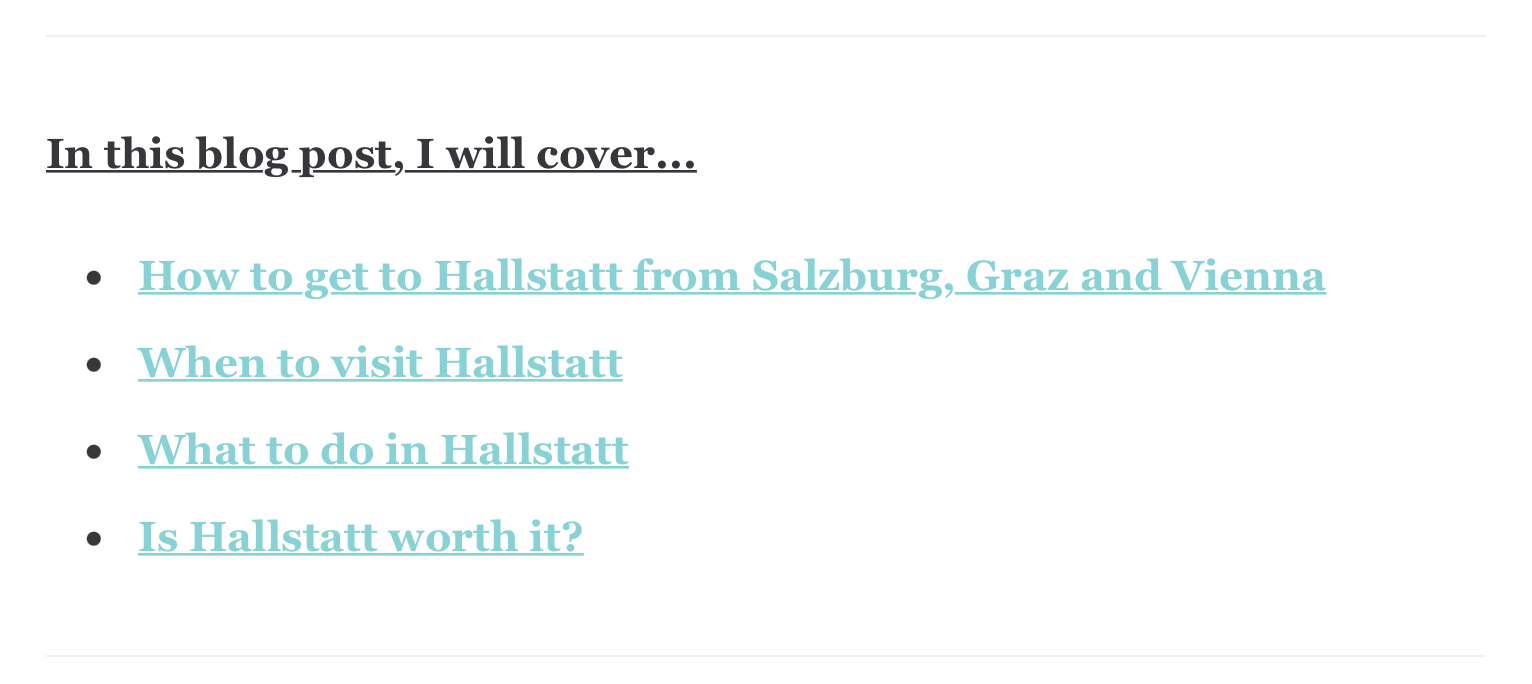
- If you would like to add bullet points to your contents list . Then, write "*" and space.
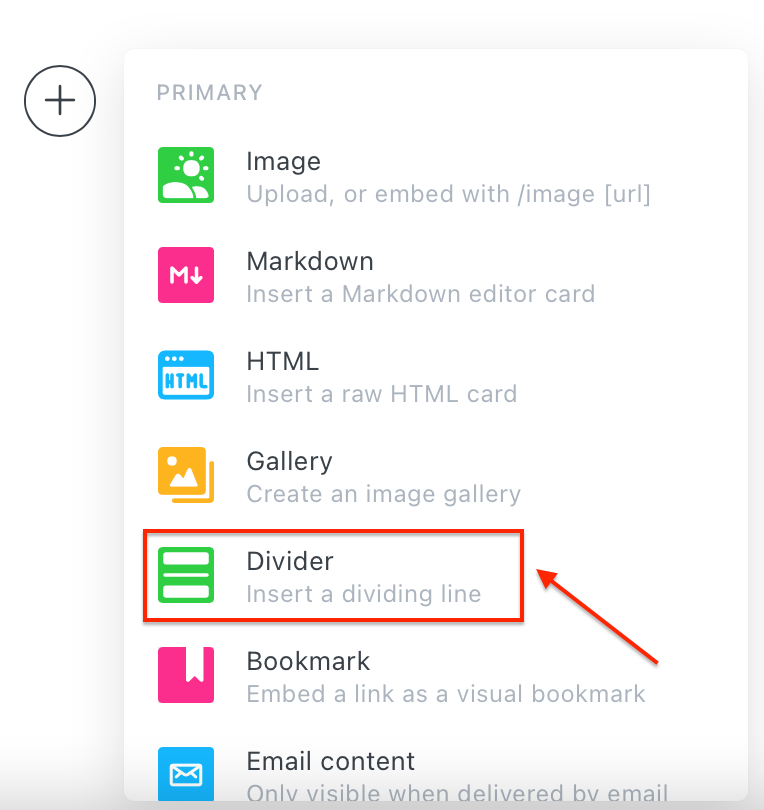
- If you would like to add the divider lines to seperate your contents list, then press the 'plus' sign at the left hand side of the post and click 'divider'.
STEP TWO: Make headings throughout your post
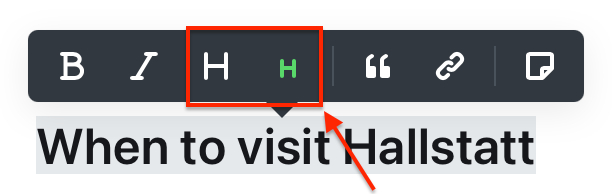
- Write your title that corresponds to a point in your contents list.

2. Turn this title into a heading by clicking either heading one or heading two.
STEP THREE: Link the headings to your contents list
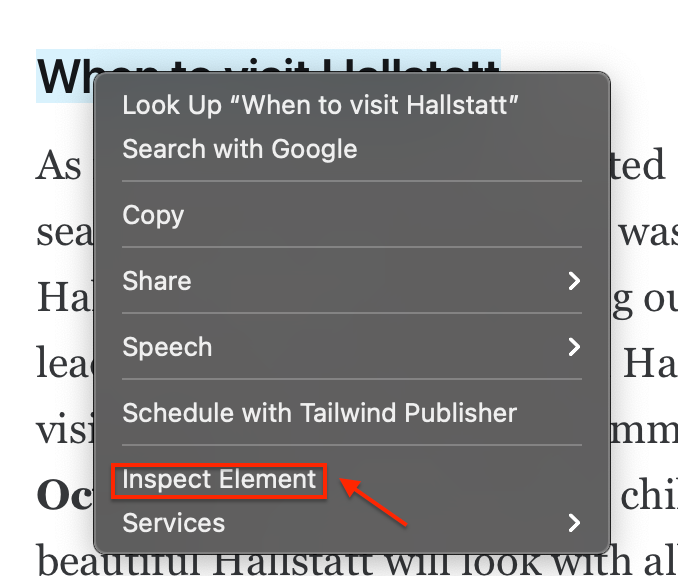
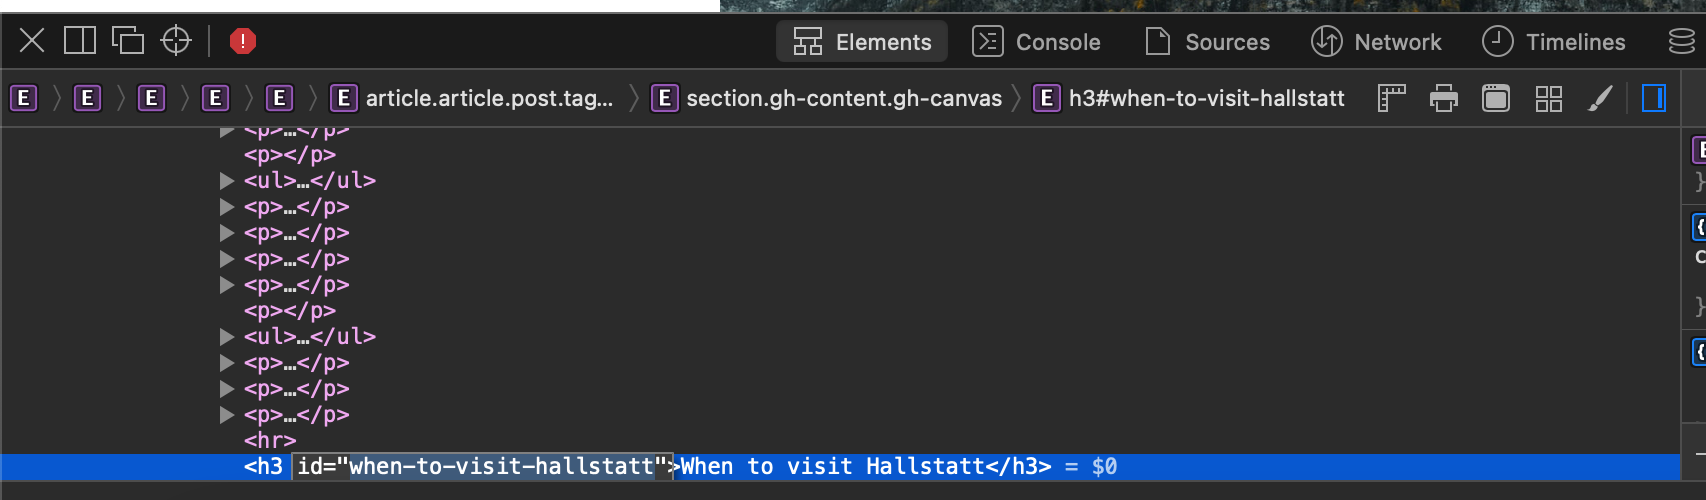
- If you haven't published the post yet, click green 'preview' button up the top right-hand corner of your post. If you've already published the post, go to your published post. Locate a heading in your post, right click and click 'inspect element'.
2. You will see the 'id' of the heading. Double click the part within the quotations marks and after the 'id='.
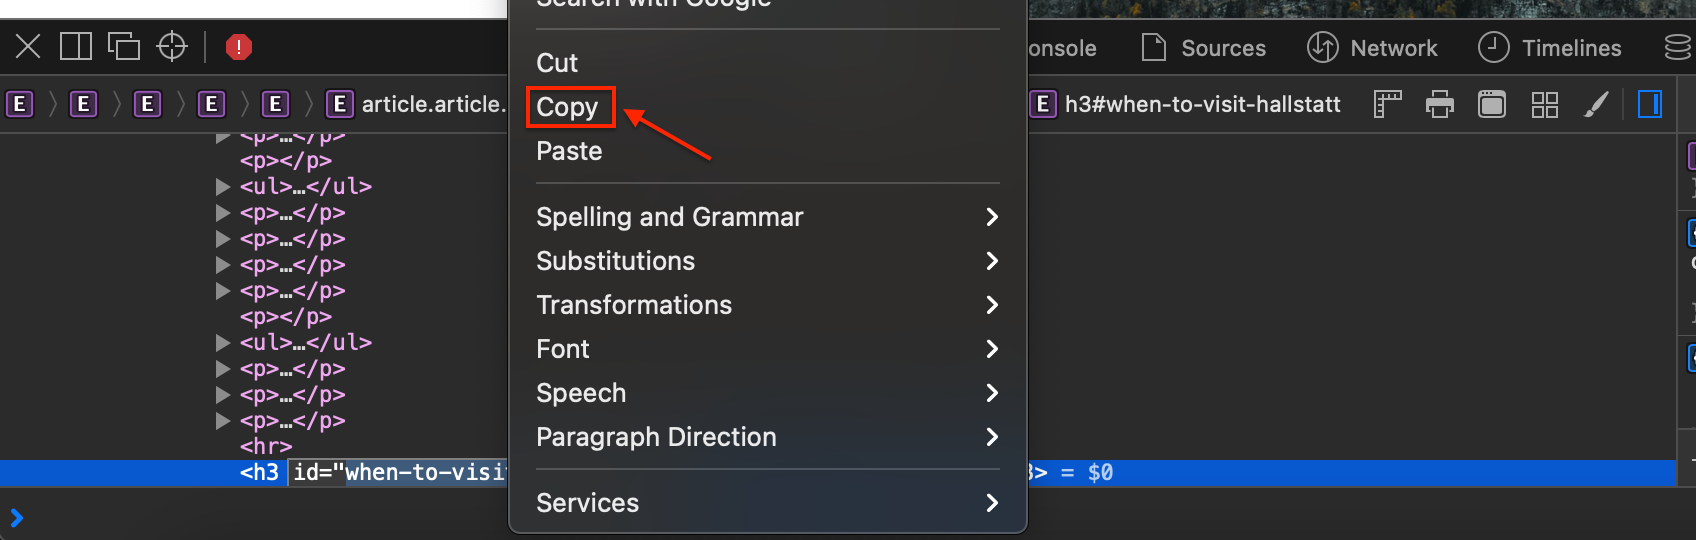
3. Copy the part within the quotation marks.
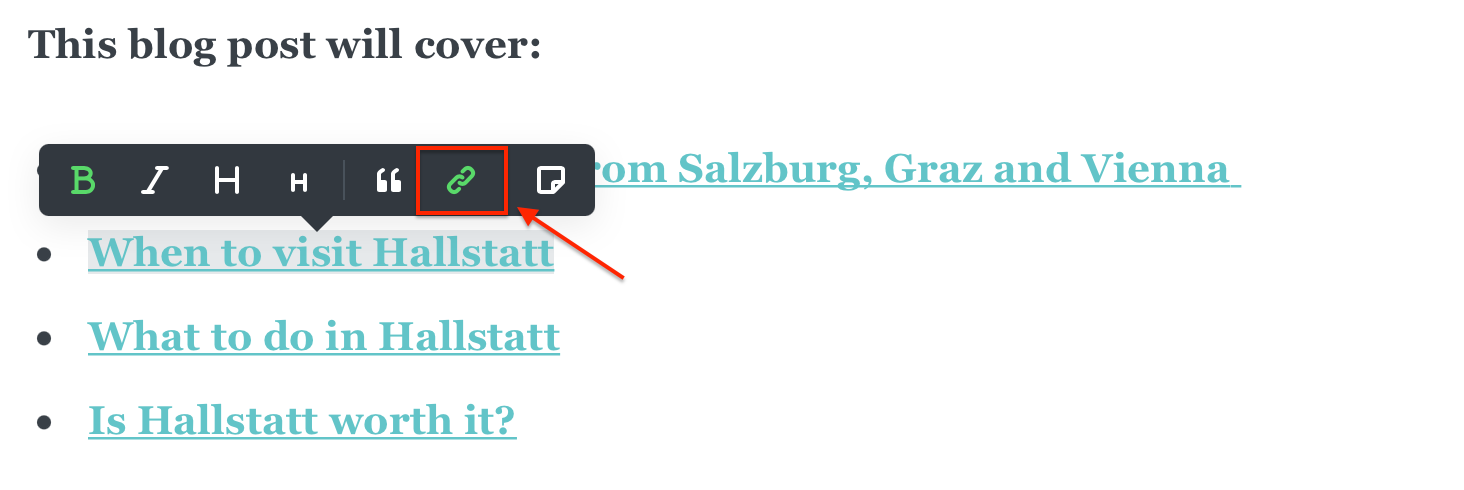
4. Go back to your post in your Ghost.org admin and go to your contents list. Highlight the point in your contents list, which corresponds to the heading 'id' you just copied, and click the 'link' button.
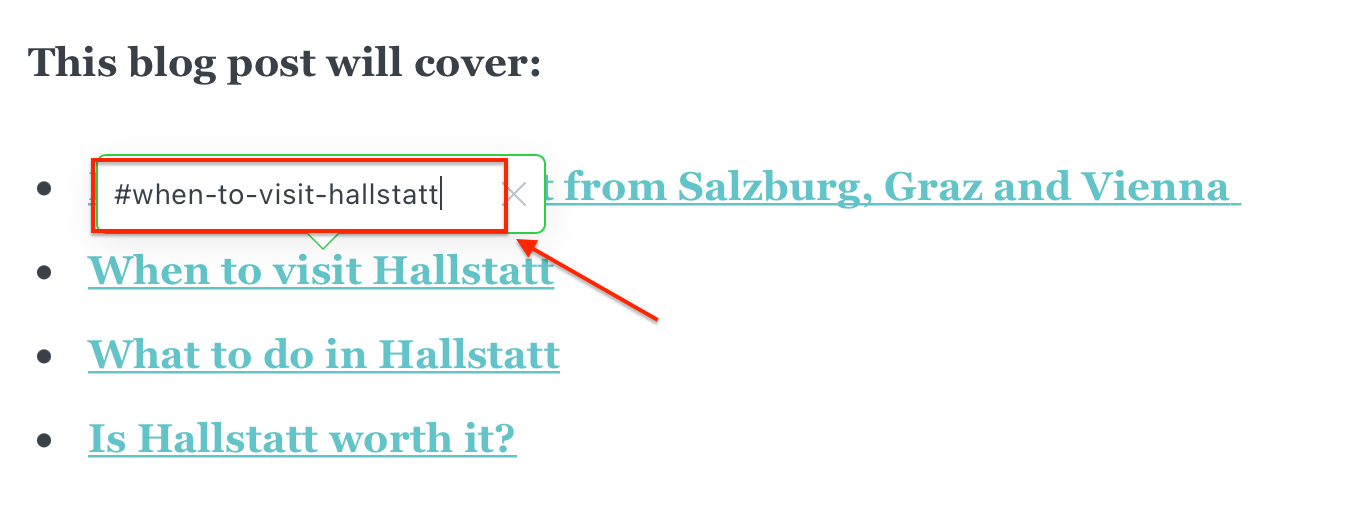
5. Input a hashtag (this is essential for this to work) and then, paste the heading 'id' you copied earlier and press enter.
6. Repeat this for the rest of your contents list. Then, publish your post and check the links work!
Links to my other 'how-to' blog posts:
 Kirsty
 Kirsty
 Kirsty
 Kirsty
 Kirsty
 Kirsty
 Kirsty
 Kirsty
 Kirsty
 Kirsty
 Kirsty
 Kirsty
In the meantime, if you have any questions please don't hesitate to contact me via the contact form.