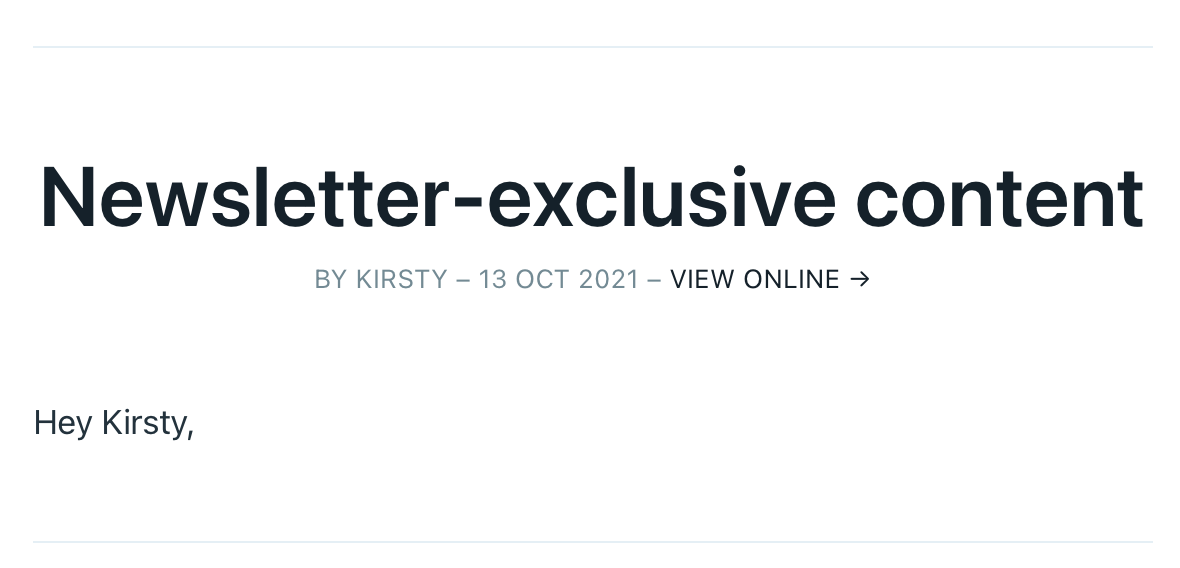
#12 HOW TO: Create member-only content to encourage readers to subscribe to your site

Last week on my 'how to start your own blog' series, I covered setting up memberships on your Ghost.org site to turn anonymous readers into subscribers. This is a necessity to start to build a following for your site. However, you need to give an incentive to encourage people to sign up to your site and there are different ways to do this. You can create posts, which are partly or fully member only. You can send out newletters or even, create comment sections for members. You should ensure that the member-only content you provide is intriguing, will provide the member with valuable information and it will benefit them to read it.
This blog post will cover:
- STEP ONE: Creating member-only posts
- STEP TWO: Creating newsletters for members
- STEP THREE: Creating comment sections for members
- Links to my other 'how-to' blog posts
If you need help with other aspects of Ghost.org/Google Domains, follow my 'how-to' blog post series linked at the bottom of this blog. A new 'how-to' blog post will be released every Thursday.
STEP ONE: Creating member-only posts
You can choose to make a certain part of your post member-only or the full post member-only. Within your posts, you can post YouTube links, podcasts links and even, create courses. Anything is possible!
Here's how you create member-only posts...
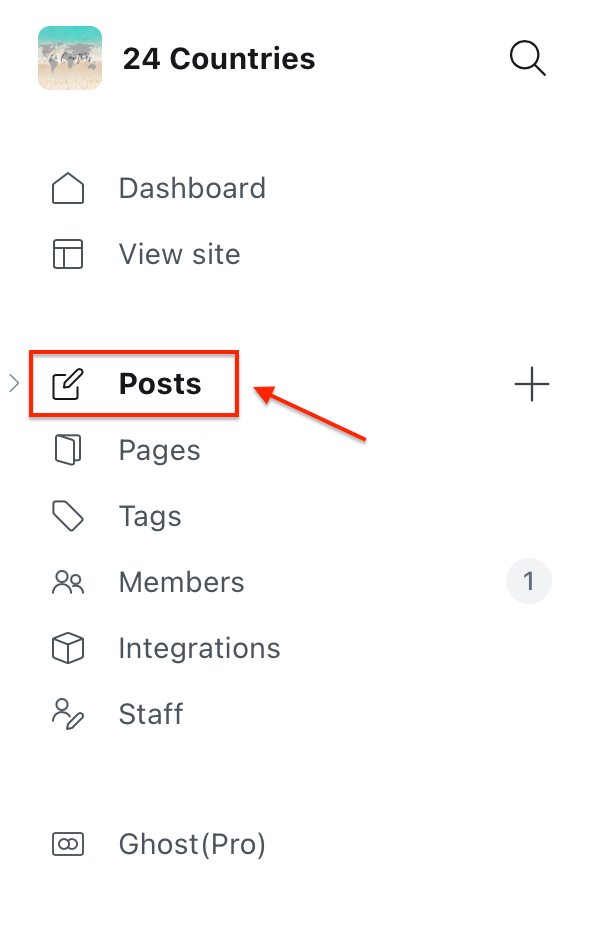
- Firstly, you need to be signed into your Ghost.org account. Then, click on 'posts' in the left-hand menu.
2. Click 'new post' up the top right-hand corner.

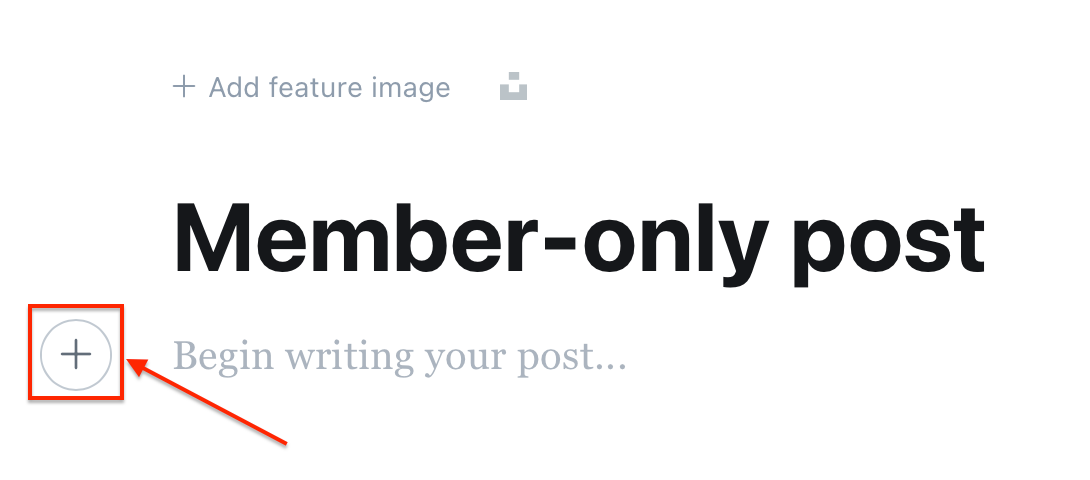
3. Click on the plus sign, which appears when you hoover over the 'begin writing your post...' section.
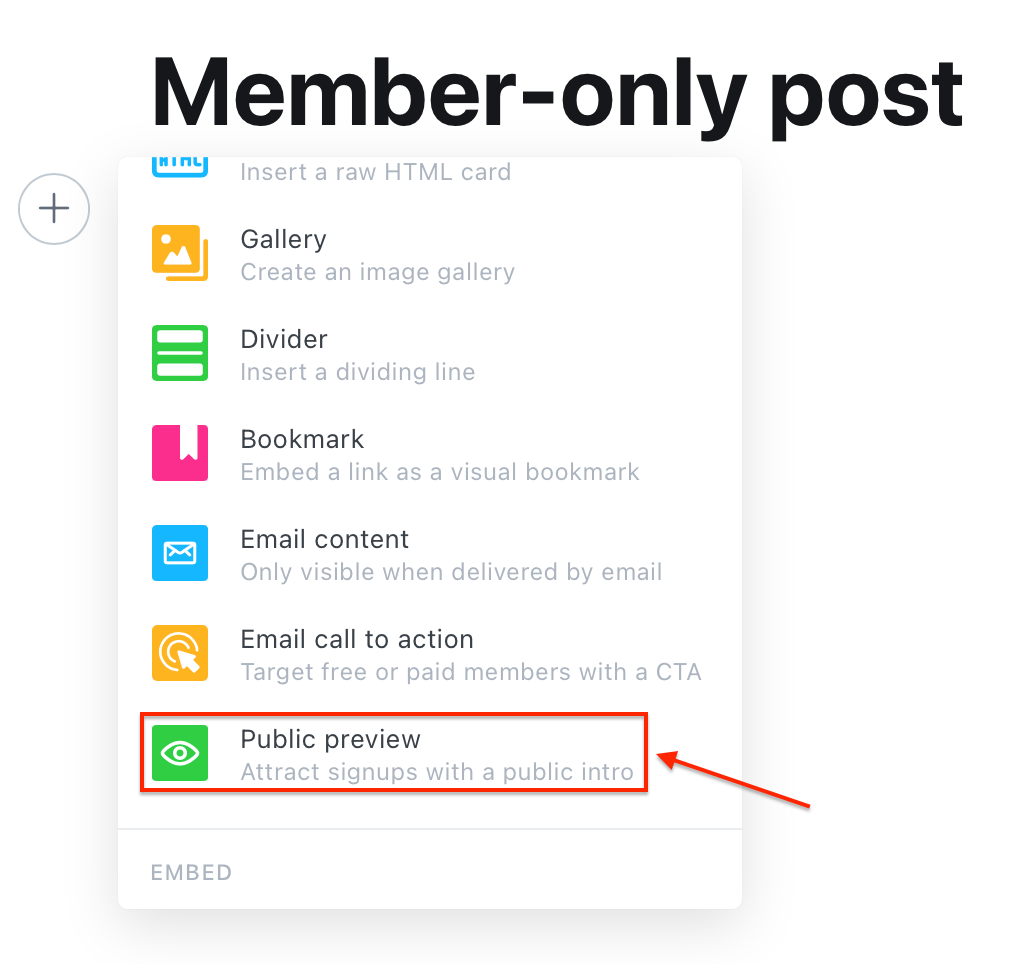
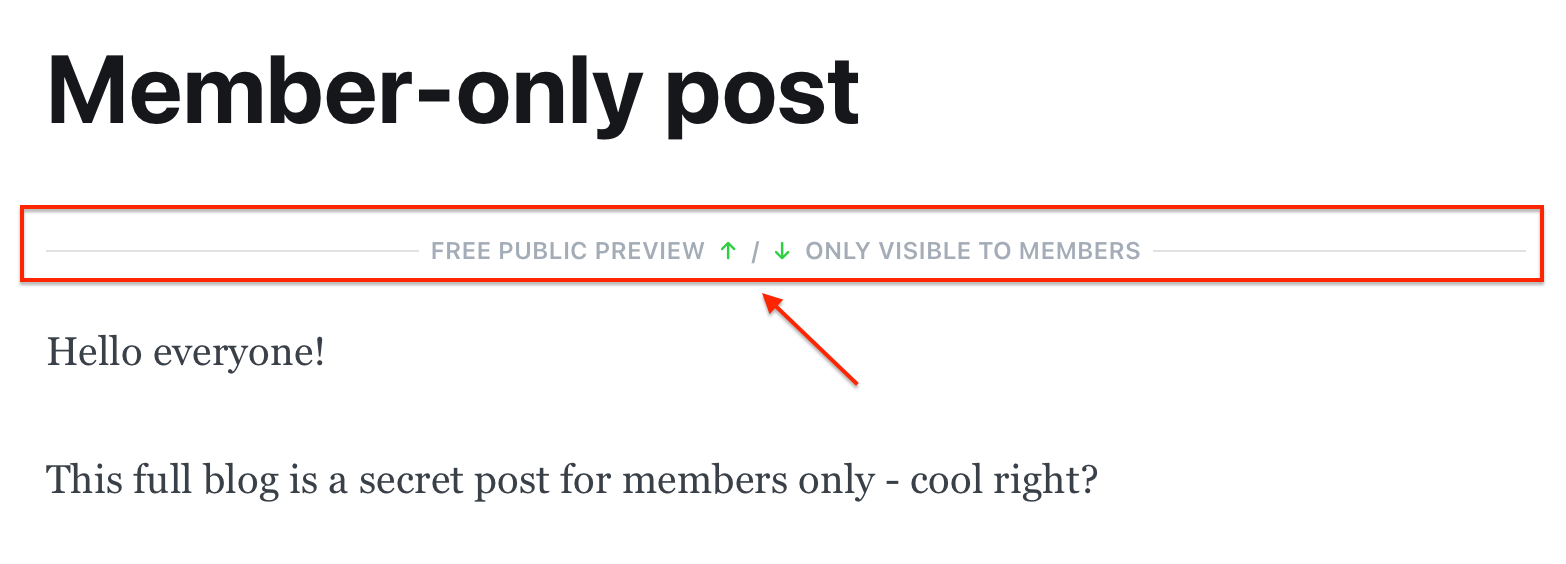
4. Once you've clicked on this plus sign, a drop-down menu will appear. Scroll down until you get to 'public preview' and choose this.
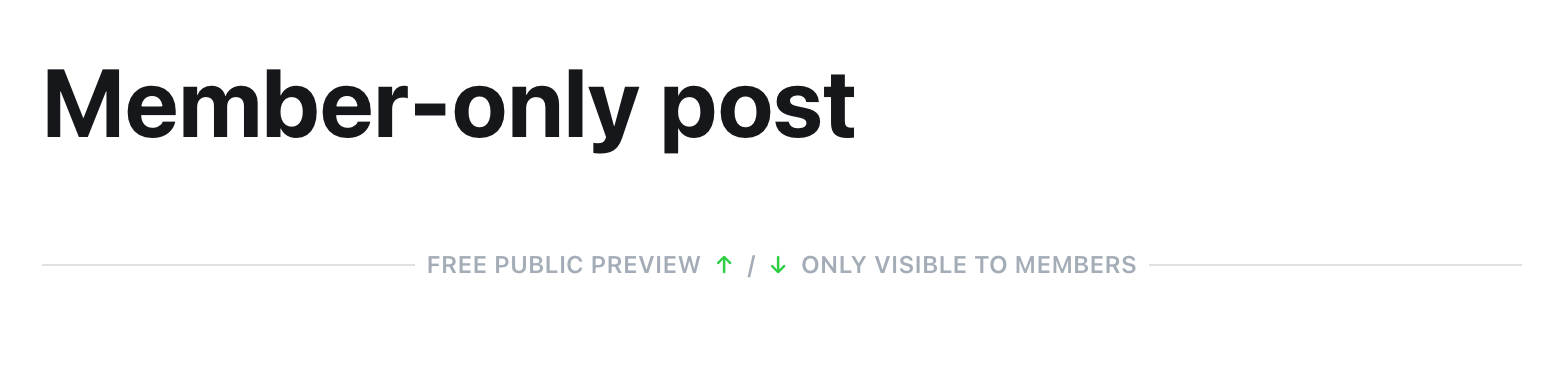
5. This will display the following on your post. This means anything above the line, everyone will be able to see but anything below this line will be for members-only.
Create a partial members-only post, so that only a certain part of the post can be seen by members like this:

Or create a fully members-only post, so that the post can only be viewed by members like this:
6. You aren't finished yet! Next, you need to click this button up the top right-hand corner.
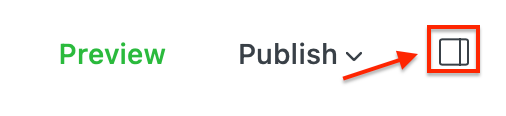
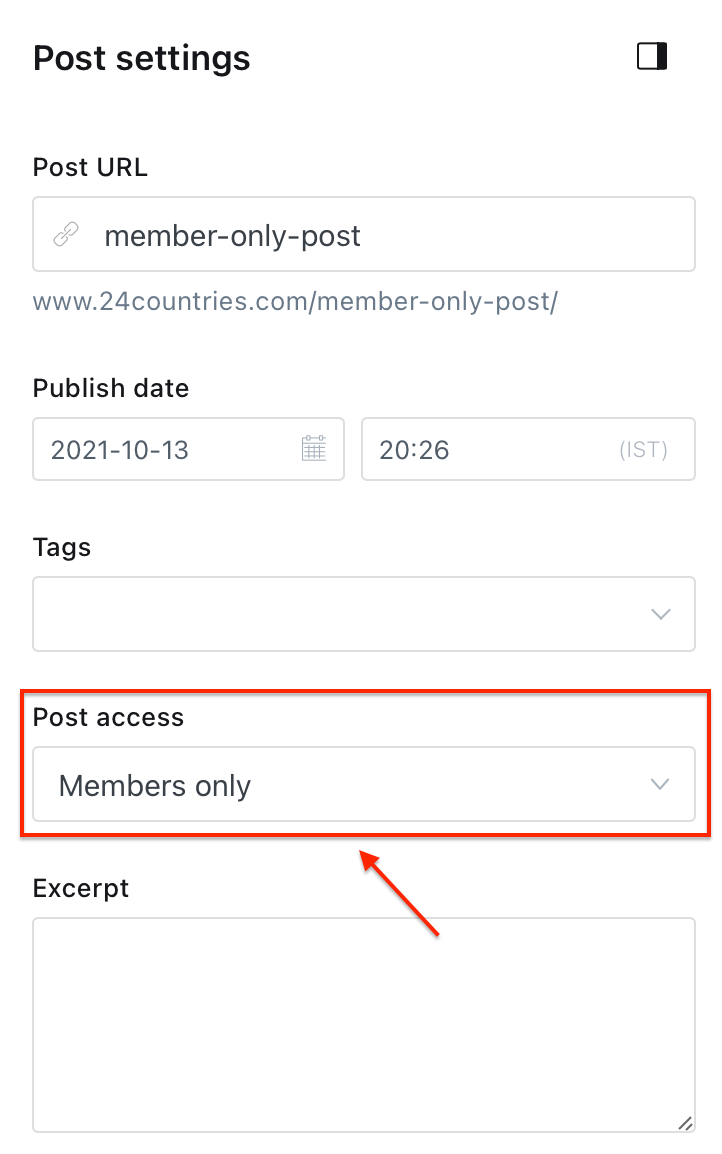
7. Then, in the post access section, choose 'members only'.
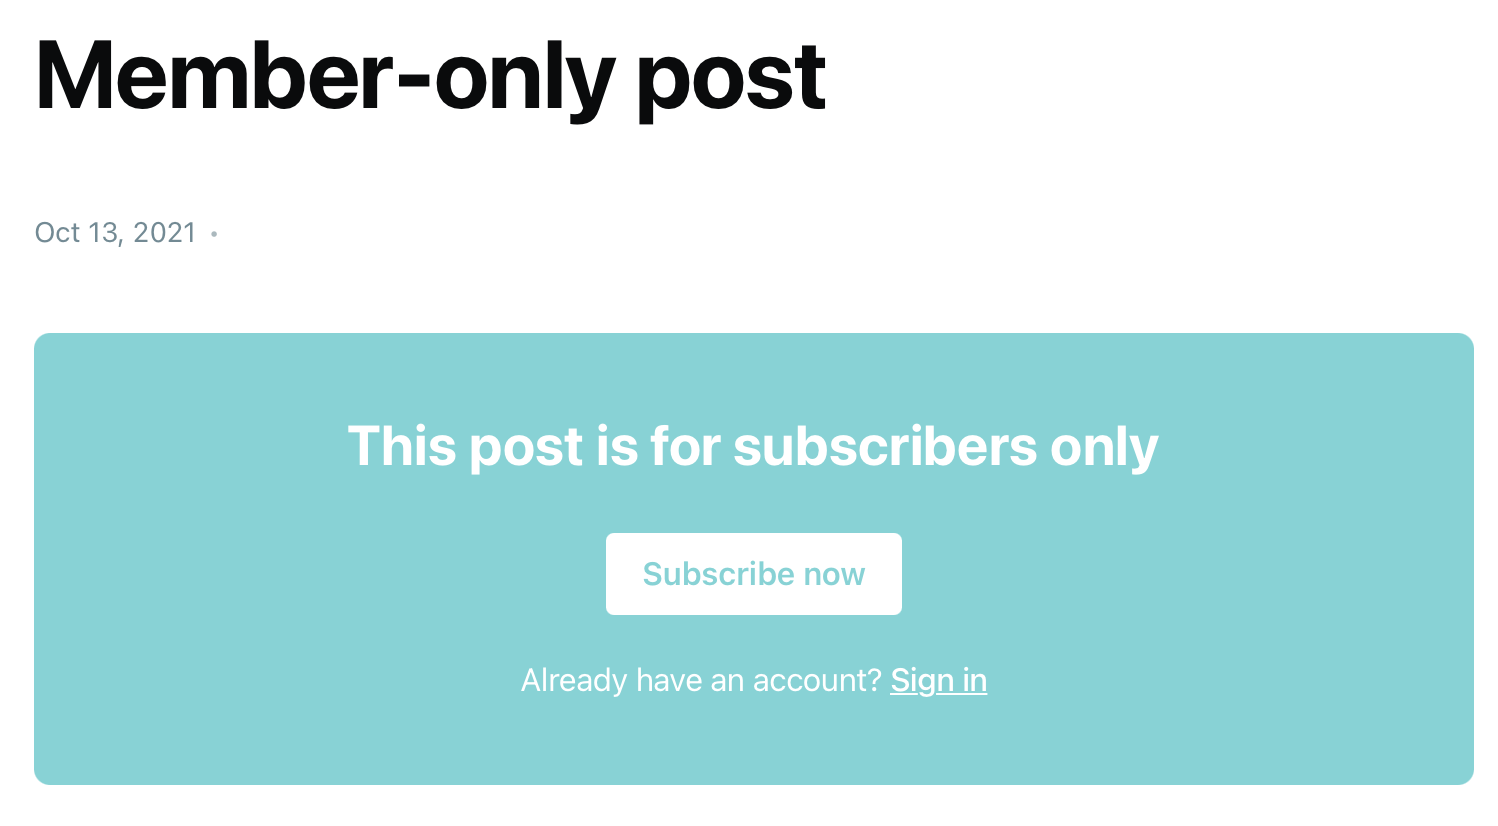
9. Once you've written your amazing members-only post, all that's left is to publish it. A partial members-only post will look like this:

And a fully members-only post will look something like this:
STEP TWO: Creating newsletters for members
Customise the look of your newsletters
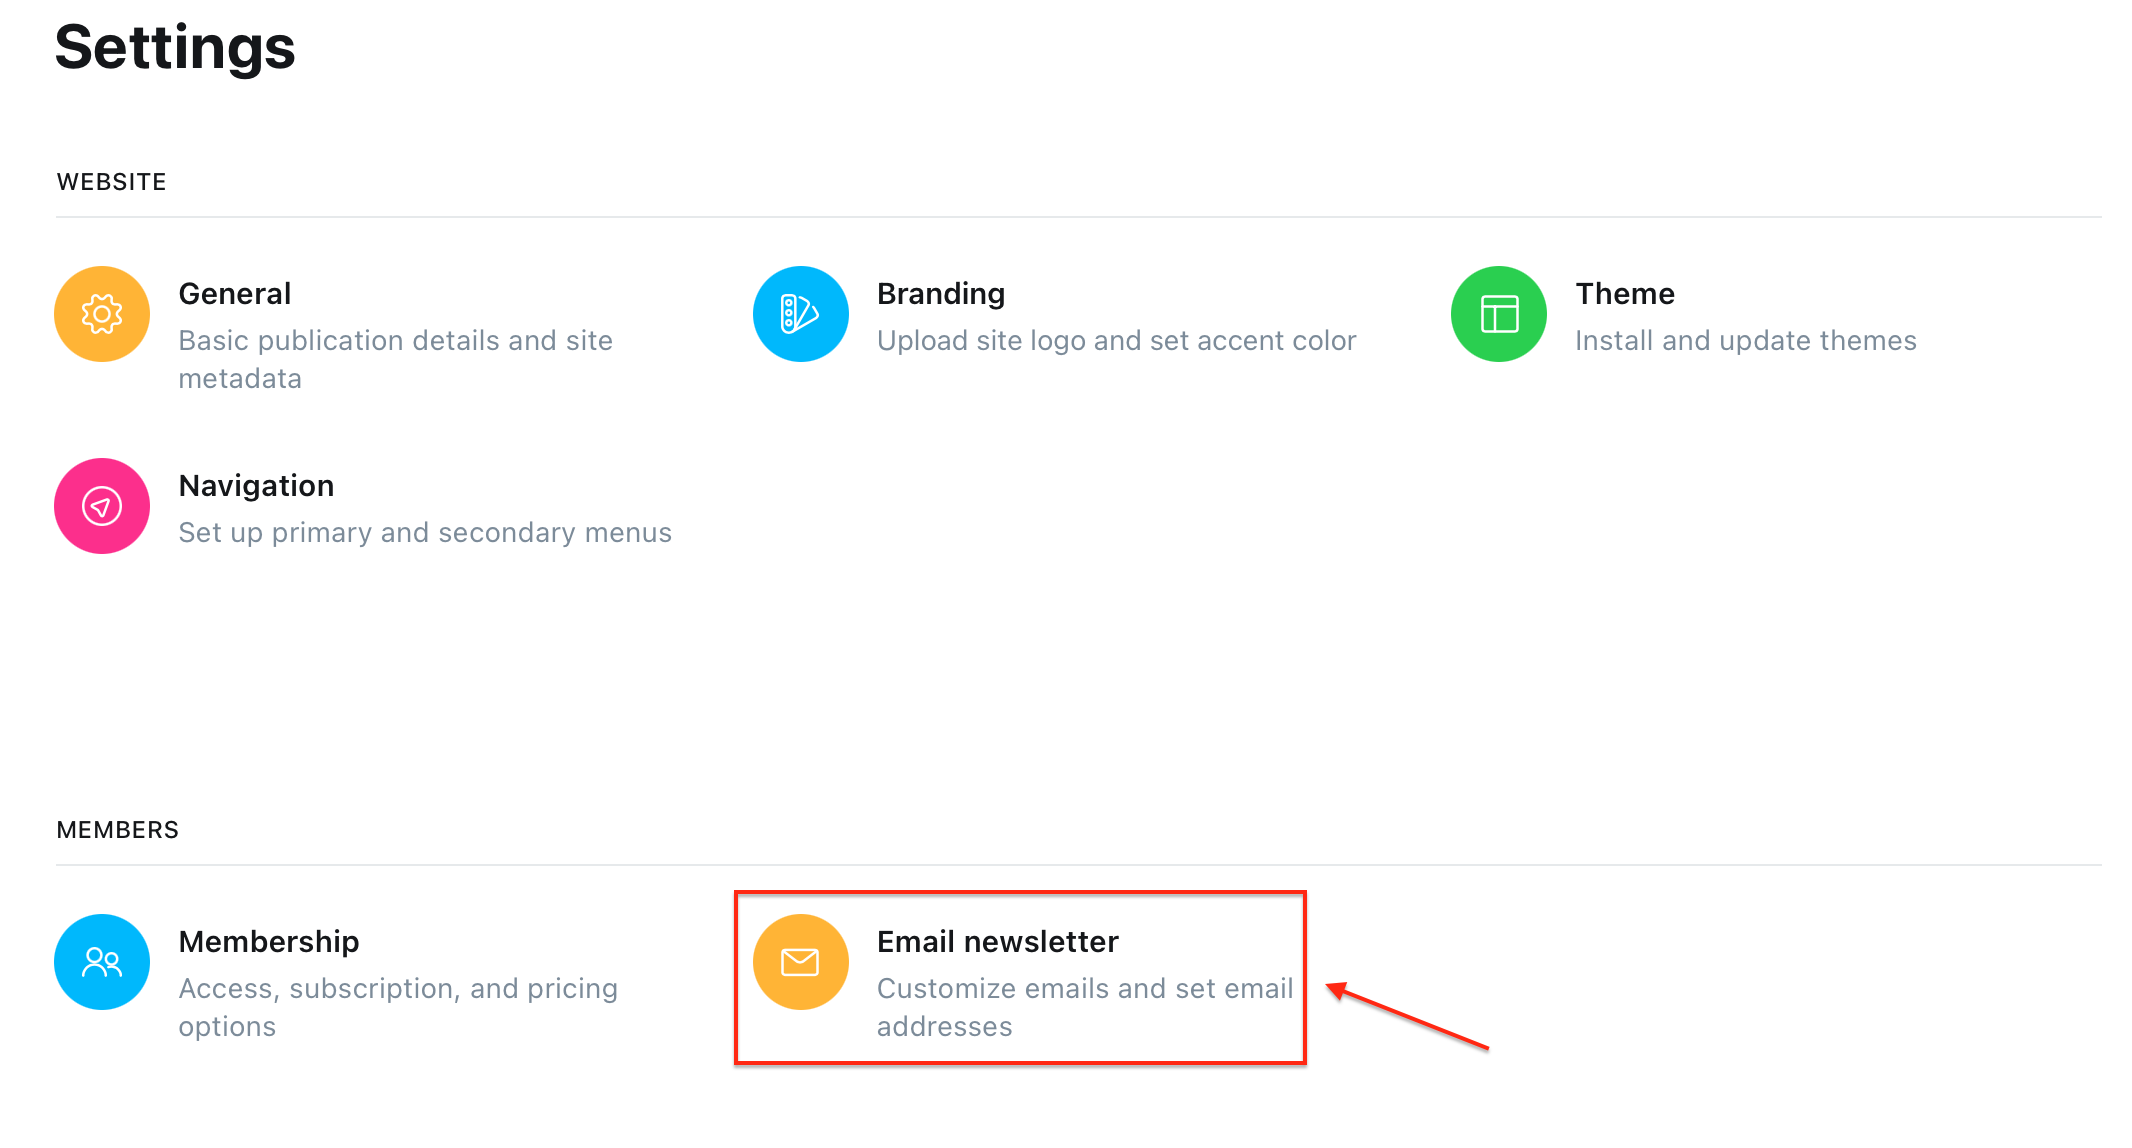
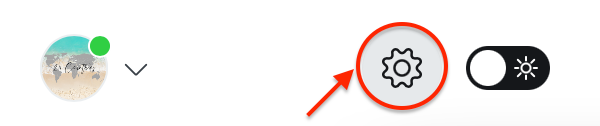
- Click the settings icon on the left-hand menu.

2. In settings under 'members', click on 'email newsletter' to customize emails.
3. Click the customise button next to email design:

This will pop up and you can start to customise your email newsletter:
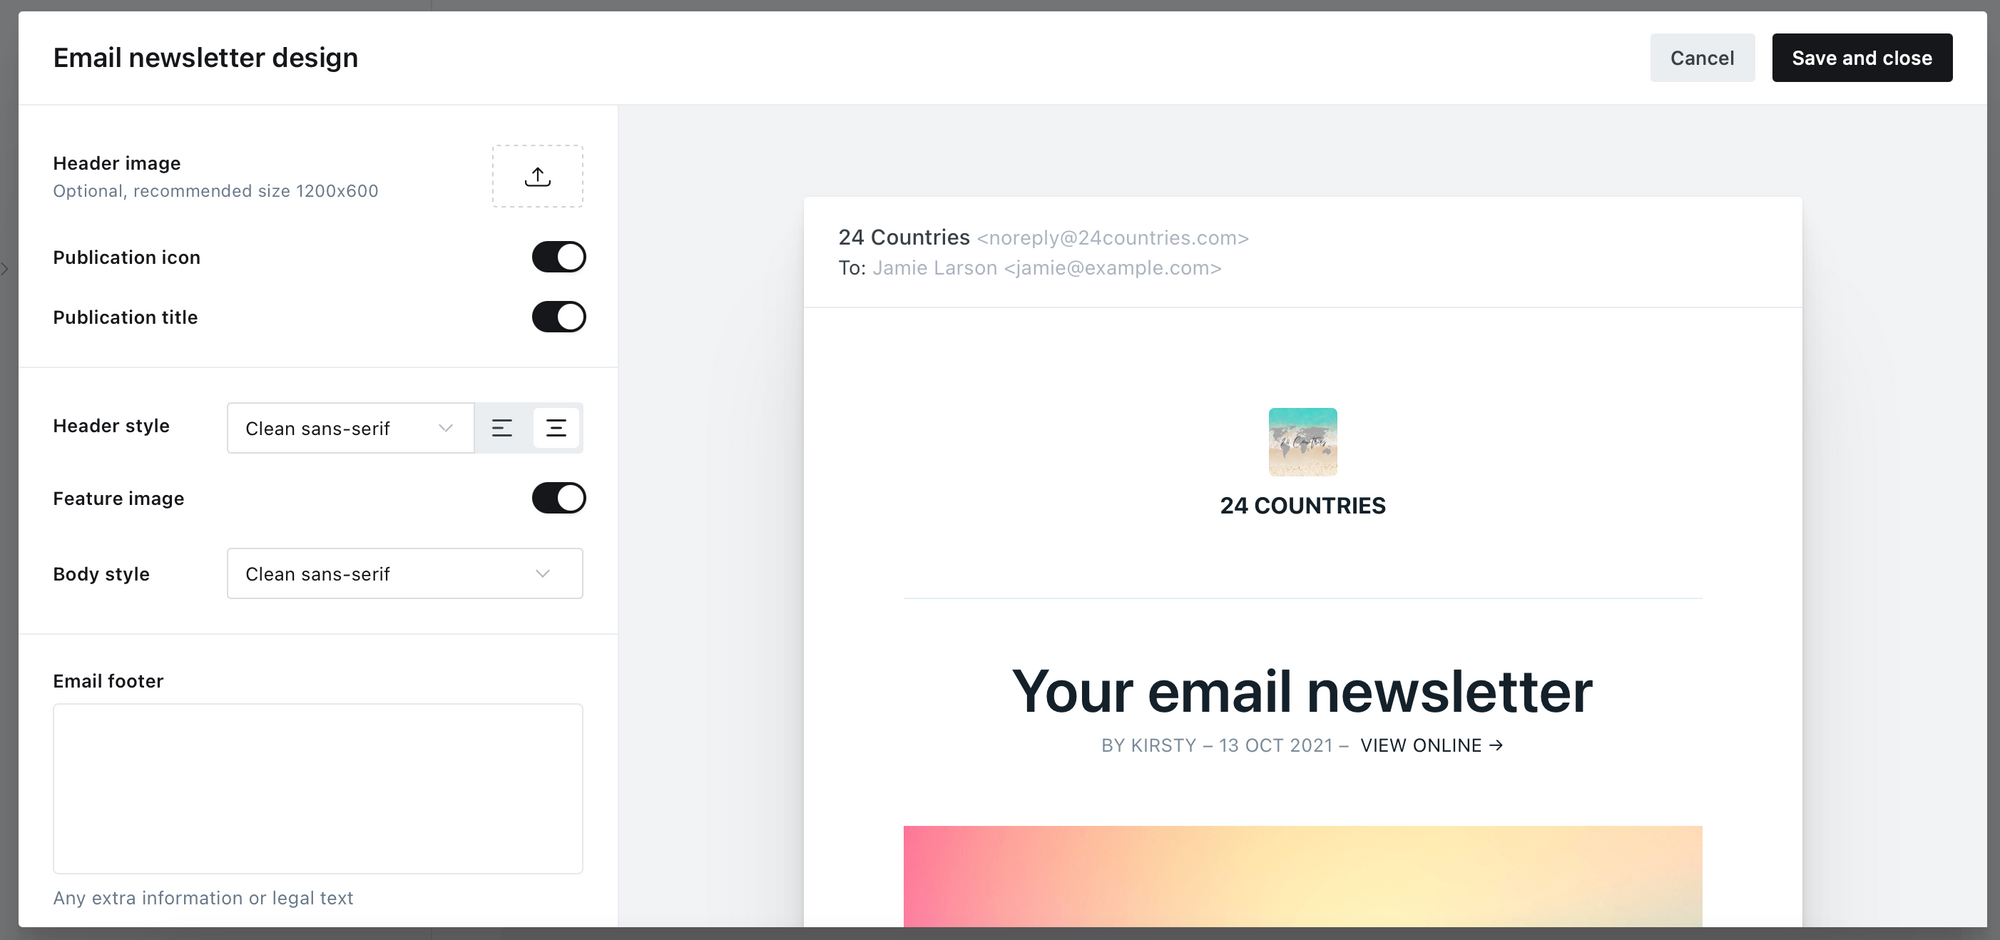
You have options on the left-hand side to change your header image, fonts, placement of header text (middle or left-hand side), email footer and buttons to slide whether you want to include your publication icon, title and feature image or not.
Once you've customised your newsletter, click 'save and close'.
4. Theres other information you can customise including:
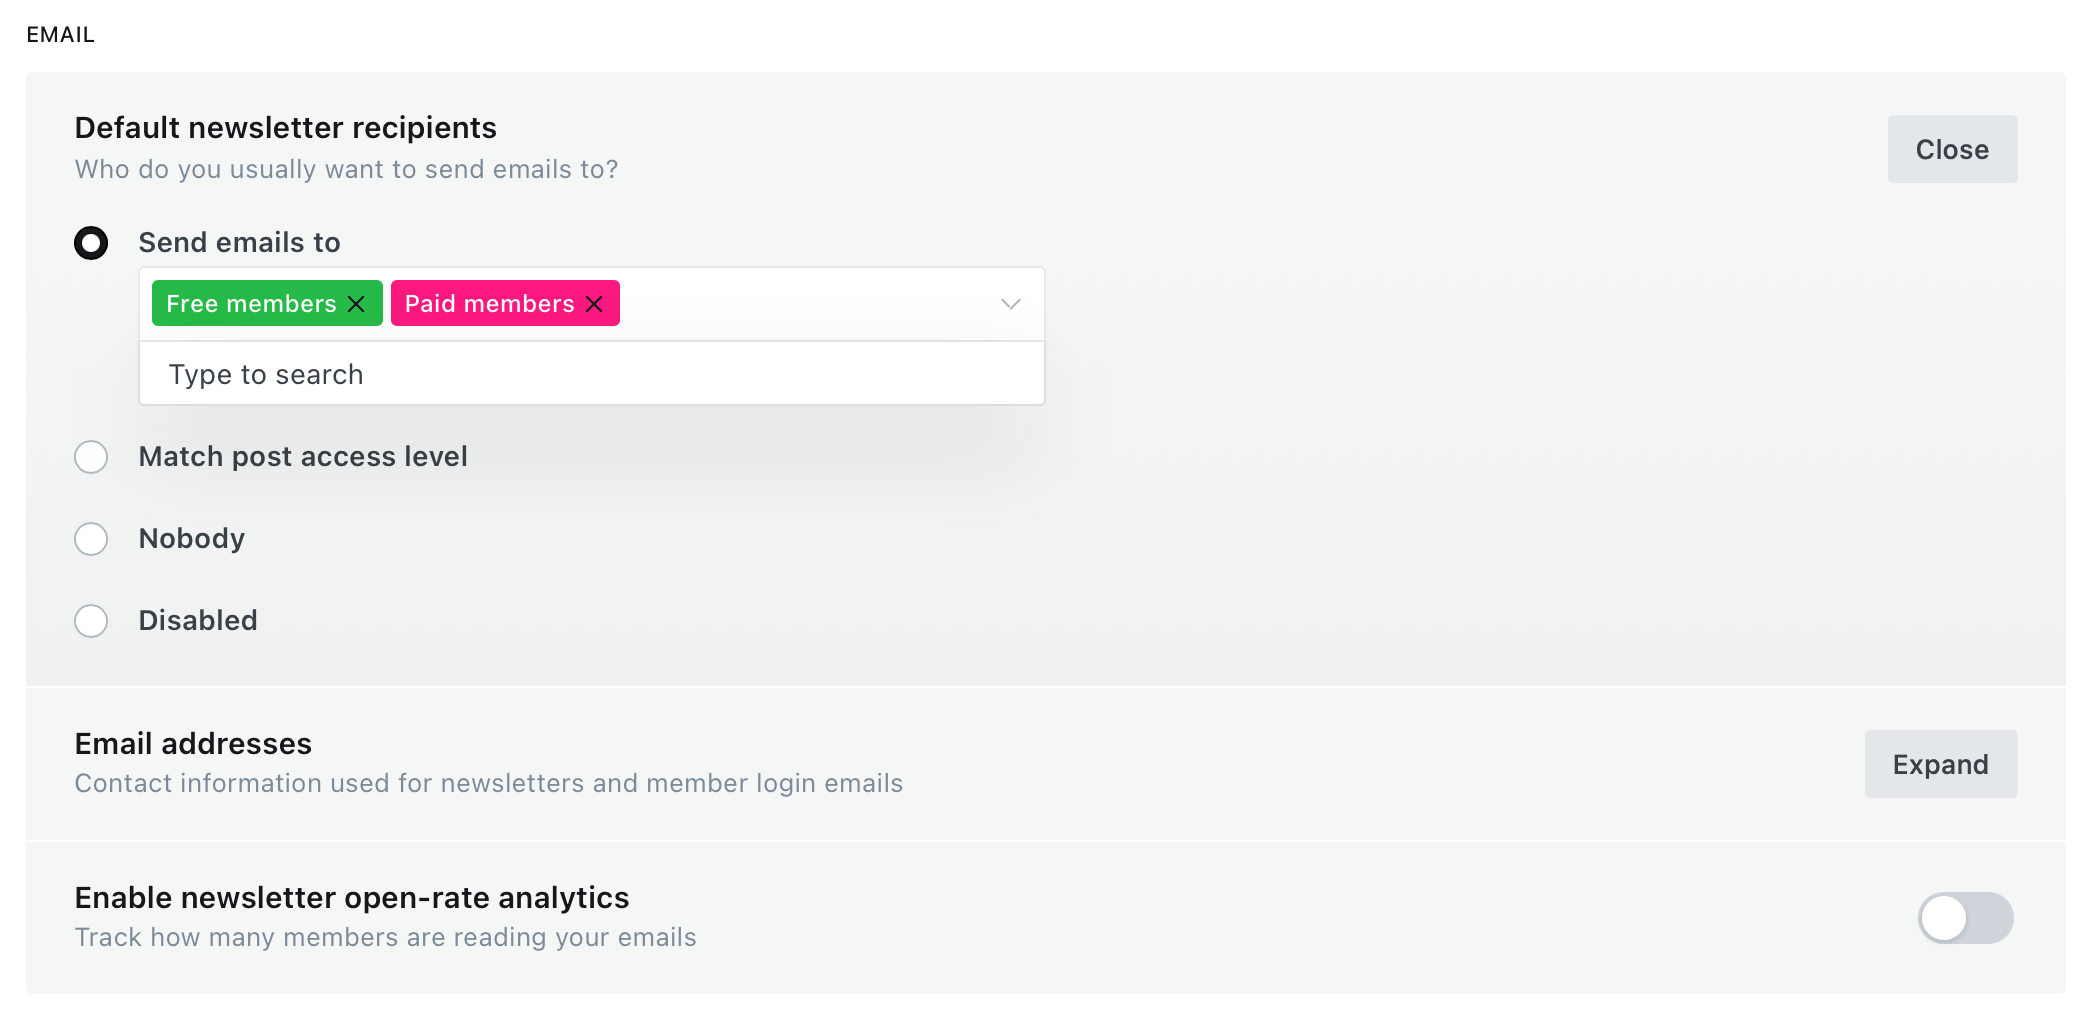
- Default newsletter recipients: You'll have the option to choose who you want to receive your emails. Here you can choose to send them to free members and paid members.
- Email addresses: Click the expand button next to email addresses, here you can change the email address in which members can contact you for support about their accounts and the address where newsletters are sent from. Also, choose which email address, newsletter replies will be sent too.
- Enable newsletter open-rate analytics: You can also enable newsletter open-rate analytics to track who is reading your emails which will give you good insight into which posts are performing the best.
5. Once you've customised your newsletter, click 'save settings' up the top right-hand corner.
Send out a newsletter to members
You will need to create a post to send out a newsletter, this will also publish your newsletter as a post but you can make it a member-only post by reading step one of this blog post or create newsletter-exclusive content by adding email cards. Read below to find out how to do this...
- Click 'posts' on the left-hand menu and then, 'new post' up the top right-hand corner. You're ready to start writing your email newsletter!
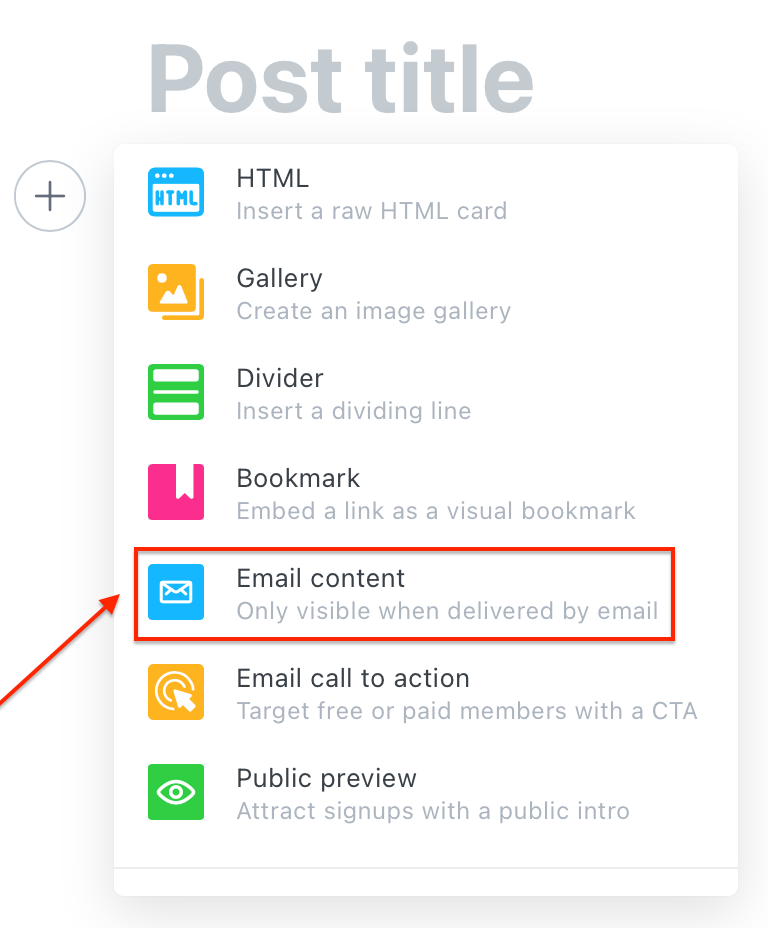
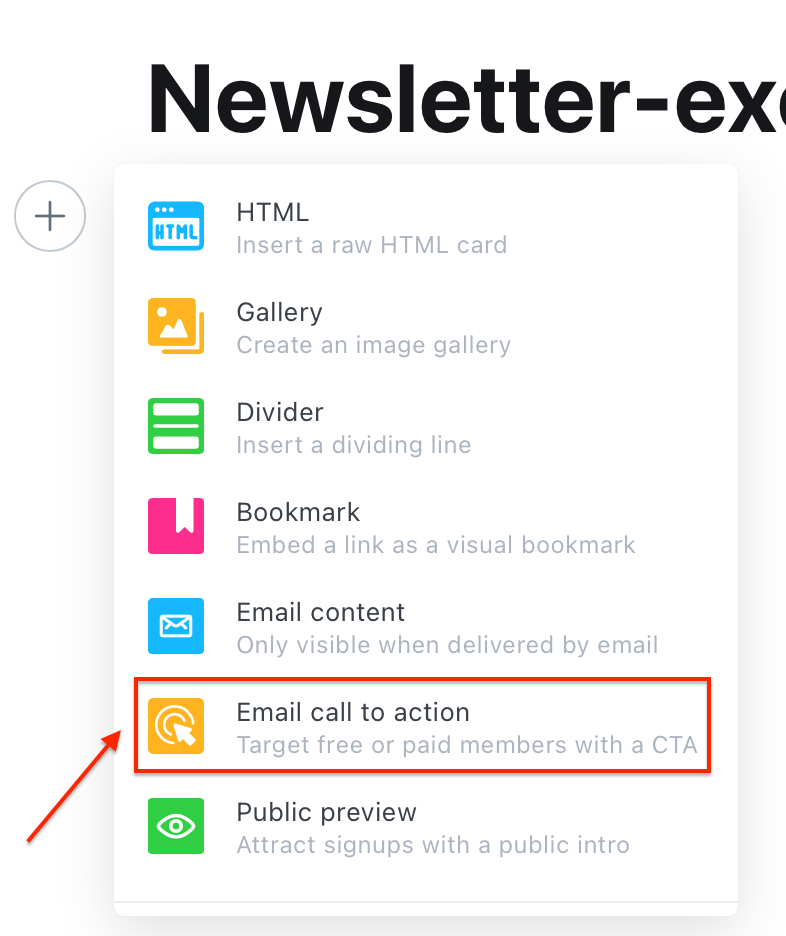
- Whatever you write on this newsletter will be seen in the published post later unless you create newsletter-exclusive content. To create newsletter-exclusive content, you need to add an email card. This means the content in this box will only appear in the newsletter and not the published post. To do this, click the 'plus' sign at the side of the post and select 'email content'.
3. When you add an email card, the default greeting is "Hey first name, (there)". If the member has input their name when they subscribed to your site then, they will receive an email that will start with "Hey (first name)". If the member hasn't input their name, then the fallback is "Hey there". You can change this to whatever you want it to be.

4. You can also include an email call-to-action card. You can use an email call-to-action card to promote your free members to sign up to your paid memberships. In your email call-to-action card, you can include a 'subscribe now' button or link directly to your sign up page. To add a email call-to-action then, click the 'plus' sign at the side of the post and select 'email content'.
5. Once you've written your post, click the green 'preview' button up the top right-hand corner and you will be able to see what it will look like as an email. You will also be able to see what the post will look like on a desktop, mobile or social media.

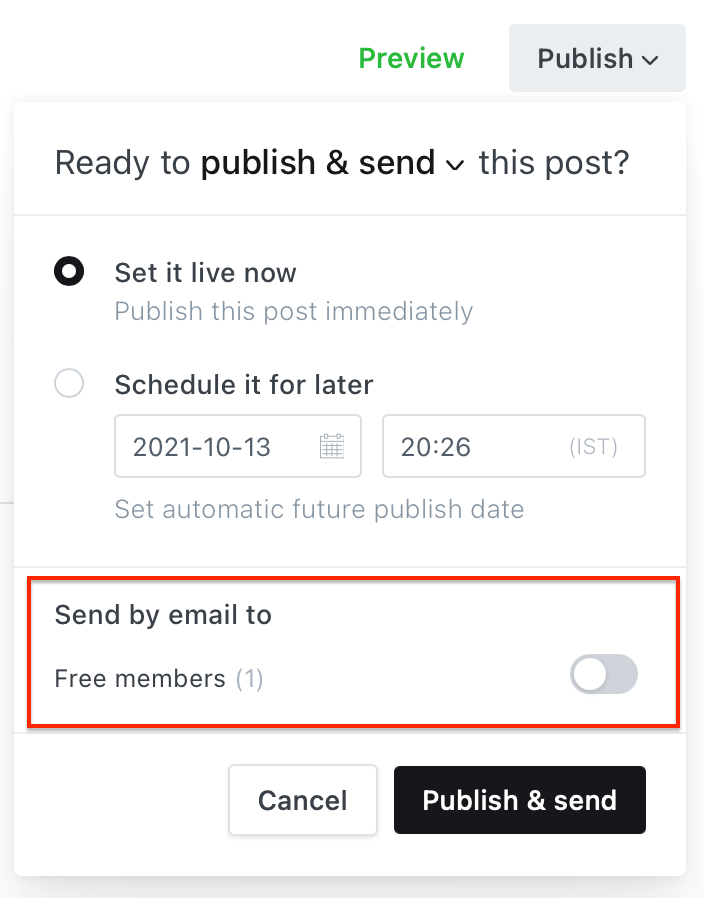
6. Now you're ready to publish your newsletter! Click 'publish' up the top right-hand corner, this will drop down a menu in which you can choose to send your post by email to your free members and if you have paying members, you can send it to them by email too.
STEP THREE: Creating comment sections for members
You can add a comment section to your site, in which only members can comment. This will encourage them to sign up to your site and allow you to connect with your members, other than just having a contact form.
To add a comment section, you need to upgrade your Ghost.org membership to a 'creator' plan. You can change your membership through the Ghost Pro section of your account, which can be found on the left-hand menu.
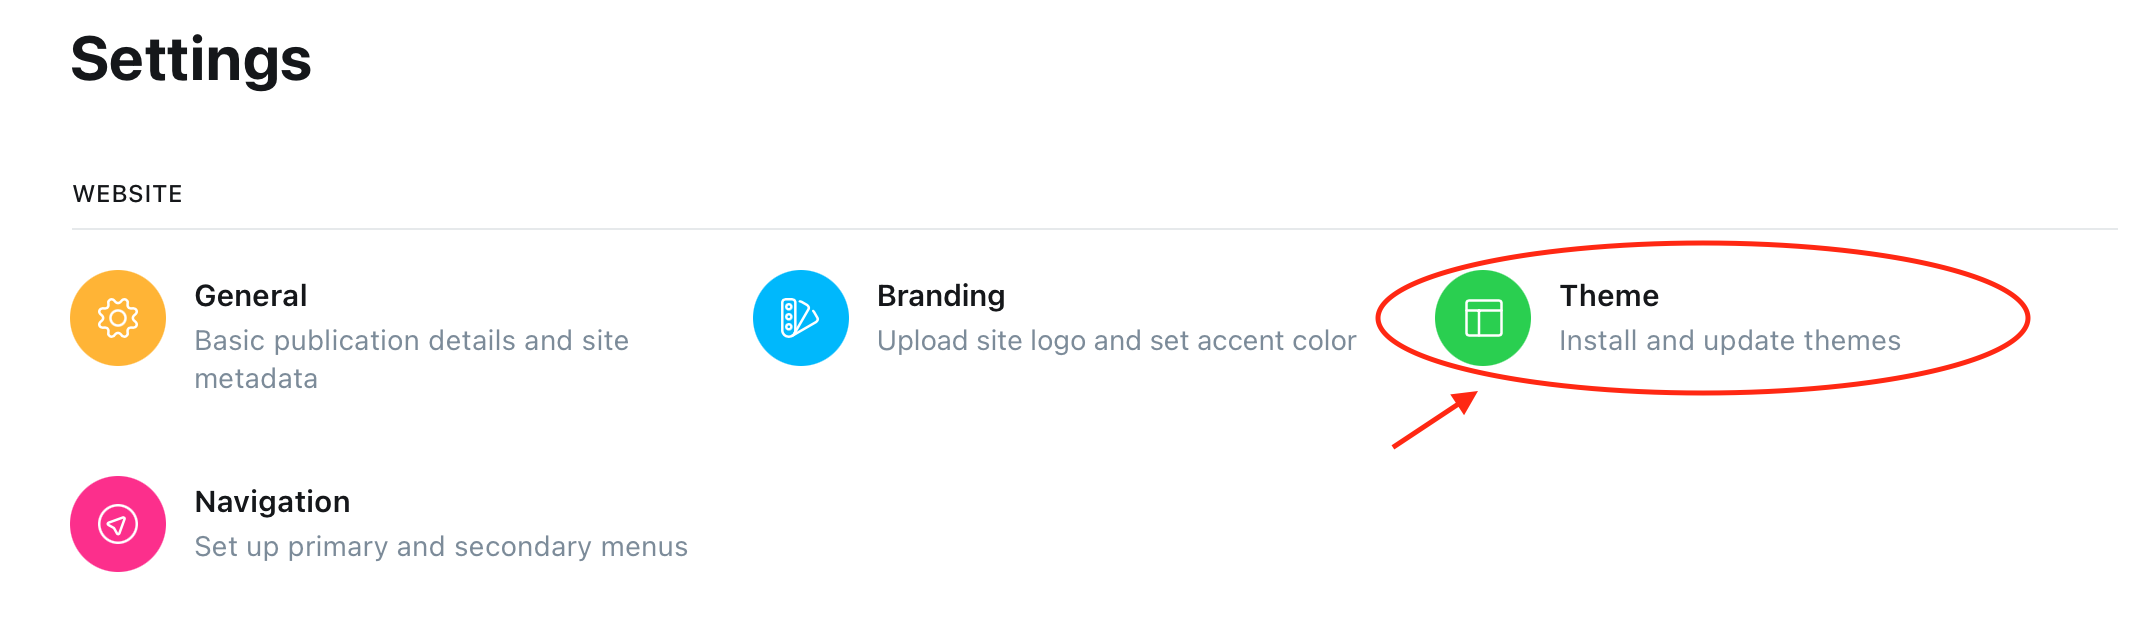
- Go to the settings section of your Ghost account (this button).
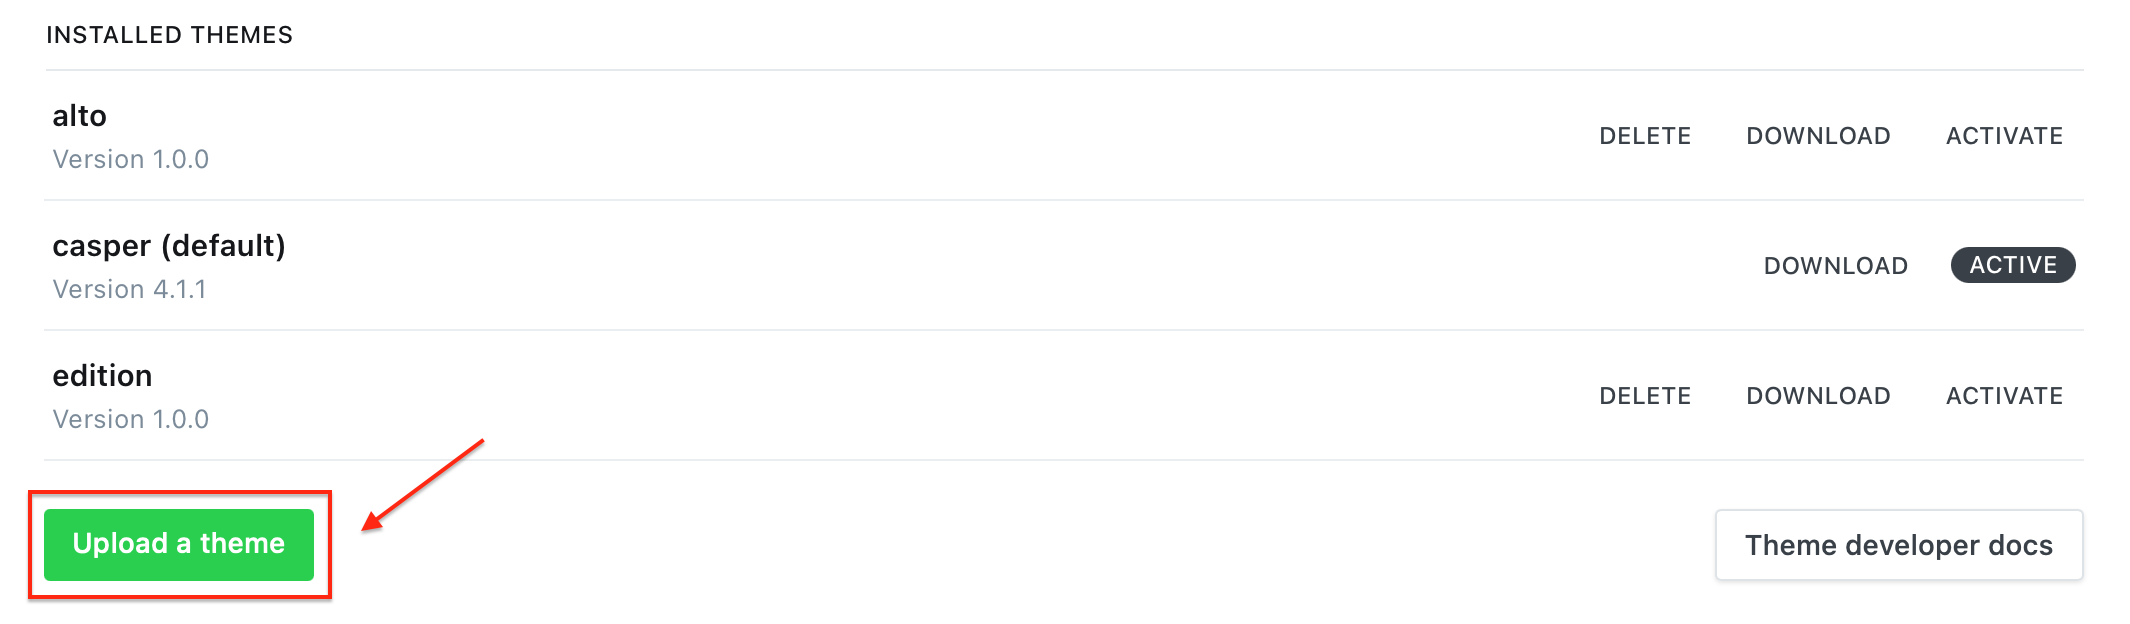
2. Under website, click on 'theme'.
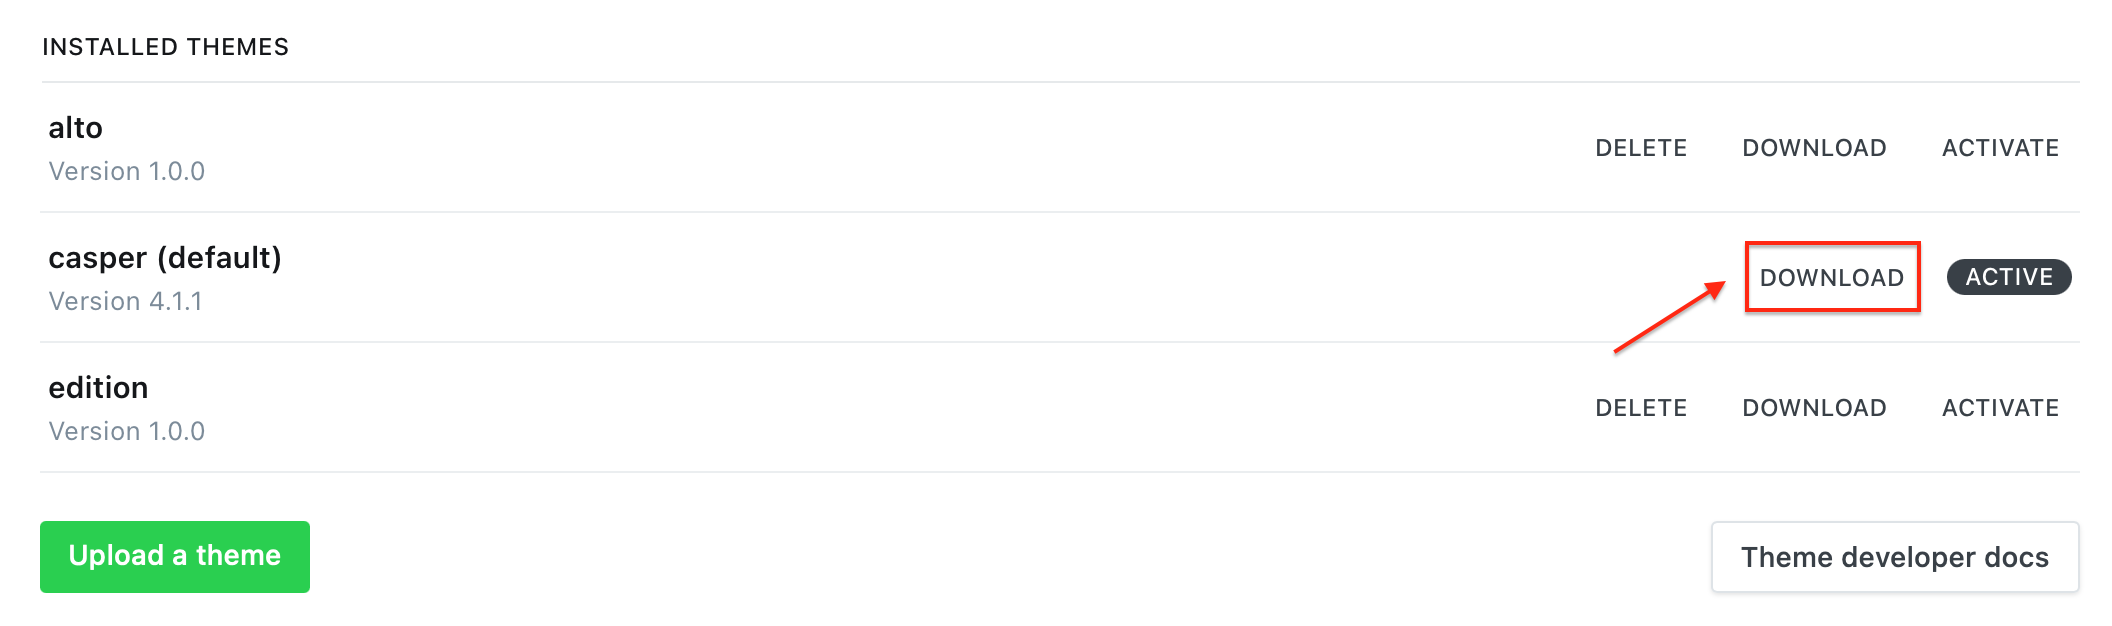
3. Then, download your theme!
4. Once downloaded, open the 'post.hbs' file in any code editor. You will find a section in the code where you can implement the code for comments. For example in the casper theme code, you will find this section where you can embed comments.
{{!--
<section class="post-full-comments">
If you want to embed comments, this is a good place to do it!
</section>
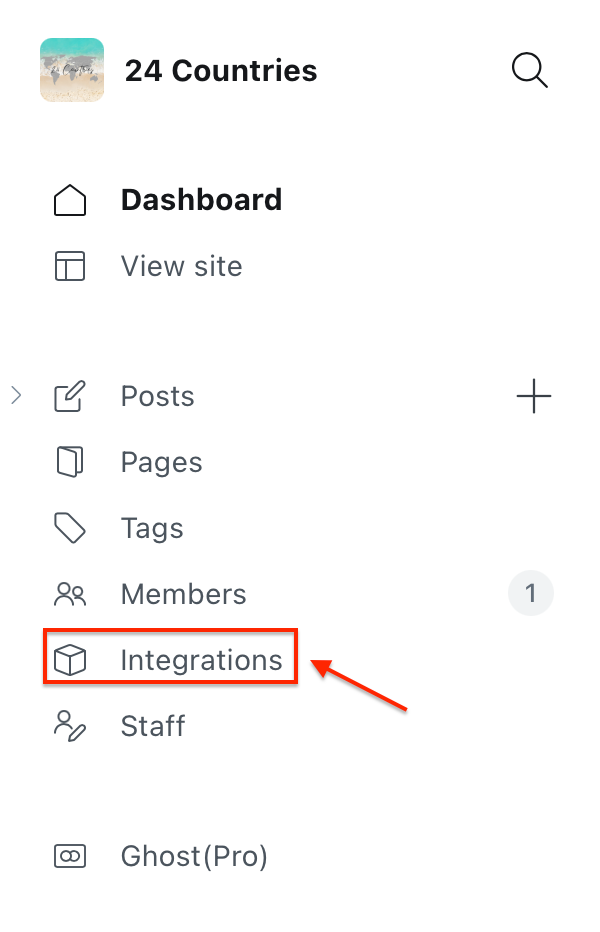
--}}5. Next, click on 'integrations' on the left-hand menu.
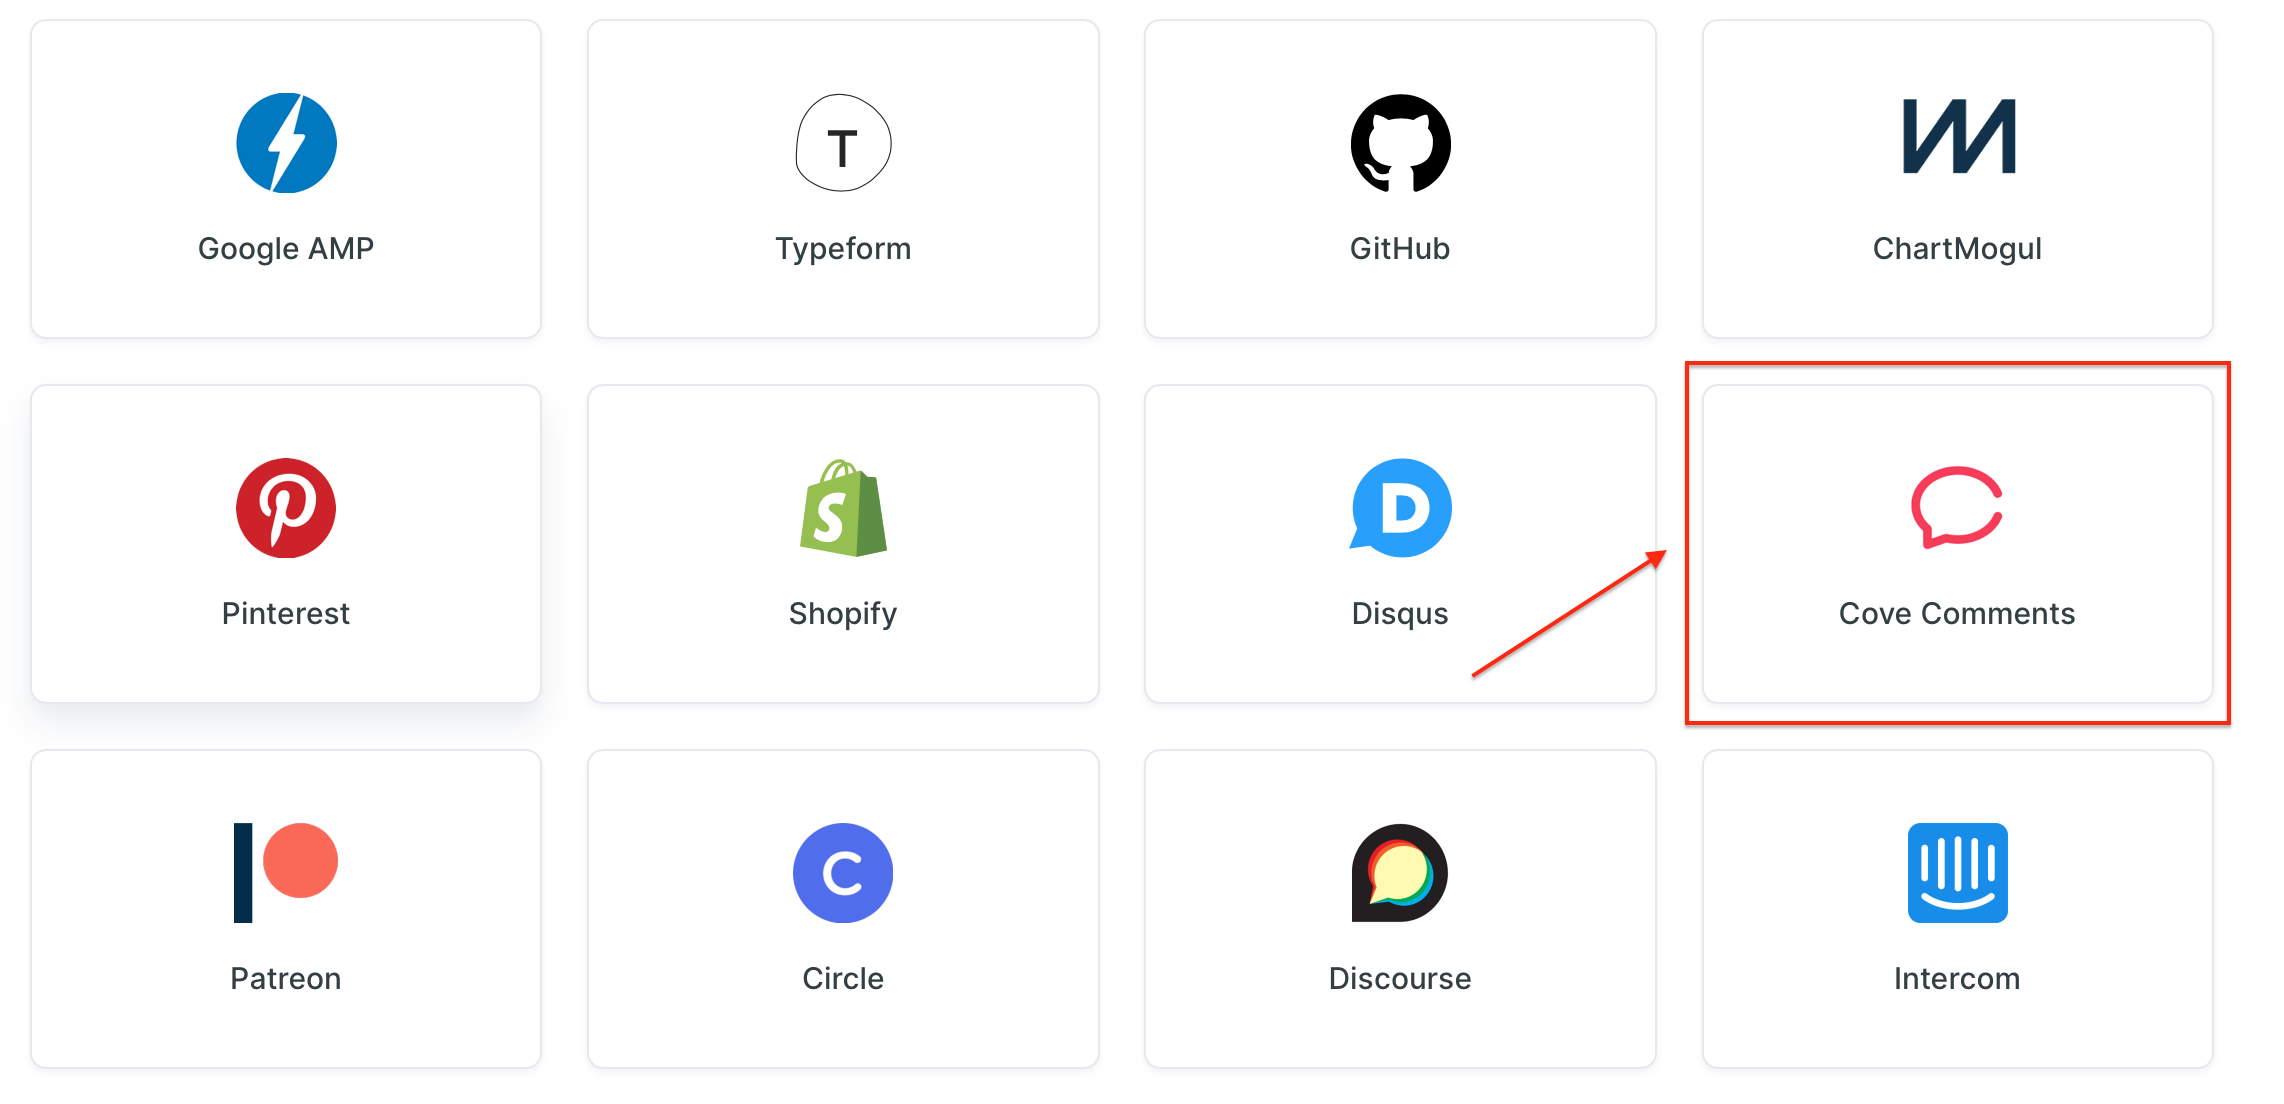
6. Select 'Cove Comments' in integrations to set up comments. When you sign up with 'Cove Comments', they will give you the code to embed comments and you will insert this into your 'post.hbs'. 'Cove' will also include the code for members-only to comment. You can also set up comments through 'Disqus' or 'Discourse' integrations.
Follow this guide to help you: https://ghost.org/integrations/cove-comments/
7. Once you have your updated code with your comments section, you need to upload your updated theme. Head back to the settings section of your Ghost.org account, then click 'theme' and 'upload theme'.
Links to my other 'how-to' blog posts:
 Kirsty
 Kirsty
 Kirsty
 Kirsty
 Kirsty
 Kirsty
 Kirsty
 Kirsty
 Kirsty
 Kirsty
 Kirsty
In the meantime, if you have any questions please don't hesitate to contact me via the contact form.